
Crochet Heart Rooster Rug Pattern – The Best Techniques and Tools

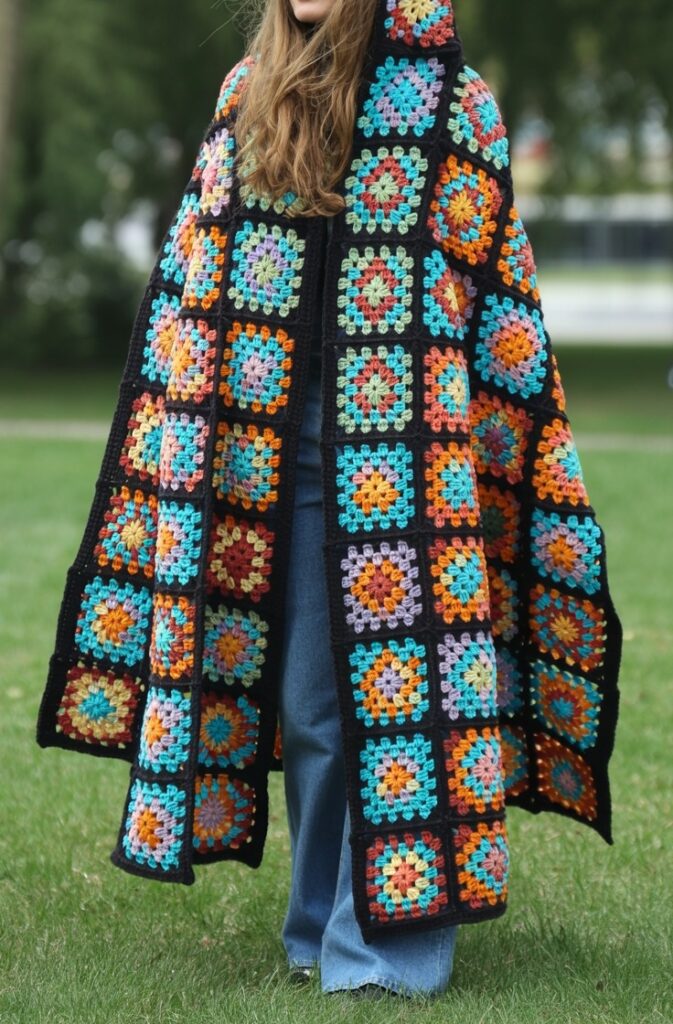
Creating a Crochet Granny Square Hooded Cloak Free Pattern is a perfect project for anyone who loves combining cozy wearables with classic crochet techniques.
This cloak is not only functional but also stylish, giving a vintage charm through the iconic granny square design. Whether you want a gift for a loved one or a personal accessory, this pattern allows for creativity and personalization.
Each granny square can be made in unique color combinations, allowing you to express your style while practicing foundational crochet skills.
This makes the cloak suitable for beginners who are learning granny squares, as well as advanced crocheters who enjoy experimenting with colorwork and stitch patterns.
Granny squares are a timeless crochet motif. By combining multiple squares into a Crochet Granny Square Hooded Cloak Free Pattern, you are preserving a classic craft while creating something contemporary and wearable. The hood adds practicality and warmth, transforming the project into a functional piece that’s perfect for chilly days. With the right yarn and hook, the cloak can be soft, warm, and durable.
To make a Crochet Granny Square Hooded Cloak Free Pattern, choosing the right materials is essential. Selecting yarn, hooks, and accessories carefully ensures the final cloak is comfortable and visually appealing.
Cotton or acrylic yarn is commonly used for this project. Acrylic is warm, lightweight, and easy to care for, while cotton gives a soft, breathable texture. You can also mix yarns to create interesting textures or color gradients.
You’ll need a crochet hook that matches the yarn weight. Using the correct hook size ensures the squares are consistent and the cloak drapes nicely. Typically, a medium-weight yarn with a 5mm hook works well, but you can adjust based on your yarn choice.
Additional tools include scissors, a tapestry needle for weaving in ends, and stitch markers if you want to mark corners or join points. Buttons or ties are optional for closures at the front or around the hood.
Color selection plays a crucial role in the aesthetic of your cloak. You can create a traditional multicolor granny square look, or choose a more subtle palette for a modern twist. Planning your color arrangement ahead of time ensures a cohesive design.
Finally, prepare a workspace with good lighting and enough room to lay out your squares. Organizing the squares before joining them helps visualize the final cloak and simplifies assembly.
The Crochet Granny Square Hooded Cloak Free Pattern begins with creating individual granny squares. Each square serves as a building block for the entire cloak.
Start by making a foundation chain, usually of 4–6 stitches, and join it to form a ring. The first round typically consists of 3 double crochets into the center, separated by chain spaces. This forms the classic granny square motif.
Continue adding rounds by working 3 double crochets into each space, separated by chain stitches. You can increase rounds until the square reaches your desired size. Experiment with colors in each round for a unique, patchwork effect.
Once all squares are complete, block them by lightly dampening and shaping to ensure even edges. Blocking helps maintain uniformity and makes assembly easier.
Joining the squares can be done with slip stitches, single crochet, or sewing with a tapestry needle. The joining method can influence the look—visible joins create a decorative effect, while invisible joins give a seamless appearance.
After joining, add a border around the cloak edges using single crochet, half-double, or shell stitches. This gives the cloak a polished finish and reinforces its structure.
Finally, work on the hood by making a rectangular or square panel, then shape it by decreasing stitches at the top corners. Attach the hood to the cloak securely, and your Crochet Granny Square Hooded Cloak Free Pattern is ready.
Personalization is one of the best aspects of a Crochet Granny Square Hooded Cloak Free Pattern. By adjusting colors, textures, and shapes, each cloak becomes unique.
Mixing yarn textures creates depth. Combining smooth cotton with fuzzy acrylic adds visual and tactile interest. You can also vary stitch patterns within each square for a modern twist on the classic granny square.
Play with color combinations to create ombre effects, contrasting motifs, or thematic palettes. Planning your color scheme before joining squares ensures a harmonious final look.
The hood can also be customized. You can make it oversized for extra warmth, pointed for a whimsical effect, or trimmed with decorative edging like picots or shells.
Consider adding functional elements like pockets or buttons. Pockets can be crocheted separately and sewn on, while buttons or ties allow the cloak to be secured in front.
Sizing is flexible. Measure the wearer and adjust the number of squares or square size to create a cloak that fits comfortably. Making a sample square and measuring it helps estimate the number of squares needed.
Finally, add finishing touches such as tassels, fringe, or embroidered motifs. These small details enhance the handcrafted charm and make the cloak truly one-of-a-kind.
To maintain your Crochet Granny Square Hooded Cloak Free Pattern, proper care is essential. Hand washing in cold water is recommended, especially for mixed yarn types, to prevent stretching or color bleeding.
Lay the cloak flat to dry to maintain shape and avoid distortion. Avoid hanging, as gravity can stretch the fabric over time.
For machine-washable acrylic yarns, use gentle cycles and low spin settings. Always check the yarn label for specific care instructions.
The cloak can be worn in layers for warmth and styled with belts or brooches for a fashionable look. Pairing it with casual or formal outfits makes it a versatile addition to any wardrobe.
Blocking after washing can help the squares maintain crisp edges. Lightly steam or reshape while damp to restore the cloak’s appearance.
Accessories such as hats, scarves, or gloves can complement the hooded cloak. Coordinating colors or motifs adds cohesion to the outfit and showcases the handmade design.
Finally, store your cloak in a cool, dry place away from direct sunlight to preserve colors and prevent fading. Folding it gently avoids stretching the squares and keeps it ready to wear.
1. Can beginners make this hooded cloak?
Yes, beginners can create this cloak by mastering basic granny squares and practicing joining techniques.
2. How many granny squares are needed?
The number depends on the cloak size and square size. Typically, 24–36 squares are sufficient for an adult-sized cloak.
3. What yarn works best for this project?
Acrylic, cotton, or a blend works well. Choose yarn that is soft, warm, and easy to care for.
4. How can I customize the hood?
You can adjust the size, shape, and edging style. Adding a decorative trim or shaping it differently adds personality.
5. Can I make this cloak in one color?
Absolutely. A monochrome cloak looks elegant and allows textures and stitch patterns to stand out.
6. How do I join the granny squares?
Squares can be joined using slip stitches, single crochet, or sewing with a tapestry needle. Each method affects the overall appearance.
The Crochet Granny Square Hooded Cloak Free Pattern combines classic granny squares with modern functionality, resulting in a stylish, cozy, and personalized wearable.
Whether made in bright, playful colors or elegant neutrals, this cloak showcases the charm of handmade crochet while providing warmth and versatility.
Share your results, color choices, and creative modifications. Feedback and suggestions inspire more unique crochet projects and celebrate the joy of handmade craftsmanship.


