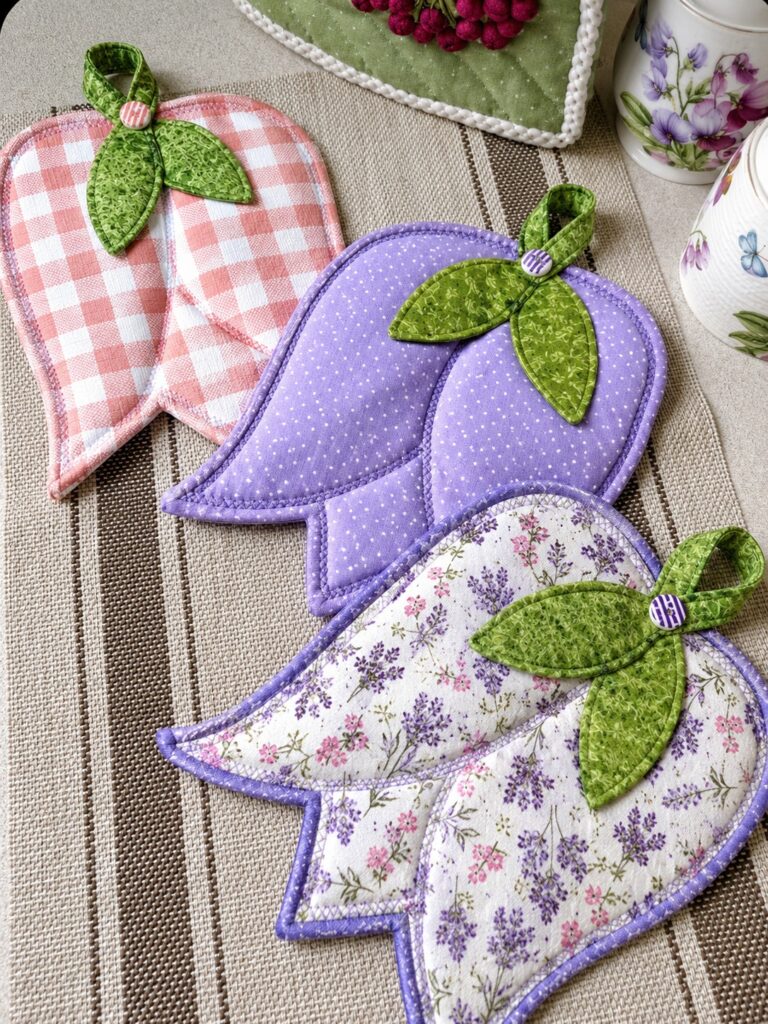
Fabric Tulip Pot Holder Pattern

Fabric Tulip Pot Holder Pattern is a charming quilting and sewing project that combines beauty, creativity, and everyday functionality. Inspired by the elegant shape of a blooming tulip, this handmade kitchen accessory is perfect for protecting your hands from hot cookware while adding a decorative touch to your home.
Whether you are an experienced quilter or just beginning your sewing journey, creating a Fabric Tulip Pot Holder Pattern is an enjoyable project that allows you to practice quilting, binding, and appliqué techniques while producing something both practical and beautiful.
One of the reasons the Fabric Tulip Pot Holder Pattern has become increasingly popular is its versatility. The project can be customized with countless combinations of colors, floral prints, gingham fabrics, polka dots, and seasonal patterns. The tulip shape offers a unique alternative to traditional square pot holders, making it an excellent handmade gift for birthdays, Mother’s Day, housewarming celebrations, weddings, or holiday gatherings. Because the design is visually appealing, many sewists also use it as a decorative kitchen accent when it is not in use.
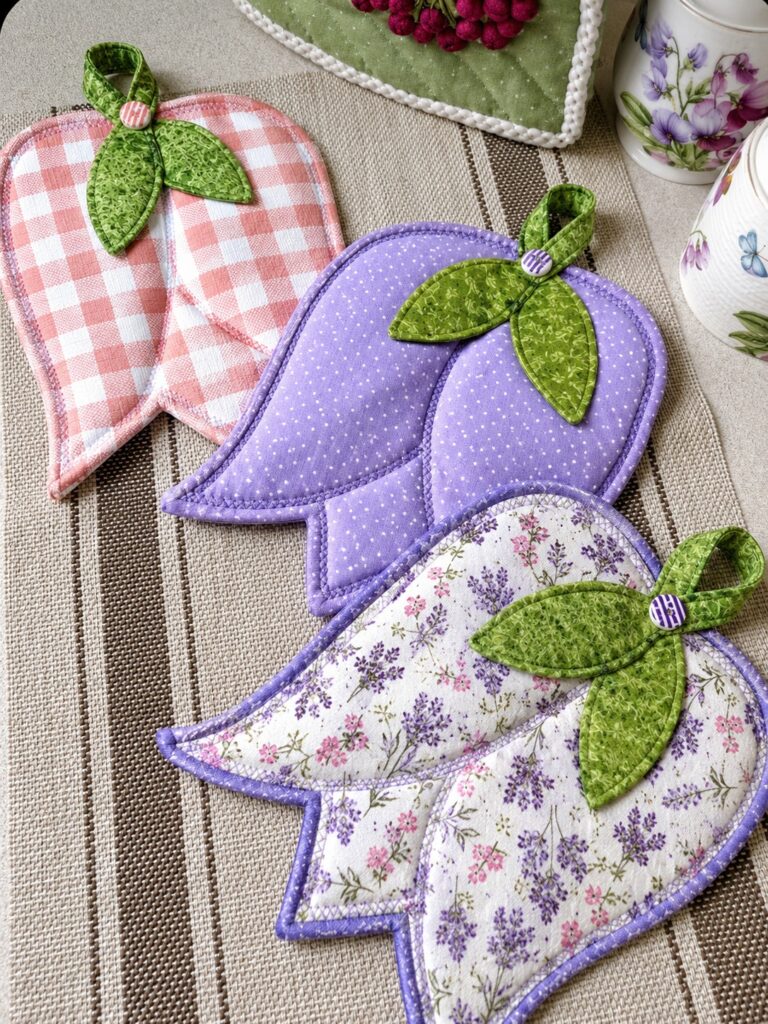
If you are looking for a quilting project that is beginner-friendly yet impressive enough to showcase your creativity, the Fabric Tulip Pot Holder Pattern is an excellent choice. Throughout this guide, you will learn the materials required, the complete step-by-step construction process, sewing techniques, finishing tips, and creative customization ideas. By the end of this article, you will have a clear understanding of how to create your own beautiful tulip-shaped pot holder while improving your quilting and sewing skills.
Choosing quality materials is the first step toward creating a beautiful Fabric Tulip Pot Holder Pattern. Since the project is designed for kitchen use, selecting durable cotton fabrics and heat-resistant batting is highly recommended. Cotton is easy to sew, holds its shape well, and offers endless design possibilities.
Start by gathering two coordinating cotton fabrics for the main tulip petals. Floral prints, gingham, lavender patterns, pastel solids, or seasonal fabrics work especially well. You may also choose contrasting prints to create a more vibrant appearance.
For the leaves, select a green cotton fabric with subtle texture or floral motifs. The leaves become one of the focal points of the design, so choosing a fabric with visual interest will make the finished project even more attractive.
Use insulated batting or cotton batting specifically designed for pot holders. This layer provides protection from heat while also giving the project a soft quilted appearance. Avoid using polyester batting because it may not perform well with high temperatures.
Bias binding should coordinate with the chosen fabrics. You can purchase ready-made binding or create your own from matching cotton fabric for a professional finish.
Finally, prepare matching thread, sewing pins, scissors, rotary cutter, quilting ruler, fabric marker, and an iron. Accurate cutting and careful pressing throughout the project will significantly improve the final result.
Begin by printing or drawing your Fabric Tulip Pot Holder Pattern template. The design typically includes two mirrored tulip petals, one backing piece, two leaves, and a small hanging loop. Carefully cut all pattern pieces before transferring them to your fabrics.
Cut two tulip-shaped front pieces from your selected cotton fabric. Then cut one backing piece using coordinating fabric. Next, cut two leaf shapes from green fabric and one narrow strip that will become the hanging loop.
Cut matching pieces of insulated batting using the tulip template. Depending on your preferred thickness, you may use one or two layers. Position the batting behind each fabric piece before quilting.
Quilt each tulip front individually by sewing decorative straight lines, gentle curves, or diagonal quilting patterns. Quilting secures the batting while adding texture and durability to the finished project.
Fold and stitch the hanging loop into a narrow fabric strip. Position it securely at the top center where the leaves will later be attached. This loop allows the finished pot holder to hang conveniently in the kitchen.
Sew the leaf pieces together with right sides facing, leaving a small opening for turning. Turn them right side out, press carefully, topstitch around the edges, and attach them above the tulip petals. Finish by adding a decorative button at the center where the leaves meet, creating the charming floral appearance shown in the project inspiration.
Accurate cutting is one of the most important factors in producing a polished Fabric Tulip Pot Holder Pattern. Even small differences between mirrored pieces can affect the overall symmetry of the tulip shape.
Press every seam immediately after sewing. Proper pressing reduces bulk, improves accuracy, and creates crisp, clean edges that give handmade projects a professional appearance.
Use quilting clips instead of pins when attaching binding around curved edges. Clips help maintain smooth curves without distorting the fabric layers.
When sewing the rounded edges of the tulip, reduce your sewing speed slightly. Slower stitching allows better control and produces smoother curves with fewer puckers.
Choose high-quality cotton thread that coordinates with your fabrics. Strong thread helps the pot holder withstand regular kitchen use and repeated washing without weakening the seams.
Before using the finished project with hot cookware, perform a simple heat test using a warm baking dish. This ensures your chosen batting provides adequate insulation and confirms that all stitching is secure.
The beauty of the Fabric Tulip Pot Holder Pattern lies in its endless customization possibilities. Every fabric combination creates a completely different visual effect, allowing each finished piece to become unique.
Spring-inspired versions look beautiful with lavender prints, soft pink gingham, pastel purple fabrics, and delicate floral motifs. These combinations create a fresh, cheerful appearance perfect for seasonal kitchen décor.
For autumn kitchens, consider warm shades such as mustard yellow, burnt orange, deep burgundy, olive green, and cream florals. These colors complement harvest-themed decorating styles beautifully.
Holiday-themed tulip pot holders are also popular. Christmas fabrics featuring holly, snowflakes, or plaid prints create festive gifts, while Valentine’s Day versions can include red, pink, and heart-patterned fabrics.
Personalized gifts become even more meaningful when embroidered with initials, family names, or small decorative quilting motifs. Handmade kitchen accessories are thoughtful presents that combine practicality with craftsmanship.
Consider sewing multiple Fabric Tulip Pot Holder Pattern projects in coordinating colors to create matching kitchen sets. Pair them with fabric trivets, tea towels, table runners, or oven mitts for a cohesive handmade collection.
What is a Fabric Tulip Pot Holder Pattern?
A Fabric Tulip Pot Holder Pattern is a sewing and quilting design that creates a tulip-shaped insulated pot holder used to safely handle hot cookware while decorating the kitchen.
Is this project suitable for beginners?
Yes. Beginners with basic sewing knowledge can successfully complete the project by following the pattern carefully and taking their time during cutting, quilting, and binding.
What fabric works best for a Fabric Tulip Pot Holder Pattern?
One hundred percent cotton fabric is the preferred choice because it is durable, easy to sew, heat resistant when combined with proper batting, and available in countless attractive prints.
Can I wash the finished pot holder?
Yes. Most cotton fabrics and cotton batting can be machine washed using a gentle cycle. Air drying or low-temperature tumble drying helps preserve the shape and quilting.
Which batting should I use?
Insulated batting designed specifically for pot holders is the safest option. Cotton batting may also be used depending on your intended level of heat protection.
How long does this project usually take?
Most sewists can complete a Fabric Tulip Pot Holder Pattern within two to four hours, depending on quilting complexity and sewing experience.
Can I sell finished pot holders made from this pattern?
In most cases, handmade finished items may be sold if the pattern’s licensing terms allow commercial use. Always verify the terms associated with the specific pattern you are following.
What size should a tulip pot holder be?
Most finished tulip pot holders measure approximately 8 to 10 inches tall, although the dimensions can easily be adjusted when creating your own template.
The Fabric Tulip Pot Holder Pattern is an enjoyable quilting project that combines creativity, functionality, and decorative appeal. By selecting quality cotton fabrics, using insulated batting, carefully quilting each layer, assembling the tulip petals, attaching the decorative leaves, and applying neat binding, you can create a beautiful handmade kitchen accessory that is both practical and visually charming. This project also offers endless opportunities for personalization through fabric choices, quilting designs, seasonal themes, and decorative embellishments, making every finished piece unique.
I hope this guide has helped you understand each step involved in creating your own Fabric Tulip Pot Holder Pattern with confidence. If you enjoyed this tutorial, please leave your honest opinion and share your suggestions or ideas for future sewing and quilting projects. Your feedback is always appreciated and helps inspire even more creative handmade designs.