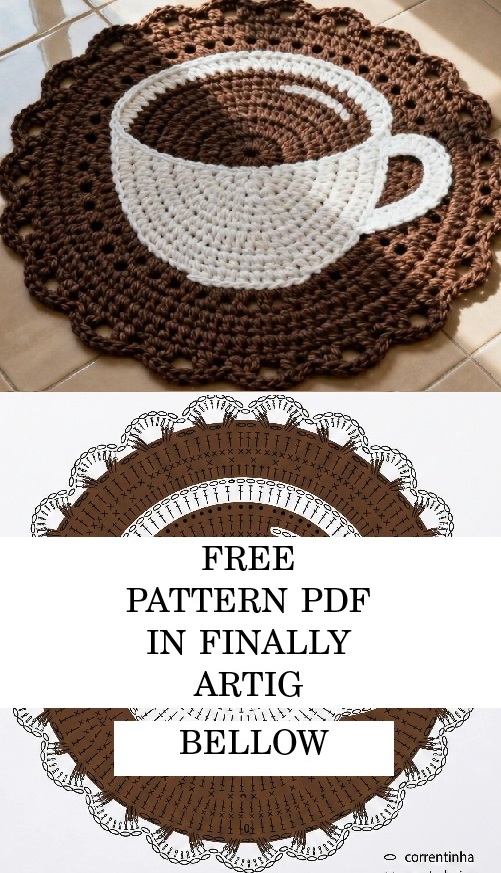
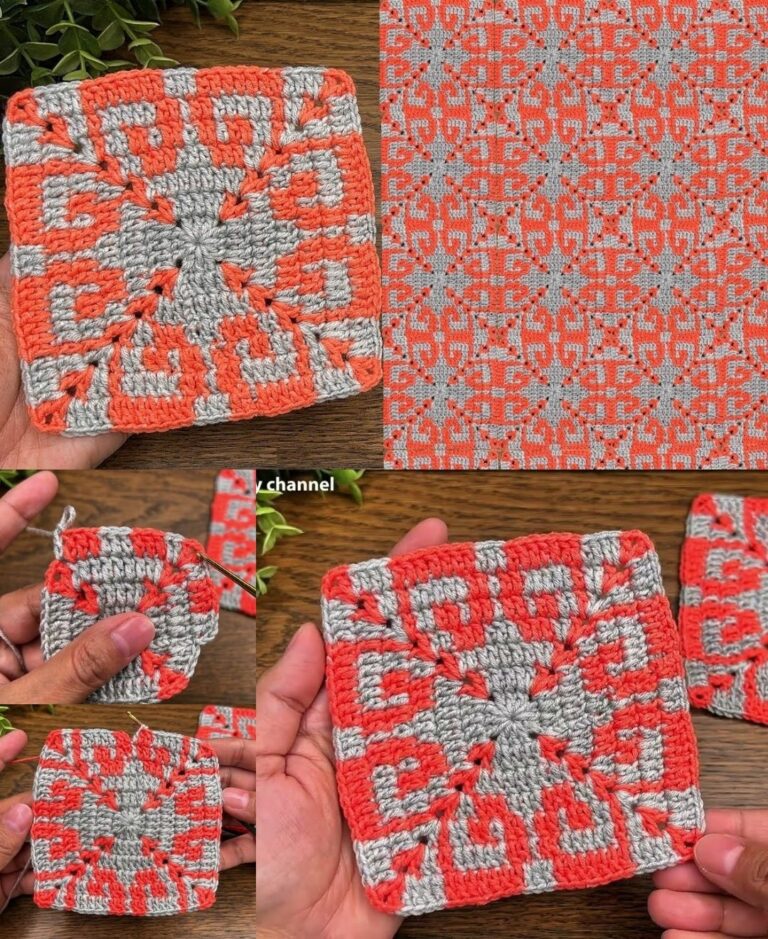
Crochet Luxury Coffee Rug Pattern

If you love handmade crafts and want to create something both stylish and practical, then this Prismatic Wrist Warmers Tutorial is perfect for you.
Wrist warmers are an easy and fun crochet project that not only keep your hands cozy but also add a splash of personality to your outfit.
In this step-by-step guide, we’ll walk you through everything you need to know to make your own prismatic wrist warmers, from choosing the best yarn to mastering the stitches that bring these vibrant accessories to life.
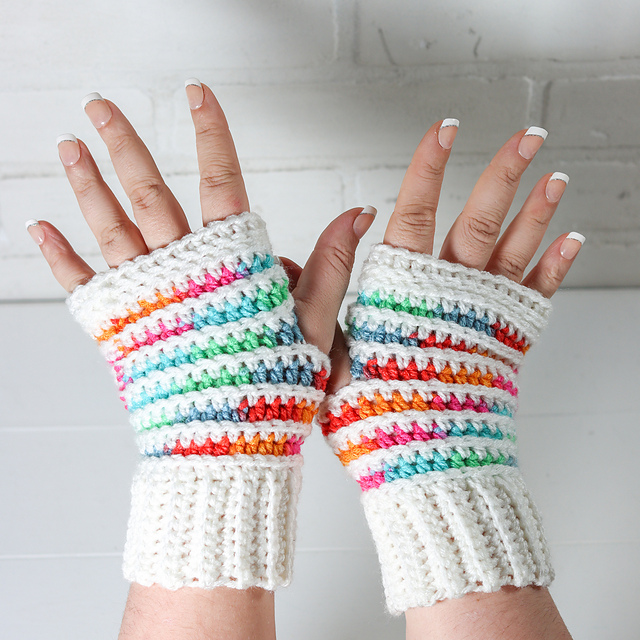
Creating prismatic wrist warmers is an ideal project for beginners and experienced crocheters alike. The term “prismatic” refers to the use of multiple colors that blend beautifully together, giving the wrist warmers a unique and eye-catching appeal.
Whether you prefer soft pastels or bold rainbow hues, you can personalize your design to match your style. By the end of this tutorial, you’ll not only have a pair of cozy wrist warmers but also the confidence to experiment with colorwork and texture in future crochet projects.
In this Prismatic Wrist Warmers Tutorial, we’ll cover every step in detail—from preparing your materials to finishing touches that give your wrist warmers a professional look. Each section includes helpful tips, best practices, and creative ideas to help you make the most of your crocheting experience. So grab your crochet hook, pick your favorite yarn colors, and let’s get started on making a set of beautiful prismatic wrist warmers that will brighten any chilly day!
Before you begin crocheting your prismatic wrist warmers, it’s important to understand the basic techniques and tools you’ll need. Wrist warmers are typically made as simple tubes that fit snugly around your wrist and lower hand, leaving your fingers free. This makes them perfect for cold weather when you still need to type, drive, or use your phone.
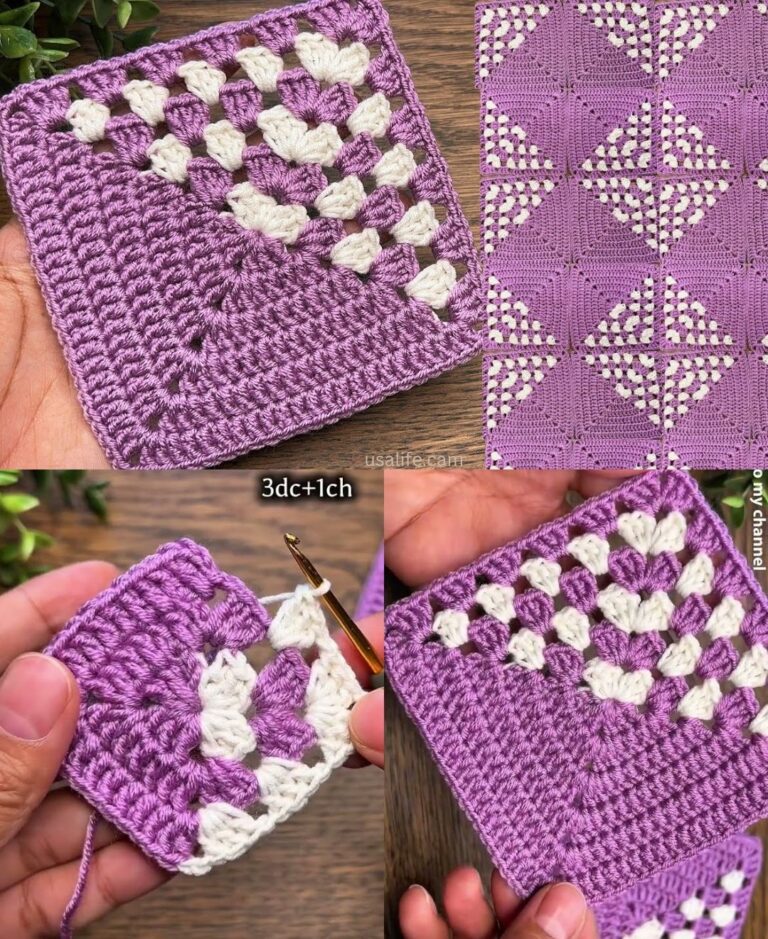
Crochet is a technique that uses a single hook to loop yarn into a fabric. For wrist warmers, you’ll mostly use basic stitches such as chain stitch, single crochet, and double crochet. These stitches create a warm and flexible texture that feels comfortable on the skin. You can also add decorative patterns like stripes or color gradients to make your prismatic wrist warmers more vibrant.
When working with multiple colors, as in this Prismatic Wrist Warmers Tutorial, color transitions are key. You can achieve beautiful prismatic effects using self-striping yarn or by manually switching between colors. The choice depends on your comfort level—self-striping yarn is easier for beginners, while manual color changes give more control to advanced crocheters.
Lastly, make sure your wrist warmers fit comfortably. The pattern should allow for stretch but not be too loose. It’s a good idea to measure your wrist and hand circumference before starting so you can adjust your stitches accordingly. Comfort and flexibility are the foundation of every good pair of prismatic wrist warmers.
Having the right materials is essential for creating high-quality prismatic wrist warmers. Here’s what you’ll need to get started:
Choose soft, lightweight yarn for comfort and flexibility. For this Prismatic Wrist Warmers Tutorial, consider a worsted weight or DK weight yarn. Acrylic yarns are affordable and come in a variety of colors, while wool blends offer warmth and elasticity. To achieve the prismatic effect, look for gradient or variegated yarns, or use several solid colors to create your own color sequence.
A 4mm to 5mm crochet hook is ideal for most wrist warmer patterns. The hook size depends on your chosen yarn weight—always check the yarn label for recommendations. A comfortable ergonomic hook is highly recommended for longer crochet sessions, ensuring even tension and reducing strain on your hands.
Stitch markers help you keep track of rounds or specific stitches, especially if you’re working in continuous rounds without joins. This is particularly useful in the Prismatic Wrist Warmers Tutorial, where precision ensures both wrist warmers match perfectly in size and shape.
You’ll need sharp scissors to cut your yarn neatly and a tapestry needle to weave in ends securely. The tapestry needle also helps with sewing small details or connecting seams if your wrist warmers are crocheted flat before joining.
A measuring tape ensures that both wrist warmers are the same length and width, giving your project a polished, professional finish.
Now that you have all your materials ready, let’s dive into the crochet process. This Prismatic Wrist Warmers Tutorial breaks the pattern down into clear and manageable steps.
Start by measuring around your wrist and make a foundation chain that matches that measurement. Ensure the chain is an even number of stitches, as this will help with pattern consistency. Join the chain with a slip stitch to form a loop, being careful not to twist it.
Begin working in rounds using single crochet stitches. This creates a snug and elastic base for your prismatic wrist warmers. Work 4–6 rounds in a solid color before switching to your first color change.
Here comes the fun part—introducing the colors! You can alternate colors every few rows or use gradient yarn for a seamless transition. For a more textured look, try alternating between single crochet and double crochet stitches. This adds depth and enhances the prismatic effect of your wrist warmers.
To create the thumb hole, crochet back and forth in rows instead of continuous rounds for a few stitches. Once the hole is large enough, rejoin your stitches in the round and continue working up the hand. This step adds comfort and flexibility, ensuring your prismatic wrist warmers fit perfectly.
Once your wrist warmers reach the desired length, finish off with a few rounds of single crochet for a clean and sturdy edge. You can also add a decorative border, such as a picot or shell stitch, to enhance the visual appeal.
After completing both wrist warmers, weave in all loose ends using a tapestry needle. Blocking your wrist warmers (lightly wetting and shaping them) will help even out stitches and give them a professional finish.
Q1: Are prismatic wrist warmers suitable for beginners?
Yes! This Prismatic Wrist Warmers Tutorial is designed with beginners in mind. The pattern uses simple stitches and techniques that are easy to follow, even for those new to crochet.
Q2: How long does it take to make a pair?
Depending on your skill level, a pair of prismatic wrist warmers typically takes between 2 to 4 hours to complete. More complex color patterns may take slightly longer.
Q3: Can I make these wrist warmers using leftover yarn?
Absolutely! This project is perfect for using leftover yarn from other crochet projects. Mixing small amounts of different colors creates a stunning prismatic look.
Q4: Do I need to block the wrist warmers?
While not required, blocking helps your wrist warmers look more polished by smoothing out the stitches and improving their shape.
Q5: How should I wash my prismatic wrist warmers?
Always follow the care instructions on your yarn label. Most acrylic and cotton yarns can be machine washed gently, but wool blends may need hand washing.
Q6: Can I sell the wrist warmers I make?
Yes, handmade prismatic wrist warmers make wonderful gifts or items to sell at craft fairs. Just be sure to create your own unique color combinations to stand out.
In this Prismatic Wrist Warmers Tutorial, we’ve explored everything you need to know to create colorful, cozy, and stylish wrist warmers. From selecting the best yarn and hook to mastering color changes and adding personal touches, you now have all the tools to crochet your own pair with confidence. Wrist warmers are not only practical for keeping your hands warm but also a great way to showcase your creativity through color and texture.
Now it’s your turn—grab your yarn and hook, and start crafting your very own prismatic wrist warmers today! If you found this guide helpful, please share your honest opinion and suggestions for future tutorials. Your feedback helps inspire more creative and accessible crochet projects for everyone.
