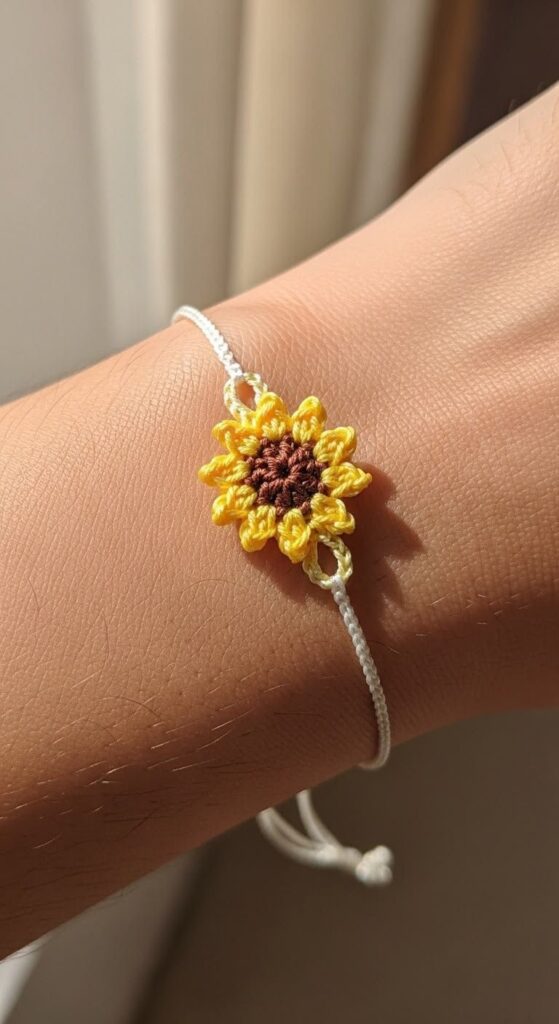
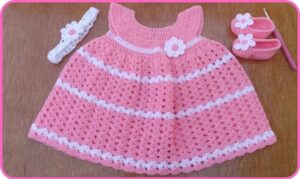
Sunflower Bracelet Pattern

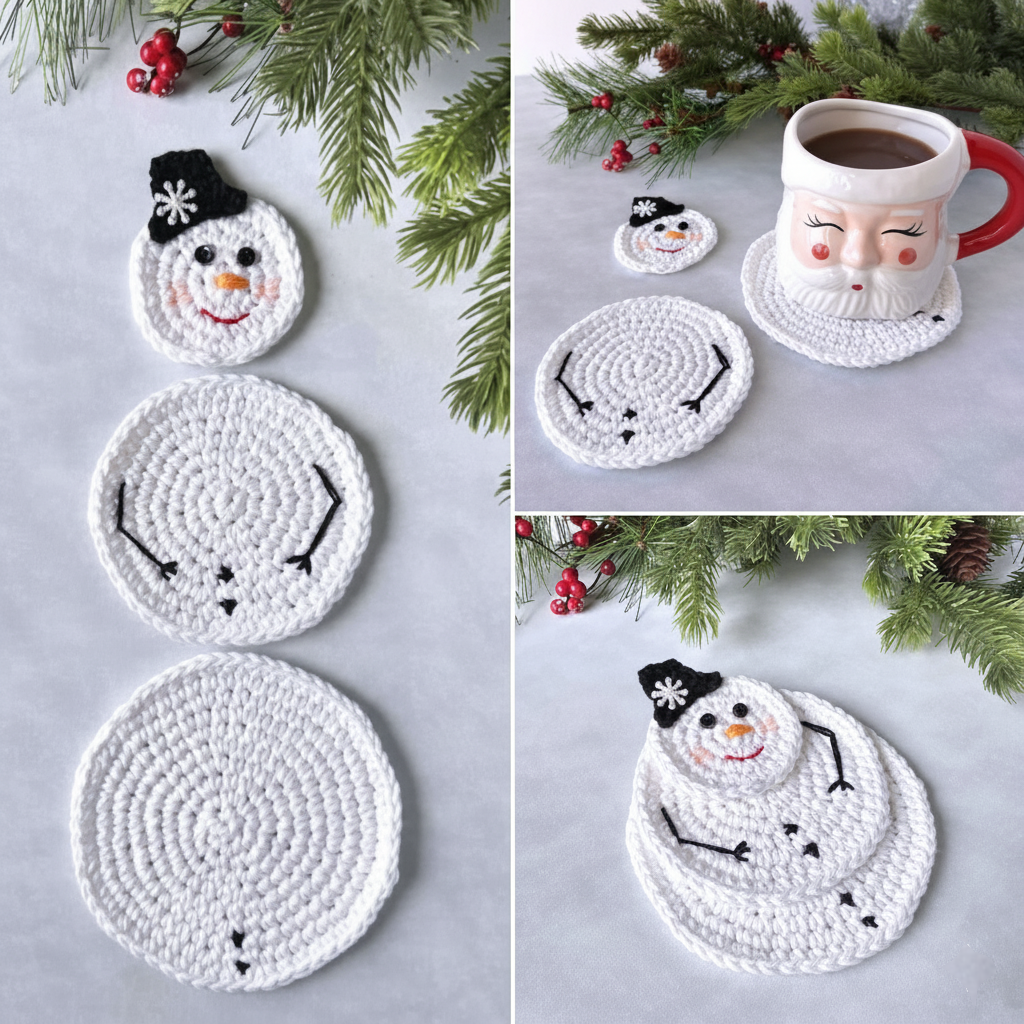
The Crochet Snowman Coaster Tutorial is a fun, festive, and easy project perfect for bringing a touch of winter cheer to your home.
Whether you’re decorating for the holidays or looking for a quick handmade gift idea, these cute snowman coasters will melt hearts without melting snow.
Using simple crochet techniques and minimal materials, you can create charming snowman faces that protect your tabletops while adding a cozy handmade touch to your décor.
This Crochet Snowman Coaster Tutorial is suitable for all skill levels, from beginners to seasoned crocheters looking for a quick, creative project.
Handmade crochet coasters are a wonderful way to combine function and style. Not only do they keep your surfaces safe from heat and moisture, but they also serve as adorable decorative accents. The Crochet Snowman Coaster Tutorial brings this practicality to life with a playful design that’s both seasonal and timeless. With their round faces, little carrot noses, and colorful scarves, these snowmen make any coffee or cocoa moment feel extra special.
In this guide, you’ll learn how to make your own crochet snowman coasters step by step—from materials and stitches to final details like embroidery and assembly. The project works up quickly, making it ideal for last-minute gifts, craft fairs, or winter home décor. Let’s dive in and discover how to crochet these delightful, frosty friends!
Before starting your Crochet Snowman Coaster Tutorial, gather all the supplies you’ll need. The best part about this project is that it uses simple, inexpensive materials that you might already have in your yarn stash.
You’ll need:
Cotton yarn is ideal for coasters because it’s durable, absorbent, and easy to clean. However, acrylic yarn works well too, especially if you’re making decorative sets. Make sure your hook size matches your yarn weight to ensure a neat, flat coaster that lies evenly on a table.
The Crochet Snowman Coaster Tutorial uses only basic stitches, making it beginner-friendly. You’ll need to know:
Once your materials are ready, take a moment to plan your color combinations. A traditional snowman features white for the face, black for the features, orange for the nose, and a colorful accent for accessories. But don’t be afraid to get creative—pastels, metallics, or bold Christmas colors can give your snowman a fresh personality.
Now that you have your materials, it’s time to crochet your snowman! Follow these simple steps in this Crochet Snowman Coaster Tutorial to create an adorable, round snowman face that works up quickly and beautifully.
Your Crochet Snowman Coaster is now complete! Each coaster takes roughly 30–40 minutes to make, making this an ideal project for batch crafting. You can create a matching set for your dining table or gift them individually as stocking stuffers.
One of the best things about the Crochet Snowman Coaster Tutorial is how customizable it is. You can adapt the design in countless creative ways to match your style, home décor, or holiday theme.
For a classic look, stick with white, black, and orange, then add a bright red or green scarf for a pop of color. This timeless design fits perfectly with traditional Christmas settings.
If you prefer a modern twist, experiment with non-traditional colors—such as gray, pastel pink, or mint green—for a more contemporary aesthetic. Metallic or glitter yarn adds a frosty sparkle that makes your snowmen shine under holiday lights.
Another fun idea is to turn your snowman into a character coaster set. Crochet different expressions—happy, winking, surprised—and let each coaster have its own personality. Kids especially love these playful variations!
You can also turn the Crochet Snowman Coaster Pattern into ornaments, appliqués, or mug rugs. Add a yarn loop to the top and hang them on your Christmas tree, or sew them onto stockings, placemats, or tote bags for a festive touch.
For added durability, stitch a second white circle for the back of each coaster and join them together with single crochet stitches. This gives your coaster extra thickness and a polished finish.
Whether you make one or a dozen, the possibilities are endless. These crochet snowmen are sure to bring joy and warmth to any winter gathering.
To make your Crochet Snowman Coaster Tutorial even more successful, keep these helpful tips in mind:
The Crochet Snowman Coaster Tutorial is not just about creating something cute—it’s about enjoying the process. Each stitch adds to a creation that’s both functional and heartwarming, perfect for sharing with friends and family.
1. Is this Crochet Snowman Coaster Tutorial suitable for beginners?
Yes! The pattern uses simple stitches and easy assembly, making it perfect for beginners or those wanting a quick project.
2. How long does one coaster take to make?
Each snowman coaster takes about 30–40 minutes, depending on your crochet speed and detailing.
3. Can I use different yarn weights?
Yes, but keep in mind that thicker yarn will create larger coasters, while thinner yarn results in smaller ones. Adjust your hook size accordingly.
4. Can these coasters be washed?
Absolutely! If you use cotton yarn, they can be hand-washed or machine-washed on a gentle cycle. Lay flat to dry to maintain their shape.
5. How do I make the coasters non-slip?
You can add a thin layer of fabric or felt to the back using fabric glue or by stitching it on. This adds grip and structure.
6. Can I sell finished Crochet Snowman Coasters?
Yes, handmade snowman coasters are great sellers at craft fairs or online shops. Just make sure to credit the design if it’s based on a shared tutorial or pattern.
The Crochet Snowman Coaster Tutorial is a cheerful, quick, and satisfying project that combines creativity with practicality. With a few basic stitches and a little imagination, you can crochet adorable snowman coasters that add handmade warmth to any winter gathering. Each piece reflects your personal touch, making it more than just a coaster—it’s a small work of art.
Throughout this tutorial, you’ve learned how to crochet, assemble, and customize your snowmen with fun details like scarves, hats, and expressive faces. Whether you make a single coaster for your desk mug or a full festive set for your holiday table, these snowmen are guaranteed to bring smiles and spark conversations.
If you enjoyed this Crochet Snowman Coaster Tutorial, please share your honest opinion and suggestions below.
Your feedback helps improve future guides and encourages others in the crochet community to embrace the joy of handmade creativity. Let’s keep crafting, one snowman at a time!


