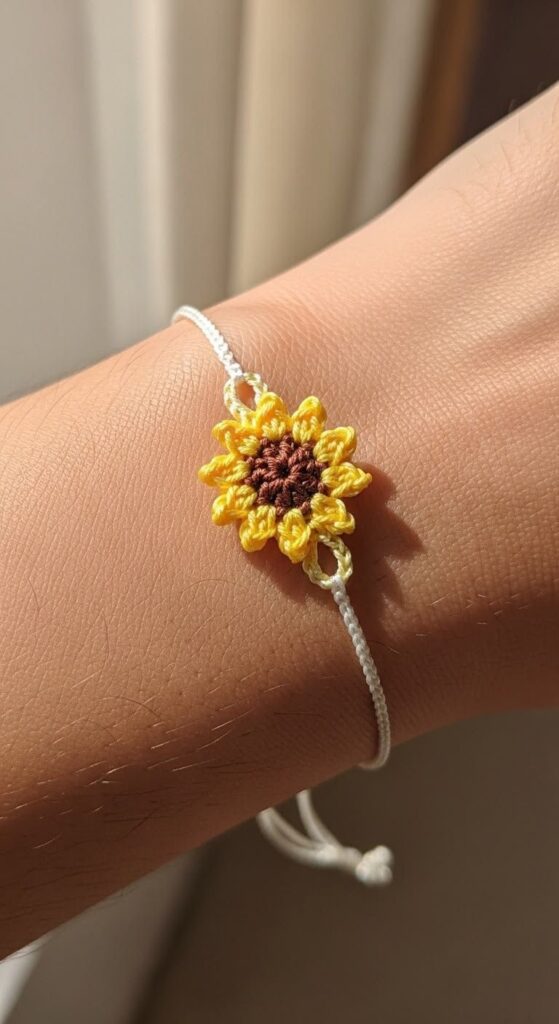
Sunflower Bracelet Pattern

The Bouncy Dog Crochet Pattern is a delightful and creative project that brings the joy of handmade crafts together with the playful spirit of dogs.
Whether you’re a crochet enthusiast or a complete beginner, this pattern is a wonderful way to create an adorable, bouncy pup that can brighten up your space or make the perfect handmade gift.
With some yarn, a crochet hook, and a bit of patience, you can bring this fun, floppy-eared friend to life. The Bouncy Dog Crochet Pattern is not only charming but also easy to customize with colors, accessories, and personality.

What makes the Bouncy Dog Crochet Pattern so enjoyable is its versatility. You can make a cute, soft toy for a child, a desk companion, or even a keychain-sized version.
The “bouncy” feature comes from the way the dog’s body is shaped and stuffed — giving it a springy, squeezable feel that’s irresistible. It’s one of those crochet projects that bring instant smiles, both during and after crafting. Plus, it’s an excellent way to use up leftover yarn, turning small scraps into something lovable and unique.
Crochet animals — often called amigurumi — have become incredibly popular for their simplicity and charm. The Bouncy Dog Crochet Pattern belongs to this adorable family of creations but stands out with its playful movement and cheerful design. In this tutorial, you’ll learn how to make your very own crochet dog step by step, discover essential tips for shaping, and get ideas for customization. Whether you prefer a realistic color scheme or something more whimsical, this pattern is sure to become a favorite in your crochet collection.
Before starting your Bouncy Dog Crochet Pattern, you’ll need to gather your materials. This project doesn’t require much, but having the right tools and yarn will make your finished dog look professional and well-crafted.
The main material you’ll need is yarn. Acrylic or cotton yarn works perfectly for this pattern. Choose soft, medium-weight yarn (category 4) so the dog feels plush and holds its shape. Brown, beige, gray, or white are classic choices, but you can make colorful versions for a fun twist.
You’ll also need a crochet hook—usually 3mm to 4mm, depending on your yarn’s thickness. The smaller hook size ensures tight stitches so the stuffing doesn’t show through. A yarn needle will be necessary for sewing parts together, and polyfill stuffing gives the dog its bouncy, squeezable body.
For the eyes and nose, you can use safety eyes or simply embroider them with black yarn. If you want a child-safe version, embroidery is best to avoid any choking hazards. A little bit of felt or ribbon can add extra character to your crochet pup.
The Bouncy Dog Crochet Pattern uses basic stitches: the magic ring, single crochet (sc), increase (inc), and decrease (dec). These simple stitches form the foundation of most amigurumi projects. If you’re new to crochet, take a few minutes to practice these before starting.
Finally, make sure to maintain even tension as you crochet. Consistent tension keeps your stitches neat and your dog’s shape even. With all your materials ready, it’s time to begin this heartwarming crafting adventure!
This Bouncy Dog Crochet Pattern is designed to be simple yet detailed enough to produce a cute and balanced toy. Follow these steps carefully, and you’ll soon have your own handmade bouncy dog.
Congratulations! You’ve completed your first Bouncy Dog Crochet Pattern. Take a moment to admire your work—you’ve created a handmade piece full of character and charm.
One of the best things about the Bouncy Dog Crochet Pattern is how customizable it is. Once you’ve mastered the basic structure, you can experiment with different breeds, sizes, and colors to make every dog unique.
For example, you can turn your crochet dog into a Dalmatian by using white yarn with small black embroidered spots. Or, make a Golden Retriever with golden-yellow yarn and a slightly longer tail.
If you prefer a cartoonish look, choose pastel colors or even rainbow yarn. The Bouncy Dog Crochet Pattern adapts beautifully to all sorts of creative ideas. Add a bow tie, scarf, or mini collar for a touch of personality.
You can also adjust the size by using different yarn weights. Bulky yarn makes a big, huggable plush dog, while fine yarn makes a cute miniature version perfect as a keychain or car ornament.
If you’re making these for kids, consider sewing a small squeaker or rattle inside the body. It adds an element of surprise and fun that children will adore.
Finally, don’t be afraid to give your crochet dog its own name and story. Whether it’s “Bouncy Buddy,” “Floppy the Pup,” or “Mini Milo,” adding a little personality makes your creation even more special.
To make your Bouncy Dog Crochet Pattern truly shine, here are some expert tips that can help you achieve professional results.
First, use a smaller hook size than recommended on your yarn label. This ensures tight stitches that hold stuffing securely.
Second, stuff gradually while crocheting. Overstuffing can distort your dog’s shape, while under-stuffing can make it sag. Aim for a soft but firm texture.
Third, use stitch markers to track your rounds. Amigurumi patterns often involve continuous rounds, and it’s easy to lose count.
Fourth, when sewing parts together, use long, invisible stitches for a clean finish. Secure the head and limbs tightly so your crochet dog keeps its shape, even when played with.
Fifth, to add real bounce, use springy stuffing or blend polyfill with a little foam material. This gives your dog a soft, squishy bounce when pressed.
Lastly, remember to have fun with the process. Crochet is about creativity, relaxation, and joy. The more love you put into your Bouncy Dog Crochet Pattern, the more personality your final creation will have.
1. Is the Bouncy Dog Crochet Pattern suitable for beginners?
Yes! It uses only basic stitches like single crochet, increase, and decrease, making it beginner-friendly.
2. What yarn works best for this pattern?
Medium-weight acrylic or cotton yarn works great. It’s durable, soft, and easy to shape.
3. Can I make the dog larger or smaller?
Absolutely. Use thicker yarn and a larger hook for a bigger dog, or thinner yarn for a miniature version.
4. How do I make the dog “bouncy”?
The bounce comes from the way it’s stuffed. Use soft polyfill and shape the body to be slightly round and flexible.
5. Can I wash my crochet dog?
Yes, gently hand-wash it in cold water and air dry. Avoid machine washing to keep it in good shape.
6. Is this safe for children?
Yes—just make sure to embroider eyes and nose instead of using plastic safety parts for small children.
The Bouncy Dog Crochet Pattern is a heartwarming, creative, and satisfying project that anyone can enjoy. From the first magic ring to the final stitch, every step is filled with joy and imagination. It’s the perfect way to combine your love for crochet and your love for dogs, resulting in a cute, handmade companion that’s sure to bring smiles.
With a few basic materials and a bit of patience, you can create a bouncy, lovable pup that’s full of character. Customize it with colors, accessories, or playful details, and each version will be uniquely yours.
If you enjoyed this Bouncy Dog Crochet Pattern, please leave your honest opinion and suggestions below.
Your feedback helps improve future tutorials and inspires more crafters to join in the fun of making handmade crochet animals. So grab your yarn, pick up your hook, and let your creativity bounce to life—one stitch at a time!


