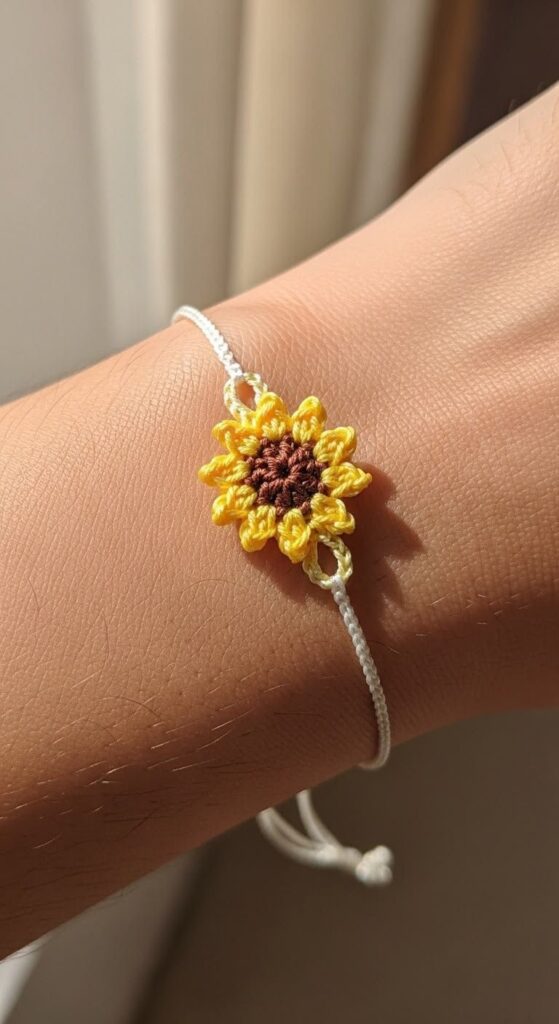
Sunflower Bracelet Pattern

Whether you are an experienced crocheter or a beginner, creating this charming Amigurumi Santa with Gift Sack allows you to craft a unique decoration for your home or a heartfelt gift for loved ones.
Crocheting the Amigurumi Santa with Gift Sack is not only a wonderful way to celebrate the season but also an opportunity to practice and improve your crochet skills.
One of the best aspects of the Amigurumi Santa with Gift Sack Free Pattern is its versatility. You can adjust the colors, materials, or even the size to suit your personal style.

Before you begin crocheting your Amigurumi Santa with Gift Sack, it is essential to gather all the necessary materials. The quality of your yarn, hook, and stuffing will impact the final appearance of your Santa, so choose materials that are suitable for amigurumi projects.
You will need various yarn colors, primarily red for Santa’s suit, white for his beard and trim, and brown or black for boots and belt. The yarn should be soft yet firm enough to hold the shape. Cotton or acrylic yarns are recommended for a sturdy structure that retains the shape well.
A crochet hook appropriate for the yarn weight is necessary for creating even stitches. Commonly, a 2.5mm or 3.0mm hook works well with amigurumi yarn. Ensuring the right tension is critical, as too loose stitches may cause the stuffing to peek through.
Safety eyes or black embroidery thread can be used for Santa’s eyes. Optional accessories like tiny jingle bells or decorative ribbons can add charm to your final Amigurumi Santa with Gift Sack. Fiberfill stuffing is essential to give Santa a soft yet firm structure, making him huggable and durable.
A yarn needle is also required for sewing pieces together and weaving in ends neatly. It is essential to work carefully to maintain the symmetry and balance of your Santa. These materials are standard in amigurumi projects and will ensure that your Amigurumi Santa with Gift Sack is high quality and visually appealing.
Finally, having stitch markers can make your project much easier to manage, especially when working in continuous rounds. These small tools help keep track of your stitch count, ensuring your Santa and his gift sack maintain consistent proportions throughout the pattern.
Creating the Amigurumi Santa with Gift Sack involves following precise steps that gradually build each component of Santa’s body and accessories. By following the instructions carefully, you can craft a professional-looking figure.
Start by crocheting Santa’s body. Work in continuous rounds to create a cylindrical shape that forms the torso. Red yarn is typically used here, representing Santa’s iconic coat. Remember to increase and decrease stitches as instructed to shape the body properly.
Next, create the legs and boots using black or brown yarn. These are usually crocheted separately and sewn to the body. Proper alignment ensures that Santa can stand or sit correctly, depending on your design preferences.
The arms are also made separately using red yarn for the sleeves and white for the cuffs. Stuff them lightly before attaching to the body to maintain proportion. Carefully position the arms so that they appear natural and allow Santa to hold his gift sack comfortably.
Santa’s head is another critical component. Begin with a beige or peach yarn for the face, shaping it into a round structure. Add features like the nose, mouth, and cheeks using embroidery thread to give Santa a cheerful and warm expression.
The hat and beard are iconic details that bring your Amigurumi Santa with Gift Sack to life. Crochet the hat in red and finish with a white trim and pom-pom. The beard can be crocheted separately or created using loops of white yarn for a fluffy effect.
Finally, the gift sack is crocheted with attention to size and proportion so Santa can hold it comfortably. Embellish it with small decorations or colorful yarn for a festive appearance. Sew the sack to one hand, making sure it hangs naturally and completes the overall look of your Amigurumi Santa with Gift Sack.
Working on the Amigurumi Santa with Gift Sack can be challenging for beginners, but there are several tips to make the process easier and more enjoyable. One key tip is to take your time and avoid rushing. Amigurumi requires patience, and a careful approach ensures better results.
Use stitch markers to track the beginning of rounds and increases. This simple tool helps prevent mistakes that could affect the symmetry of your Santa. Beginners should practice basic stitches like single crochet, increase, and decrease before attempting the full pattern.
Stuffing is another crucial factor. Use small amounts of fiberfill at a time, shaping Santa gradually to avoid lumps. Proper stuffing gives a professional finish to your Amigurumi Santa with Gift Sack.
Experienced crocheters can add creative variations. Consider changing the color scheme, adding textured stitches, or using metallic yarn for a shiny effect. These small modifications make your Santa unique and personal.
Pay attention to sewing pieces together. The placement of arms, legs, and accessories affects the overall appearance. Use a yarn needle and matching thread to attach parts securely, ensuring your Santa is durable and visually appealing.
Finally, enjoy the process. Crocheting the Amigurumi Santa with Gift Sack is not only about creating a decoration but also about embracing creativity, celebrating the holiday spirit, and crafting something meaningful for yourself or loved ones.
Once completed, your Amigurumi Santa with Gift Sack can be used in multiple ways, making it a versatile addition to your holiday decor. It can serve as a tabletop decoration, a Christmas tree ornament, or even a stocking stuffer for friends and family.
You can also gift your handmade Santa as a personalized present. Handmade gifts carry sentimental value and show effort and care. The Amigurumi Santa with Gift Sack is perfect for children and adults alike, spreading joy and cheer.
Decorate your home with multiple Santas, creating a festive scene on a mantle or shelf. Combine with other amigurumi figures, such as reindeer or snowmen, to create a cohesive holiday display.
Another creative use is to turn the gift sack into a small storage pouch. Fill it with candies, tiny presents, or notes, adding a playful and interactive element to your Santa. This functional aspect makes it more than just a decorative item.
Teachers or craft enthusiasts can also use the Amigurumi Santa with Gift Sack in workshops or holiday craft classes. It’s an engaging project that demonstrates amigurumi techniques while celebrating seasonal traditions.
Finally, share your creation on social media or with crochet communities. Many crafters enjoy exchanging patterns, ideas, and tips, enhancing your skills and connecting you with others who appreciate handmade art.
Q: What skill level is required for the Amigurumi Santa with Gift Sack pattern?
A: This pattern is suitable for beginner to intermediate crocheters. Beginners may need to practice basic stitches, while intermediate crocheters can add creative variations.
Q: Can I change the colors of my Santa?
A: Yes! The pattern allows flexibility. You can choose traditional red, green, or any color scheme that suits your style.
Q: How much yarn do I need?
A: Approximately 50-100 grams of red yarn, small amounts of white, beige, black, and optional colors for details. Yarn amounts vary depending on Santa’s size.
Q: Can I make the gift sack removable?
A: Yes. You can crochet it separately and attach it using a small loop or button, making it interchangeable or refillable.
Q: Is the Santa suitable for children?
A: Absolutely. Make sure to secure small parts like eyes or embellishments to avoid choking hazards for very young children.
Q: Can I sell my finished Amigurumi Santa with Gift Sack?
A: Yes, you can sell handmade items created from free patterns for personal or commercial use. However, crediting the original designer is recommended when sharing the pattern.
This guide provided step-by-step instructions, essential materials, tips for beginners and experienced crocheters, and creative ways to use your finished Santa.
Now it’s your turn to craft a magical Amigurumi Santa with Gift Sack. Whether for decoration, gifting, or sharing with others, this project brings the holiday spirit to life.
Share your thoughts, suggestions, and experiences with this pattern, as feedback from fellow crafters is invaluable.


