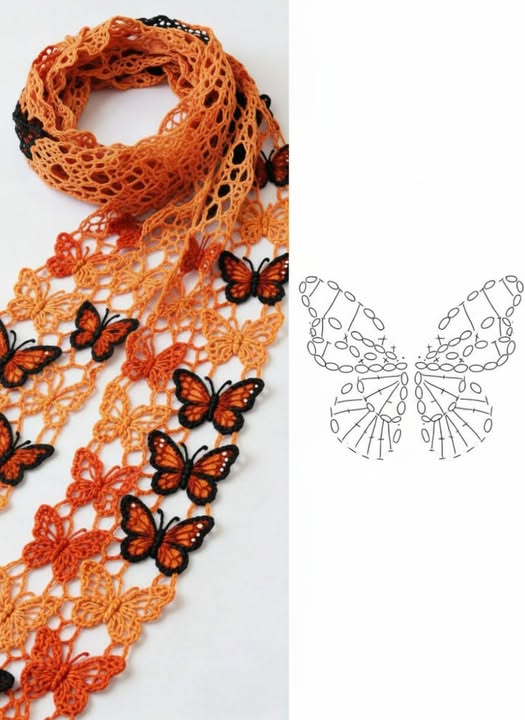
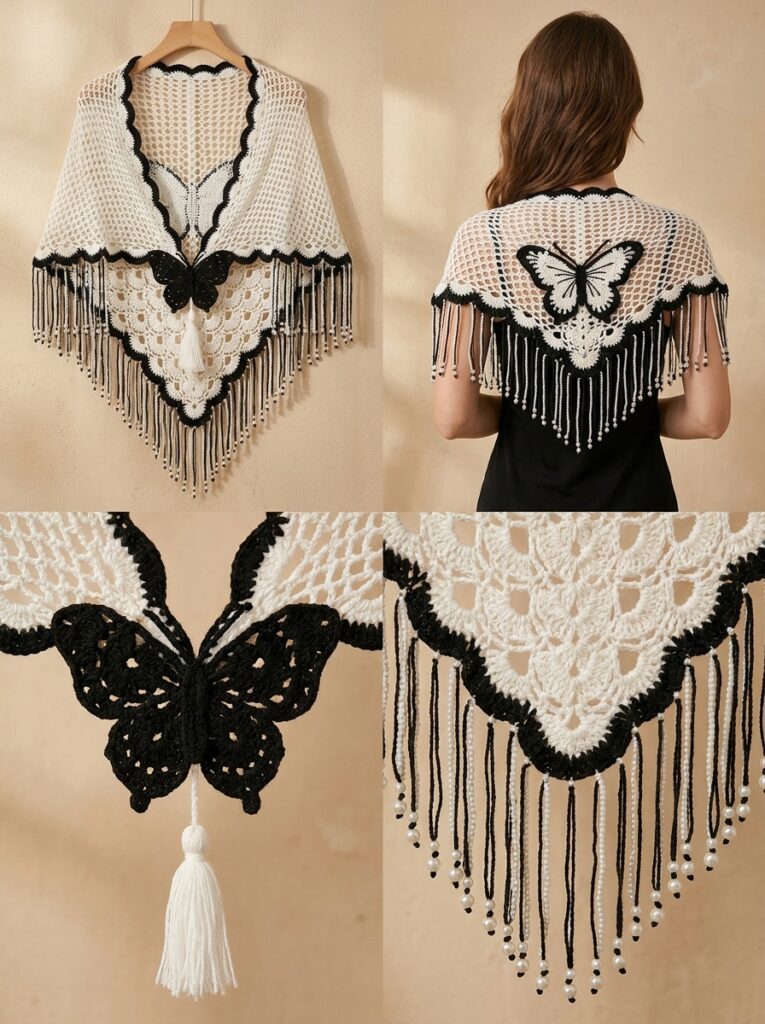
Crochet Butterfly Scarf Pattern

The Crochet Granny Square Tutorial is one of the most classic and beloved crochet techniques that every crafter should learn. In this guide, we’ll explore everything you need to know to create your own beautiful granny squares from scratch.
Whether you’re a complete beginner or someone looking to refine your crochet skills, this article will give you all the information, tips, and techniques you need to make colorful and creative designs.
The Crochet Granny Square Tutorial will walk you through the materials, stitches, and step-by-step process to master this timeless craft.
Learning how to crochet a granny square is often the first project many beginners start with. It’s a simple yet versatile pattern that can be used to make blankets, bags, pillow covers, and even clothing. The magic of the granny square lies in its modular design—you can create one square at a time and then join them together to make larger projects. Throughout this Crochet Granny Square Tutorial, you’ll understand why this technique has remained so popular for generations and how you can personalize your own pieces with color combinations and creative touches.
What makes the granny square crochet technique so appealing is its flexibility and the fact that it requires only a few basic stitches. Once you understand the foundation chain, slip stitch, double crochet, and cluster stitches, you can create endless variations. This Crochet Granny Square Tutorial will also provide tips on choosing the right yarn, hook sizes, and how to maintain consistent tension for even, professional-looking results. By the end of this article, you’ll be ready to craft your own stunning granny squares and start connecting them into beautiful handmade creations.
Before you dive into making your first granny square, it’s essential to understand the fundamentals of crochet. Every Crochet Granny Square Tutorial begins with the basics: yarn, hook, and stitches. The most common type of granny square is made using double crochet clusters and chains. These create the open, airy look that’s typical of classic crochet patterns.
To begin, you’ll need medium-weight yarn (often labeled as “worsted weight”) and a corresponding hook size, usually between 4mm and 5.5mm. These materials make it easier to see your stitches and control the yarn tension. Choosing soft, durable yarn is ideal, especially if you’re planning to make items like blankets or clothing.
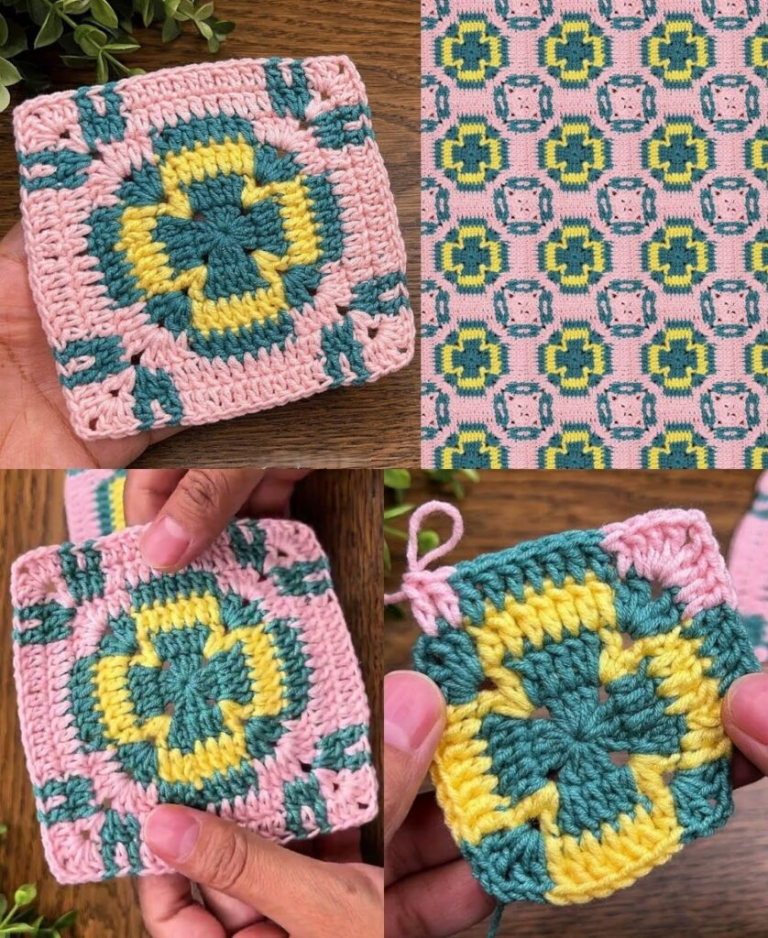
Start your granny square with a foundation chain of four stitches and join it into a ring using a slip stitch. This small circle will be the center of your square. Next, you’ll work clusters of three double crochets separated by chain spaces. The corners of the granny square are formed by adding multiple chains between clusters, allowing the square to expand evenly with each round.
As you continue following this Crochet Granny Square Tutorial, you’ll notice that each round builds upon the previous one. The pattern becomes repetitive and meditative, making it perfect for relaxation or mindful crafting. Remember, maintaining consistent tension is key—too tight, and your square will curl; too loose, and it will lose its structure.
Finally, as you progress, you can experiment with color changes. Switching colors at the start of each round is a traditional way to add character and vibrancy to your granny squares. Use a yarn needle to weave in loose ends neatly, giving your finished piece a professional look.
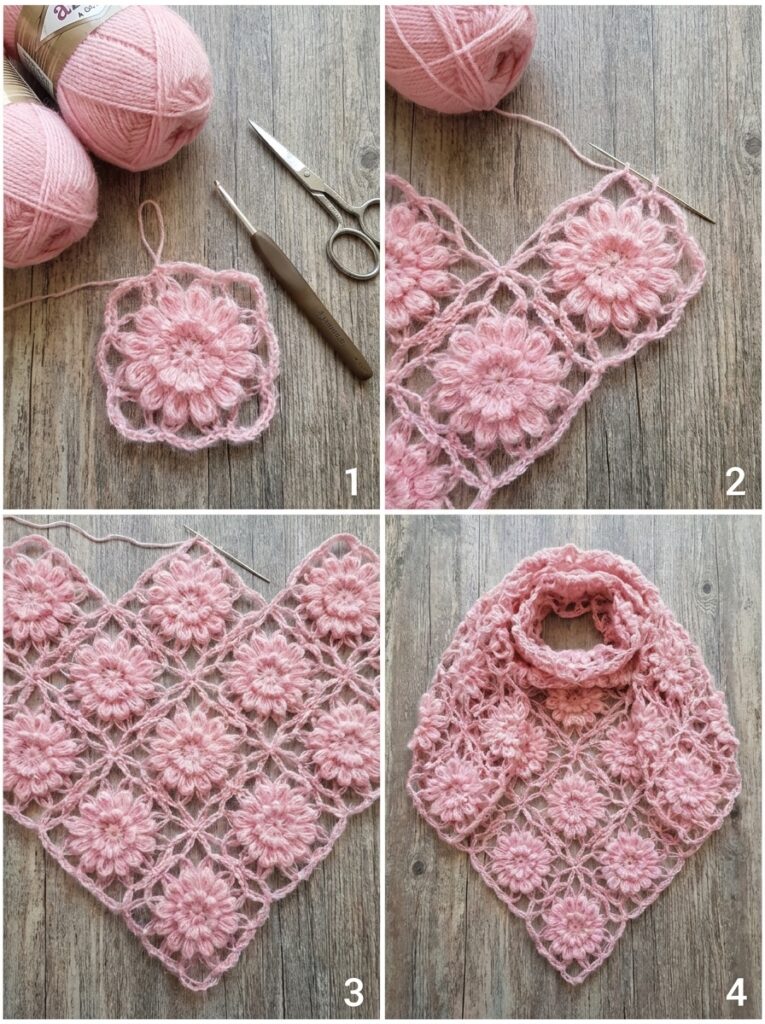
Now that you know the basics, let’s go through this Crochet Granny Square Tutorial step by step. Follow these detailed instructions to make your first square with confidence.
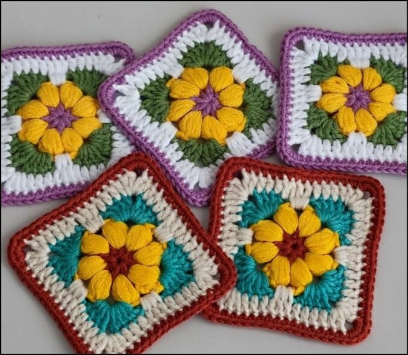
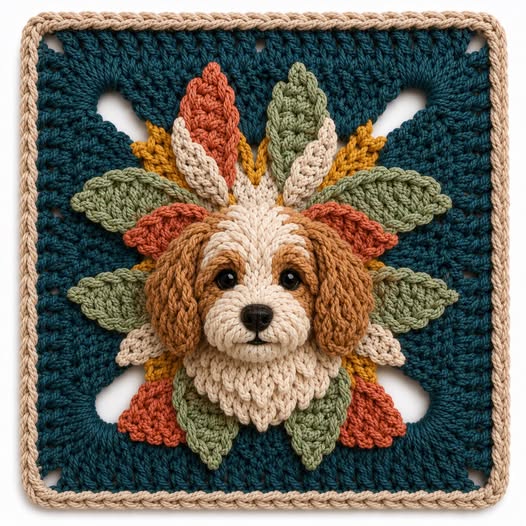
This Crochet Granny Square Tutorial can be adapted to make squares of different sizes and styles. For instance, you can create solid granny squares (without gaps), sunburst granny squares, or flower-centered designs. The beauty of crochet lies in its endless creative potential.
By following these simple yet detailed steps, you’ll soon be able to create granny squares effortlessly. As you gain confidence, try combining different yarn textures, gradients, or even metallic threads for a more unique finish.
One of the most exciting parts of this Crochet Granny Square Tutorial is discovering how versatile these squares can be. Once you have a collection of finished squares, there are countless ways to use them in projects that showcase your creativity and skill.
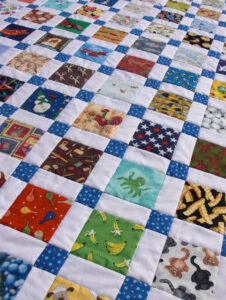
A classic use is to join granny squares together to make a crochet blanket or afghan. By mixing colors and patterns, you can create a patchwork effect that adds warmth and personality to your home. You can also make smaller projects like pillow covers, scarves, or table runners using the same technique.
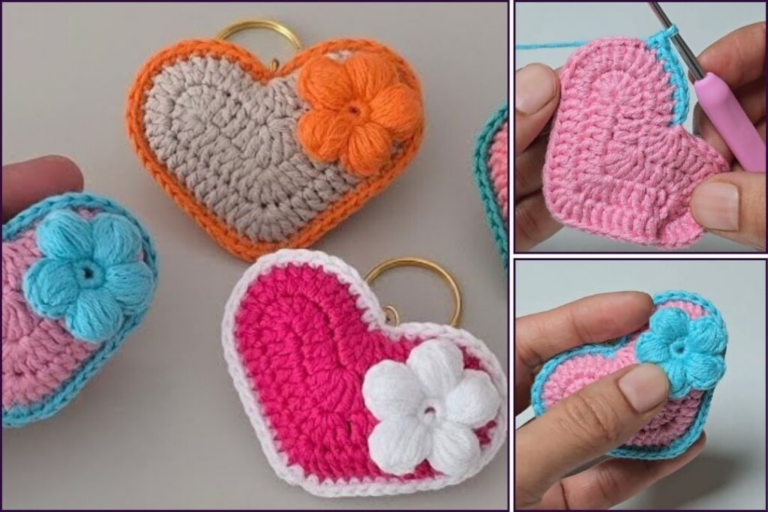
Another creative idea is to turn your granny squares into fashion accessories. For example, use them to design crochet bags, vests, or even summer tops. With the right yarn and color combinations, these pieces can become trendy, handmade statement items.
If you’re feeling more experimental, consider using granny squares as decorative wall art. Frame them individually or arrange multiple squares in a geometric pattern for a cozy, boho aesthetic. This adds a personal, handmade touch to your space.
The Crochet Granny Square Tutorial also allows for customization through color gradients and unique shapes. Try hexagons or triangles for a modern twist, or alternate solid and open squares for visual contrast. These variations make your work stand out and reflect your personal style.
Finally, granny squares make wonderful gifts. Handmade crochet items show care, time, and creativity. Whether it’s a baby blanket, a cozy shawl, or a decorative throw, a granny square project is a thoughtful gift that will be cherished for years.
Even though this Crochet Granny Square Tutorial is beginner-friendly, there are always ways to improve your technique and achieve cleaner, more professional results. Paying attention to small details can make a big difference in your finished work.
First, always block your granny squares after finishing them. Blocking involves gently stretching and shaping the squares with pins and steam to ensure they are perfectly even and flat. This step is especially important if you plan to join many squares together for a larger project.
Second, make sure to count your stitches carefully. A single missed stitch can alter the shape of your square. Use stitch markers to keep track of corners and edges when working multiple rounds.
Third, maintain consistent yarn tension. Practice keeping the same pressure on your yarn while crocheting to prevent uneven edges or misshapen corners.
Another key tip from this Crochet Granny Square Tutorial is to weave in your ends securely. This prevents unraveling and keeps your work looking neat. Use a tapestry needle and weave the yarn through the back of the stitches several times before trimming the excess.
If you want to join multiple squares, experiment with different joining methods—such as whip stitch, slip stitch join, or join-as-you-go. Each method gives a different visual effect and can change the overall texture of your project.
Finally, don’t rush. Crocheting is as much about relaxation as it is about creation. Take your time, enjoy each stitch, and let the process inspire you to try new ideas.
1. What is the easiest type of granny square for beginners?
The easiest type is the classic granny square, made with double crochet clusters and chain spaces. It’s simple to learn and ideal for practicing basic stitches.
2. Can I use any type of yarn for a granny square?
Yes, but medium-weight yarn is recommended for beginners. It’s easier to handle and provides consistent stitch definition.
3. How many granny squares do I need for a blanket?
The number depends on the desired blanket size and the size of each square. Typically, you’ll need around 40–100 squares for a medium-sized throw.
4. How do I change colors in a granny square?
Finish the last stitch of a round, cut the yarn, and tie a new color into any corner space. Then continue crocheting with the new yarn.
5. What’s the best way to join granny squares together?
Popular methods include the slip stitch join, whip stitch, or join-as-you-go technique. Choose the one that suits your desired look and texture.
6. Can I wash granny square projects in a machine?
Yes, if the yarn label says “machine washable.” Always follow care instructions to prevent shrinkage or damage.
This Crochet Granny Square Tutorial has covered everything you need to know to start your crochet journey—from understanding the basics and learning each step, to exploring creative uses and expert tips. Granny squares are timeless, fun, and deeply satisfying to make, offering endless possibilities for creativity and self-expression.
Now that you’ve learned how to craft your own granny squares, it’s time to pick up your hook and yarn and start creating. Practice regularly, experiment with colors, and most importantly, enjoy the process.
If you found this tutorial helpful, please leave your honest opinion and suggestions below. Your feedback helps improve future guides and inspires others in the crochet community to keep creating and sharing their art.