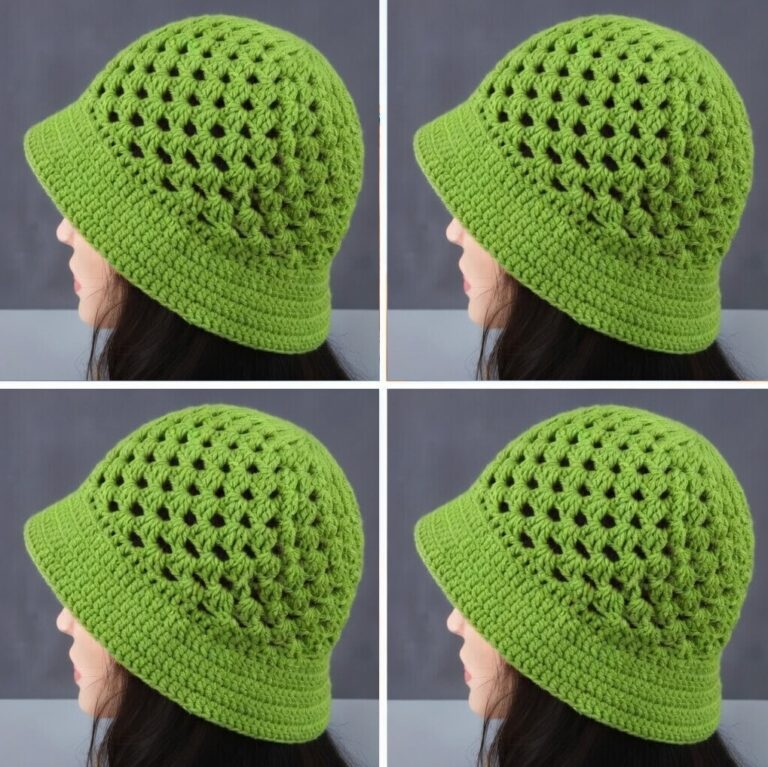
American Granny Square Bucket Hat Pattern

The Crochet Peppermint Twist Beanies Pattern is a delightful and cozy design that brings a touch of holiday cheer and handmade warmth to your winter wardrobe.
Whether you are an experienced crocheter or a beginner looking to take on a festive project, this pattern offers a fun, easy-to-follow structure that results in a stunning hat.
The charming peppermint swirl effect resembles the iconic candy that defines the Christmas season, making it the perfect gift or accessory for the cold months.
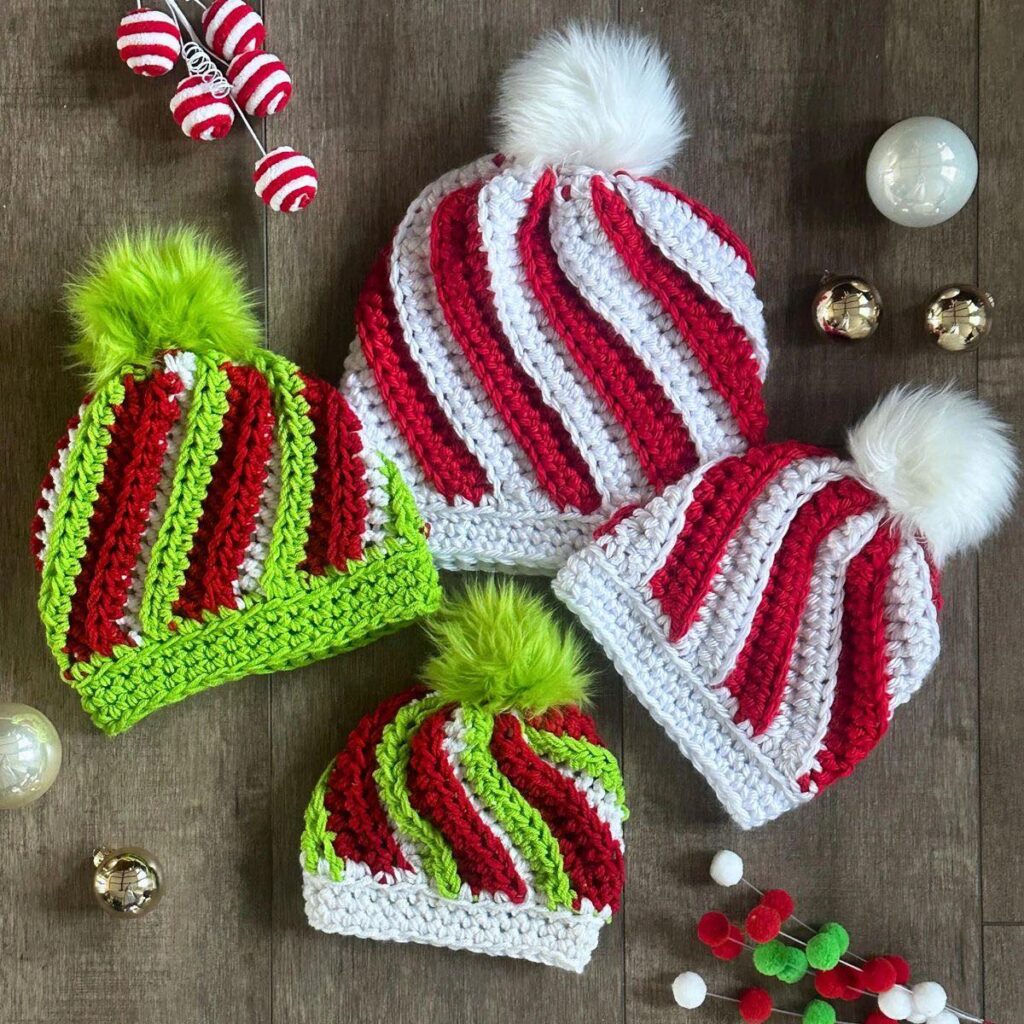
Working with this peppermint twist pattern lets you combine classic stitches with colorwork that produces an impressive visual effect without being overly complicated.
This project provides the opportunity to practice essential crochet skills, experiment with color combinations, and create something that looks professionally made while still carrying your personal touch. Plus, it’s an ideal way to use leftover yarns in festive shades like red, white, green, or even metallic silver.
What makes the Crochet Peppermint Twist Beanies Pattern so appealing is its versatility. You can easily customize it for different sizes, from newborns to adults, and adjust the colors to fit any occasion. Imagine wearing matching family beanies during winter gatherings or gifting them to loved ones as handmade surprises. The joy of crochet lies in creativity, and this pattern perfectly balances fun, function, and style.
The first step to mastering the Crochet Peppermint Twist Beanies Pattern is understanding the concept behind the design. The “twist” in this pattern refers to how alternating yarn colors are worked in a spiral or stripe formation, mimicking the candy cane look. While it appears complex, the technique mainly involves working in the round and switching colors at precise intervals.
Most crocheters begin this project using a magic ring to create a seamless start at the crown of the hat. From there, you gradually increase your stitches to form the top of the beanie. The key is maintaining an even tension while transitioning between colors to ensure that the swirl pattern remains consistent throughout the hat. Using high-contrast yarns, such as white and red or white and teal, helps the peppermint effect stand out beautifully.
Another vital part of the design is choosing the right stitch pattern. Many versions of this pattern use simple stitches such as single crochet, half-double crochet, or double crochet. These stitches not only provide a comfortable texture but also highlight the color contrast that defines the peppermint twist. Advanced crocheters may choose to incorporate puff stitches or front-post stitches for added texture, giving the hat a unique dimensional look.
Yarn choice is also crucial. Acrylic yarn is often the top choice for beginners since it’s soft, easy to work with, and machine-washable. However, for a more luxurious feel, wool or alpaca blends can add extra warmth and comfort. No matter the yarn you pick, ensure it’s medium-weight or worsted-weight yarn to give the beanie the right structure.
Lastly, remember that crochet is as much about creativity as technique. Don’t hesitate to experiment with unexpected color palettes like pink and cream or navy and silver. Even though it’s called the Peppermint Twist Beanie, your color choices can make it suitable for year-round wear, not just the holiday season.
Creating your Crochet Peppermint Twist Beanies Pattern begins with setting up your materials. You’ll need at least two contrasting yarn colors, a crochet hook that matches your yarn weight (usually 5mm or H-8 for worsted yarn), scissors, and a tapestry needle for weaving in ends. Once your materials are ready, follow these simple steps to bring your beanie to life.
Step 1: Start with the crown.
Use a magic ring and work six to eight single crochet stitches into it, depending on your desired size. Tighten the ring and close it carefully. This center will form the top of your beanie, so make sure it’s smooth and even.
Step 2: Increase evenly.
Continue working in the round, increasing your stitches evenly in each round until the crown reaches the desired diameter. For adult sizes, aim for about 6–7 inches in diameter before starting the body of the hat.
Step 3: Begin the color changes.
Now comes the fun part — the peppermint twist! Alternate your yarn colors after every few stitches or rows, depending on the pattern version you follow. Carry the unused yarn along the inside of your work to avoid tangling and to keep the fabric neat.
Step 4: Crochet the body of the hat.
After the crown is complete, stop increasing and continue crocheting in the round. This forms the sides of the beanie. Maintain consistent tension, and ensure your color changes align properly to keep the twist pattern intact.
Step 5: Finish with a border.
Once you reach your desired hat length, finish the edge with a ribbed border or a simple round of single crochet. This gives the beanie a polished, professional finish.
Step 6: Add the final touch.
Many crafters love adding a fluffy pom-pom on top of their peppermint twist beanie. You can make one with matching yarn or use faux fur for extra flair.
Following these steps helps you create a stunning handmade piece that looks intricate but is surprisingly beginner-friendly.
The best part of working with the Crochet Peppermint Twist Beanies Pattern is its flexibility. Whether you prefer a snug fit or a slouchy style, this pattern can be adapted easily. Here are a few customization ideas to help you personalize your creation.
First, adjust the size by changing the number of increase rounds at the beginning. Fewer increase rounds will create a smaller hat, while more will make it larger. You can also switch hook sizes for minor adjustments. A larger hook makes the beanie looser and more breathable, while a smaller one keeps it tighter and warmer.
Next, experiment with colors. While red and white are traditional peppermint shades, you can get creative. Try pastel combinations for spring, earthy tones for autumn, or monochrome palettes for a minimalist winter look. The contrast between the yarns is what defines the twist pattern, so choose shades that complement each other while still standing out.
You can also add texture by mixing in decorative stitches. For example, alternating rows of half-double crochet and puff stitches creates an eye-catching pattern. Another idea is to add a crochet appliqué, such as a snowflake, heart, or flower, for an extra personalized touch.
If you want your beanie to have a more professional appearance, block your crochet work after finishing. Blocking helps even out the stitches, softens the fabric, and enhances the overall shape. Simply dampen your finished beanie, shape it properly, and let it dry flat.
Finally, don’t forget about lining your beanie for added warmth. Sew a fleece lining inside the hat to make it cozier during extremely cold weather. It also prevents stretching and gives your crochet project a polished finish.
With these customization options, each Crochet Peppermint Twist Beanie you make can be unique — no two need to look exactly the same.
Once you’ve completed your Crochet Peppermint Twist Beanies Pattern, proper care is essential to keep it looking new. Handmade crochet items require gentle maintenance to maintain their texture, color, and shape.
Start by washing it carefully. If you used acrylic yarn, it’s generally safe for machine washing on a gentle cycle with cold water. However, natural fibers like wool or alpaca should be hand-washed to prevent shrinking or felting. Always use mild detergent or a specialized wool wash to protect the fibers.
When drying, avoid wringing the hat. Instead, gently squeeze out excess water and lay it flat on a clean towel to air dry. Reshape it while it’s still damp to ensure it retains its form. Never hang a wet crochet beanie, as this may stretch it out of shape.
To store your beanie, fold it neatly and place it in a cool, dry place. Avoid sealing it in plastic bags, which can trap moisture and cause mildew. For long-term storage, use a breathable fabric bag or box to keep it safe.
If your beanie collects lint or pet hair, a simple lint roller or a piece of adhesive tape works wonders. For minor pilling, use a small fabric shaver or scissors to carefully trim away the fuzz.
Proper care not only extends the life of your peppermint twist beanie but also ensures it remains as vibrant and beautiful as the day you made it.
1. Is the Crochet Peppermint Twist Beanies Pattern suitable for beginners?
Yes, absolutely! While the swirl effect may look advanced, it mainly involves basic stitches and simple color changes, making it perfect for beginners.
2. What yarn works best for this pattern?
Medium-weight or worsted-weight yarn is ideal. Acrylic yarn is the most beginner-friendly, but you can also use wool blends for a warmer, more luxurious finish.
3. How long does it take to make a peppermint twist beanie?
Depending on your skill level, it usually takes between 3–6 hours to complete one beanie.
4. Can I adjust the pattern for different sizes?
Yes! You can modify the number of starting stitches or increase rounds to make the beanie fit infants, kids, or adults.
5. How can I make the swirl more visible?
Use high-contrast colors like red and white or black and white. The greater the contrast, the more striking the peppermint twist effect.
6. Can I sell beanies made from this pattern?
Yes, as long as it’s your handmade work. It’s always nice to credit the original pattern inspiration if applicable.
The Crochet Peppermint Twist Beanies Pattern is more than just a winter accessory—it’s a creative project that combines warmth, style, and personal craftsmanship. From its eye-catching swirl design to the endless customization options, it’s a pattern that invites both beginners and experienced crocheters to enjoy the process of making something special.
Whether you’re creating it for yourself, your family, or as a heartfelt gift, the peppermint twist beanie embodies the joy of handmade art. It’s a small yet meaningful way to celebrate creativity, comfort, and the cozy charm of the season.
If you enjoyed this article, please share your honest opinion and leave suggestions for future topics or crochet patterns you’d love to learn about. Your feedback helps inspire more beautiful handmade creations!
