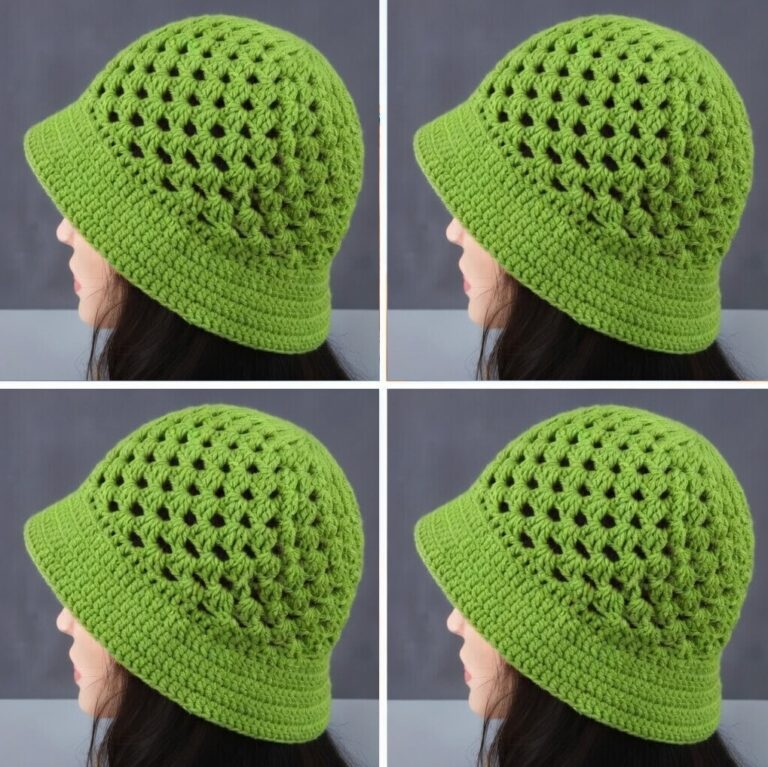
American Granny Square Bucket Hat Pattern

If you love combining whimsy and warmth in your crochet projects, the Crochet Witch Leg Scarf Pattern is a must-make! It’s playful, colorful, and absolutely perfect for celebrating Halloween. The scarf mimics a witch’s striped legs—complete with boots—creating a delightfully quirky accessory that’s as cozy as it is charming.
Whether you’re a crochet beginner looking for a seasonal challenge or an experienced crafter eager to add some humor to your handmade wardrobe, this project is pure magic.
In this complete guide, you’ll learn how to make a Witch Leg Scarf from start to finish, including materials, stitches, step-by-step instructions, customization ideas, and helpful tips to make your project both easy and enjoyable.
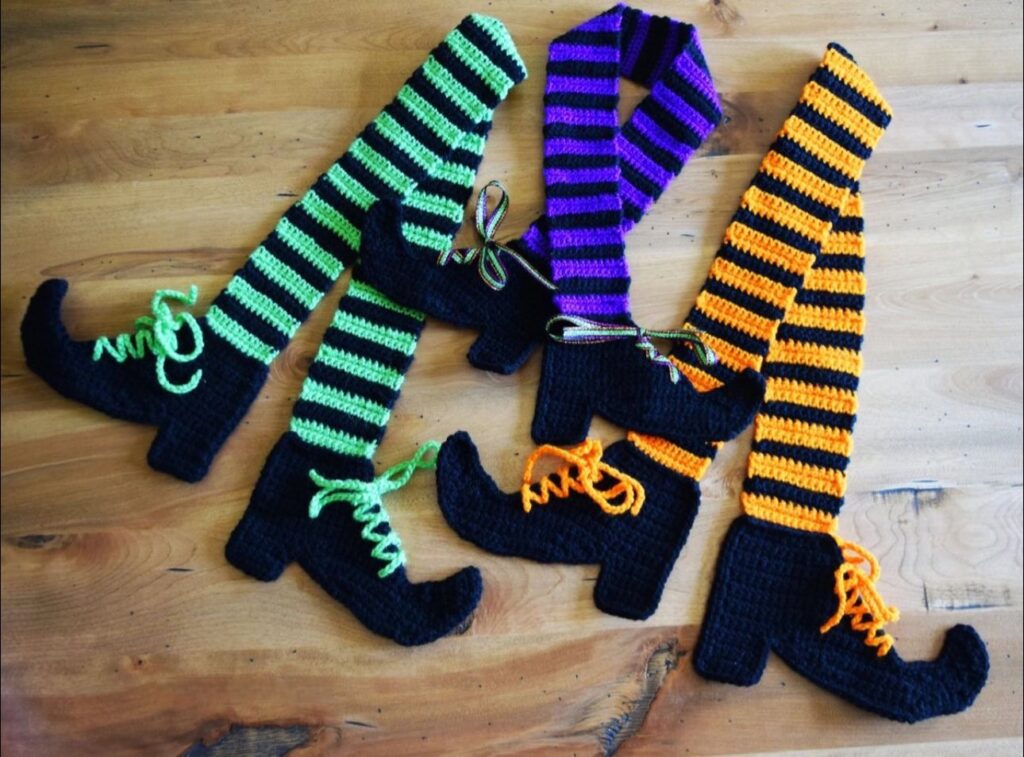
The Witch Leg Scarf is a playful crochet project inspired by Halloween’s most iconic character—the witch! The design features striped “legs” (like the witch’s tights) and boot-shaped ends that hang on each side when worn.
Imagine wrapping yourself in a scarf that looks like a pair of witch legs sticking out from your neck—it’s a guaranteed conversation starter and a favorite at parties, trick-or-treat nights, and Halloween events.
Besides being festive, it’s also practical. The scarf provides real warmth while showing off your creativity and crochet skills.
To make your Witch Leg Scarf, gather the following materials. You can easily substitute colors or yarn weights to personalize the design.
🧶 Easy to Intermediate – If you can crochet basic stitches (chain, single crochet, and double crochet), you can make this scarf. The shaping of the boots is simple, and the striped body is repetitive and relaxing.
| Abbreviation | Meaning |
|---|---|
| ch | chain |
| sc | single crochet |
| dc | double crochet |
| sl st | slip stitch |
| st(s) | stitch(es) |
| inc | increase (2 sts in same st) |
| dec | decrease (crochet 2 sts together) |
Let’s bring this spooky-cute scarf to life!
The boots form the base of your scarf.
This forms the boot shaft.
Use your yarn needle to stitch the front toe area into a gentle curve—it should look like a witch shoe tip curling upward.
This is the fun and colorful part!
Keep repeating this stripe pattern until the leg section measures approximately 26 inches.
Repeat Steps 1 and 2 to create the second leg of the scarf.
You’ll end up with two identical boot and leg pieces.
Once both legs are complete:
This creates the “neck” portion that sits around your collar when worn.
The best thing about this pattern is its flexibility. Here are a few ways to make your Witch Leg Scarf truly your own:
Attach small black or orange pom-poms to each boot toe for extra movement and fun.
Make a Witch Hat Beanie or Striped Fingerless Gloves to match your scarf for a complete Halloween set.
Try a self-striping yarn to avoid constant color changes or add sparkly metallic threads for a magical touch.
This pattern has become a Halloween favorite for a reason. It’s:
It’s the kind of project that makes people smile the moment they see it!
To keep your scarf looking fresh year after year:
1. Can beginners make this scarf?
Absolutely! The pattern uses only basic stitches and simple color changes. The boot shaping is easy to follow.
2. Can I make it longer or shorter?
Yes. Simply add or remove rows in the striped sections.
3. How long does it take to finish?
On average, about 6–8 hours depending on your speed and color changes.
4. Can I use different yarn weights?
You can! Just adjust your hook size and expect the final dimensions to change slightly.
The Crochet Witch Leg Scarf is more than just a Halloween project—it’s a joyful, imaginative piece that shows off your creative spirit. With its bold stripes, quirky boots, and endless customization possibilities, this scarf is a seasonal favorite you’ll want to wear every October.
It’s lightweight enough for fall weather yet cozy enough to keep you warm on chilly nights. Plus, it’s guaranteed to get smiles (and compliments!) wherever you go.
