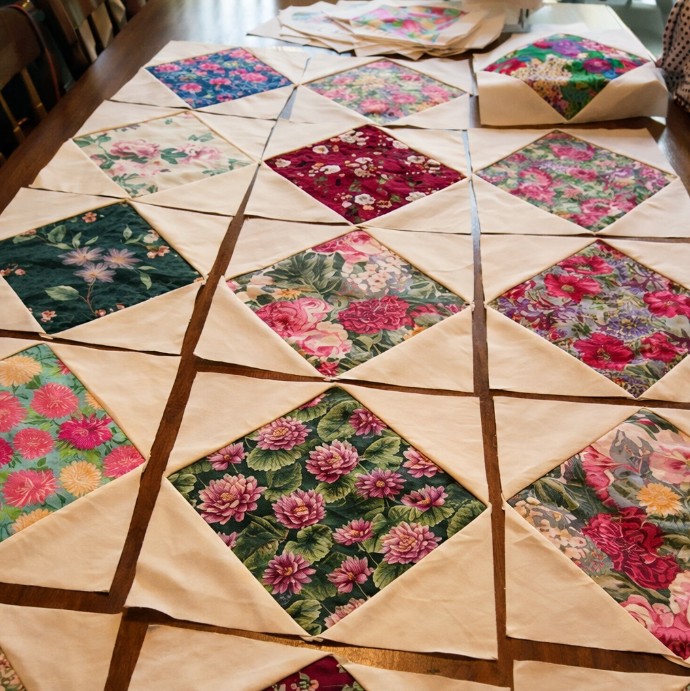
Patchwork Square Design Block Pattern

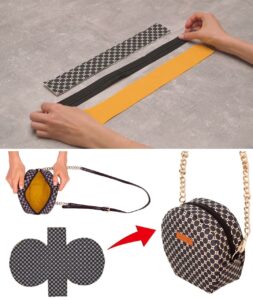
Creating a Small Backpack Easily Tutorial is a wonderful way to introduce beginners and intermediate crafters to the joy of sewing a practical and stylish fabric backpack.
In this article, you will learn how to design a functional mini backpack using simple quilting techniques, fabric scraps, and essential sewing tools.
The Small Backpack Easily Tutorial is perfect for those who enjoy handmade accessories and want a quick project that results in a useful everyday item. From choosing materials to assembling the final structure, this comprehensive guide will help you complete a durable and attractive backpack without stress.

Before diving into the first major steps, it is important to understand the value of handmade backpacks. They are eco-friendly, customizable, and often more durable than mass-produced alternatives.
Following a Small Backpack Easily Tutorial gives you full creative freedom to choose colors, textures, and quilting styles that express your personal aesthetic. Whether you prefer minimalist tones or vibrant patchwork designs, this project adapts beautifully to your preferences. With essential sewing knowledge and the right guidance, your backpack will look professionally crafted.
Another advantage of the Small Backpack Easily Tutorial is that it teaches essential sewing and quilting techniques that can be applied to future projects. Skills like fabric cutting, interfacing, assembling layers, stitching curves, attaching zippers, and making straps are foundational in bag-making. As you work through this tutorial, you will solidify your craftsmanship while also enjoying the satisfaction of completing a fashionable quilted mini backpack. Let’s continue by exploring the required materials and preparation steps.
Gathering your materials is a key step in successfully completing the Small Backpack Easily Tutorial. For this project, you will need quilting cotton, lining fabric, medium-weight interfacing or foam stabilizer, thread that matches or contrasts with your fabric, a zipper, strap adjusters, and basic sewing tools like scissors, rulers, and pins. Each item plays a crucial role in creating a structured and durable mini backpack that holds its shape.
Choosing the right fabric is essential, especially if you want your backpack to last. Quilting cotton is highly recommended because it is easy to sew and available in countless prints, giving your project a touch of personality. When following the Small Backpack Easily Tutorial, selecting fabrics that coordinate or complement each other will elevate the final look of your backpack. Consider mixing solid colors with patterned accents to add charm.
Interfacing and stabilizers add structure and prevent the backpack from collapsing. If you want a firm, professional appearance, use foam stabilizer or medium-heavy interfacing between the exterior fabric and the lining. This enhances both durability and shape. The Small Backpack Easily Tutorial emphasizes stabilization to ensure the mini backpack has strength and long-term usability.
Cutting your pieces accurately is another key element. Measure and cut all components according to the size you prefer for your mini backpack. Symmetry and precision will make the sewing process smoother. Using a rotary cutter and quilting ruler ensures cleaner edges and better alignment for assembling parts later.
Next, organize your materials on a clean workspace. Labeling each fabric piece helps maintain order throughout the process, especially when working with multiple layers and pockets. Beginners often misunderstand the layout steps, so staying organized will enhance your experience with this Small Backpack Easily Tutorial.
Finally, before moving on, wind your bobbin, thread your machine, and test a few stitches on scrap fabric. This ensures smooth quilting and stable stitching as you build your backpack.
The front and back panels form the main structure of the mini backpack, making this step central to the Small Backpack Easily Tutorial. To begin, prepare your exterior pieces and apply interfacing or foam stabilizer to provide shape and support. Ironing the layers together helps them stay firmly attached during sewing.
For added style, many crafters incorporate simple quilted stitching on the outer panels. Whether you choose straight lines, diagonal patterns, or free-motion quilting, this decorative step adds beauty and durability. The Small Backpack Easily Tutorial recommends light quilting to avoid stiffness while still enhancing the bag’s structure.
Once your quilting is complete, trim any excess fabric around the edges to keep everything even. Clean cuts ensure that the front and back panels align perfectly when assembled. Symmetry prevents uneven seams and contributes to a polished appearance.
Next, consider adding a front zipper pocket or slip pocket for extra storage. This optional step enhances functionality and gives your backpack a professional touch. A small pocket also increases the usefulness of the bag for carrying keys, cards, or small tools. The Small Backpack Easily Tutorial encourages creativity, so feel free to adapt pockets to your needs.
After attaching any pockets, set aside your finished front and back panels. Keeping them flat and wrinkle-free is important, as changes in shape can affect the sewing process later. Ready panels make the next assembly steps significantly easier.
When both panels are prepared, move on to constructing the sides and bottom portion of the backpack, where everything will begin to come together.
The side and bottom pieces define the depth of your backpack and give it a classic rounded or boxy shape. Start by attaching interfacing to these pieces just as you did for the main panels. This reinforces the structure and ensures the bag maintains its form. Following the Small Backpack Easily Tutorial, shape and stability are essential qualities for a well-crafted mini backpack.
Next, sew the side pieces to the bottom piece, forming a continuous band that wraps around the bag. Take your time with this step, as accuracy will determine how smoothly the pieces attach to the front and back panels. Curves and corners require patience, so sew slowly and guide the fabric gently.
Once the side band is complete, set it aside and focus on the zipper. Choosing a high-quality zipper ensures longevity and smooth use. Place the zipper between the top edges of the quilted exterior and lining fabric, sewing carefully to create a clean and sturdy closure. The Small Backpack Easily Tutorial highlights the importance of zipper installation for ease of access and durability.
After the zipper is in place, begin attaching the side-and-bottom band to the front and back panels. Use plenty of pins or clips to maintain alignment. Sewing curves can be tricky, but steady movements and proper pinning will result in a neat finish.
When the entire exterior is assembled, turn it inside out to admire the shape. You should see the structure forming clearly. This satisfying step shows your progress and signals that you are moving toward completion.
The final part of this section involves repeating the assembly process for the interior lining. The lining should mirror the exterior construction, ensuring everything fits perfectly when inserted.
Straps are essential for both comfort and functionality. Begin by cutting long fabric strips, folding them, and sewing to create strong, neat straps. Reinforce them with interfacing if you want added durability. The Small Backpack Easily Tutorial emphasizes the importance of strong straps, especially for carrying heavier items.
Attach the straps to the upper back panel, sewing them securely with reinforced stitching. Boxes or X-shaped stitches provide extra strength and prevent tearing. Proper strap placement ensures good weight distribution and comfort during use.
Next, insert the lining into the exterior, making sure all seams align. Carefully sew the lining around the zipper seam to close the piece and complete the interior finish. This step creates a clean, professional look and hides all raw edges.
Add a small top handle if desired. Handles make the mini backpack easier to carry in hand, adding convenience and aesthetic appeal. The Small Backpack Easily Tutorial encourages creativity, so explore decorative fabric, quilted handles, or even braided straps.
Once everything is assembled, gently iron your mini backpack to smooth out wrinkles and give it a crisp appearance. A beautifully finished backpack looks more polished and is more enjoyable to use.
Finally, test the zipper and straps for safety and comfort. Your handcrafted backpack is now ready to use or gift.
1. Is this project suitable for beginners?
Yes, the Small Backpack Easily Tutorial is beginner-friendly, especially for those familiar with basic sewing techniques.
2. What type of fabric works best?
Quilting cotton is ideal because it is easy to handle and offers countless design options.
3. Do I need a special sewing machine?
A regular sewing machine works perfectly. A walking foot can help with thicker layers.
4. Can I customize the size?
Absolutely. Adjust measurements to create a smaller or larger backpack.
5. How long does the project take?
Most crafters complete it in one afternoon or spread it over two days.
6. Is interfacing necessary?
Yes, it helps give the backpack shape and durability.
7. Can I add extra pockets?
Yes, the tutorial allows customization for interior or exterior pockets.
8. What type of zipper should I use?
A nylon coil zipper is recommended for ease of sewing and flexibility.
9. Can children use this backpack?
Yes, it’s a great lightweight option for kids.
10. Is this backpack washable?
Yes, but use gentle washing methods to preserve its shape.
In this Small Backpack Easily Tutorial, you learned how to choose materials, prepare quilted panels, assemble the structure, add a zipper, and finish straps to create a stylish and functional mini backpack. This project enhances your sewing skills while offering a practical item you can use daily or gift to someone special.
I hope this guide inspires you to make your own beautiful creation. Please leave your sincere opinion and share suggestions on how I can improve future tutorials!


