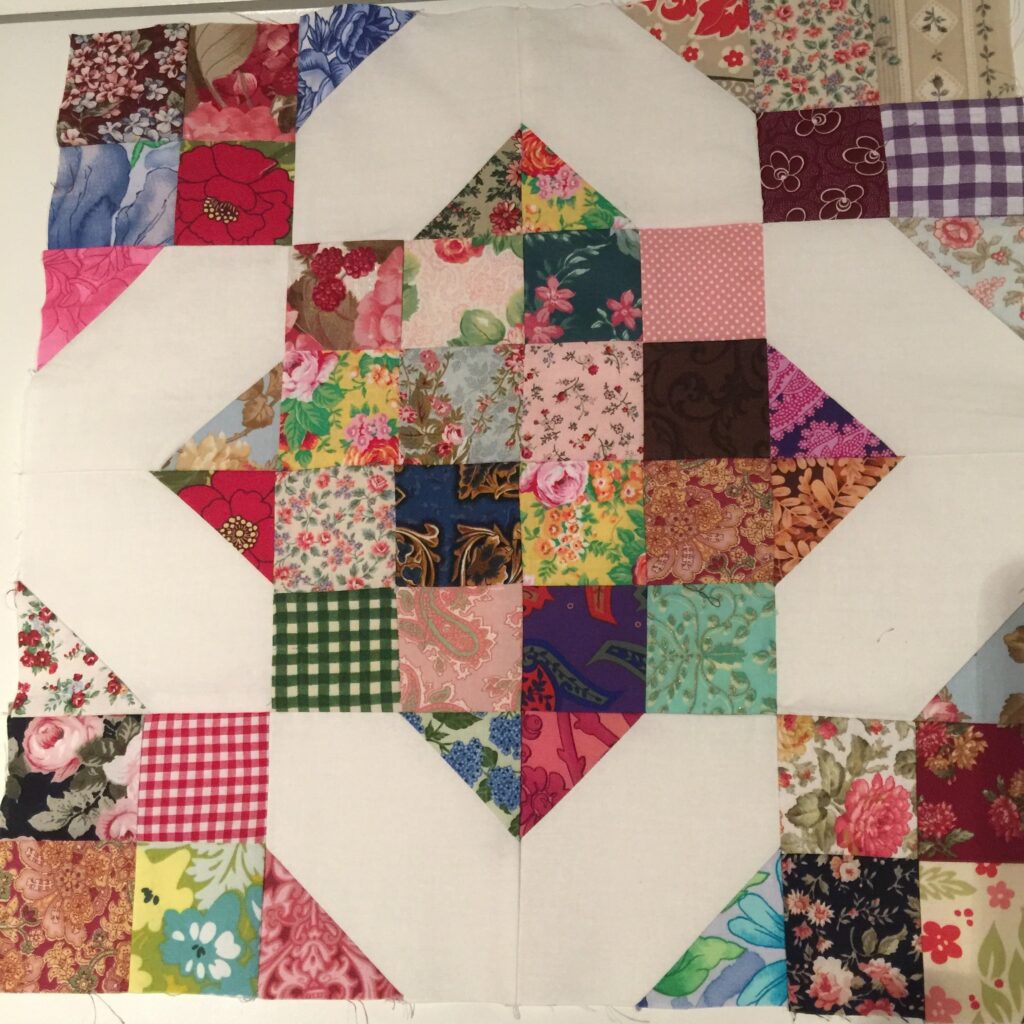
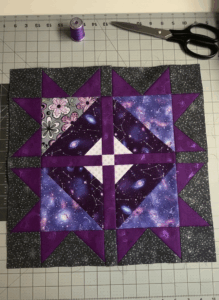
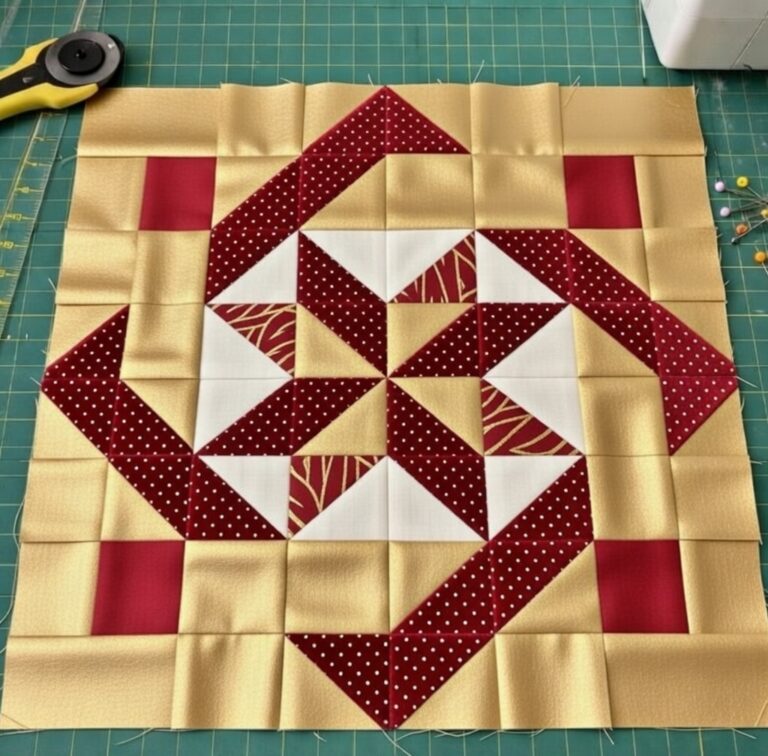
Patchwork Square Design Block Pattern

My Scrappy Cross Roads Block Free Pattern is the perfect gateway to joyful, stash-busting quilting, and in this guide I’ll show you how to cut, piece, press, and finish a block you’ll be proud to sew again and again.
Before we start, it’s worth noting why the My Scrappy Cross Roads Block Free Pattern stands out: it’s modular, forgiving, and celebrates imperfection as charm.
A final word before cutting: success is all about consistency. Keep your seam allowance steady, press with intention, and trim units when needed to maintain accuracy.
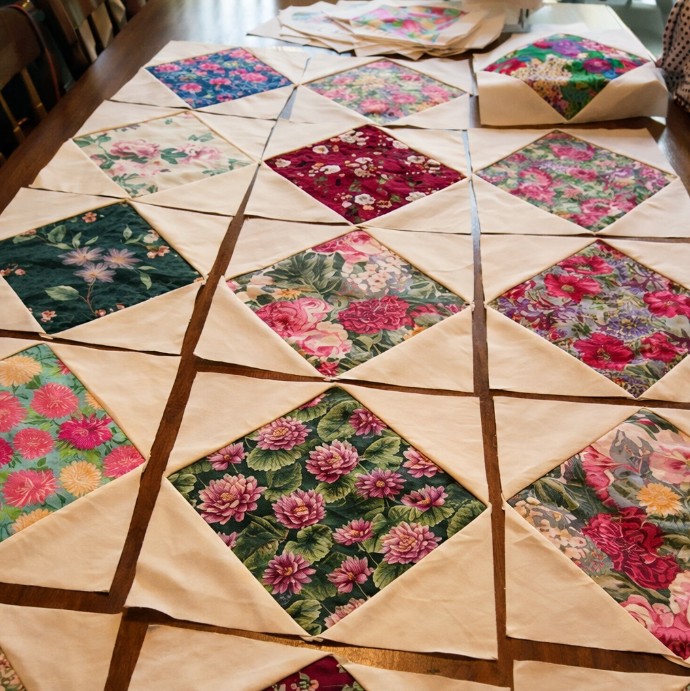
Start by shopping your stash. For My Scrappy Cross Roads Block Free Pattern, gather a lively mix of brights, prints, and tonal textures plus a reliable background. High contrast works best: think dark colorful scraps against a pale background or vice versa. Pull fabrics you love, not just the ones you feel obligated to use. The more variety, the more dynamic your finished My Scrappy Cross Roads Block will be.
Choose a consistent background that lets your scraps shine. A classic white, cream, or light gray gives the eye a place to rest and makes the “roads” read clearly. If you prefer a darker, moodier palette, try charcoal or navy as your background with candy-colored scraps. Either way, keep the background uniform to preserve the crisp lattice effect that defines My Scrappy Cross Roads Block Free Pattern.
For one 12½″ unfinished block (12″ finished), cut the following: from background, (8) 2½″ squares and (4) 2½″ × 4½″ rectangles; from scraps, (12) 2½″ squares and (4) 4½″ squares if you want larger corner focus points. Adjust these counts if you prefer a denser cross-road effect or if you’re scaling to 9″ or 15″ blocks. The flexible math is part of the charm of My Scrappy Cross Roads Block.
Audition values, not just colors. Lay out a few sample units before committing to full-scale chain piecing. Aim for a spread of lights, mediums, and darks so the “roads” pop without losing the fun, scrappy vibe. If a fabric fights for attention in the wrong spot, relocate it. My Scrappy Cross Roads Block Free Pattern thrives on balance.
Begin with the corner units. Pair one scrap 4½″ square with two background 2½″ squares for easy corner-flip triangles. Draw a diagonal on the wrong side of each background square, stitch on the line, trim a ¼″ seam, and press out. You’ll repeat this to form crisp diagonal accents that define the roads in My Scrappy Cross Roads Block.
Next, build the center cross. Sew together a 2½″ × 4½″ background rectangle flanked by 2½″ scrap squares, forming a unit that looks like a small bar bordered by color. Make two identical units. These become the horizontal and vertical “roads” in My Scrappy Cross Roads Block Free Pattern, intersecting at the block’s heart.
Assemble four 2½″ nine-patch-style clusters from scrap squares to fill around the roads. Alternate strong prints with calmer ones to avoid visual clumps. Press rows in opposite directions to nest seams. The nesting will give you tight, handsome intersections in My Scrappy Cross Roads Block without bulky lumps.
Go monochrome for a modern look. Use one color in many shades—teal, rose, or mustard—with a consistent background. The gradient adds sophistication while the roads remain bold. This approach makes My Scrappy Cross Roads Block feel cohesive and gallery-ready.
Try low-volume scrappy with pops of neon. Soft prints and whisper-light backgrounds create calm fields where a few electric scraps become fireworks. Place brights near the center cross for maximum drama in My Scrappy Cross Roads Block Free Pattern.
Introduce fussy-cut corners. Those 4½″ scrap squares are perfect frames for novelty prints—tiny florals, animals, or motifs from your favorite designer. The corners become miniature showcases that personalize each My Scrappy Cross Roads Block.
Press with purpose. After each seam, set the stitches by pressing the seam flat, then press to the darker fabric or open where bulk accumulates. Thoughtful pressing keeps intersections crisp in My Scrappy Cross Roads Block.
Chain piece for speed. Feed identical units through the machine back-to-back without snipping in between. This reduces thread waste and keeps pieces in order, accelerating your progress on My Scrappy Cross Roads Block Free Pattern.
Use leaders and enders. Start and end seams on a scrap “leader” to prevent thread nests and improve tension. Bonus: turn those leaders into micro-blocks for a future project while you build My Scrappy Cross Roads Block.
Plan your quilt dimensions. Decide on throw, twin, or queen and calculate how many blocks you need. A 60″ × 72″ throw takes twenty 12″ finished blocks in a 4 × 5 layout, leaving space for a border if desired. This planning step keeps My Scrappy Cross Roads Block projects on schedule.
Estimate yardage for background fabric. For a throw with sashing-free construction, budget about 2½–3 yards of background, depending on your seam preferences and cutting efficiency. Scraps cover the rest, making My Scrappy Cross Roads Block Free Pattern affordable and eco-friendly.
Batch your workflow. Cut all background pieces first, then sort scrap colors and values. Piece similar units in assembly lines to maintain rhythm and consistency. This method speeds up production on multi-block My Scrappy Cross Roads Block quilts.
What size should my starting squares be for a 12″ finished block?
Use 2½″ squares for most patch units, 2½″ × 4½″ rectangles for the road bars, and 4½″ squares for the corner focus pieces. Trim the completed block to 12½″ before joining to the quilt, ensuring a perfect 12″ finished My Scrappy Cross Roads Block.
Can I make this with charm packs or jelly rolls?
Yes. Charm packs (5″ squares) are ideal for the 4½″ corner focus squares with minimal trimming. Jelly roll strips (2½″ × WOF) can be sub-cut into the 2½″ squares and rectangles used across My Scrappy Cross Roads Block Free Pattern.
How do I keep my intersections crisp?
Nest seams by pressing adjoining seams in opposite directions, or press open where several seams meet. Pin exactly through seam ditches and sew slowly across joins. This yields sharp points in every My Scrappy Cross Roads Block.
Is this pattern beginner-friendly?
Absolutely. The construction relies on straight seams, basic corner-flip units, and consistent pressing. With careful measuring and trimming, newcomers can produce polished My Scrappy Cross Roads Block Free Pattern results.
What if my scraps don’t “match”?
Scrappy quilts celebrate variety. Focus on value (light/medium/dark) more than perfect color coordination. A consistent background pulls everything together and keeps My Scrappy Cross Roads Block cohesive.
How do I scale the block to 9″ or 15″?
Multiply all cut sizes by 0.75 for a 9″ finished block or by 1.25 for a 15″ finished block. Maintain a ¼″ seam allowance and square up after each stage to protect the proportions of My Scrappy Cross Roads Block Free Pattern.
What quilting designs complement this block?
Straight lines echoing the roads, crosshatch in the background, or soft serpentine lines all work beautifully. Choose a thread that blends with the background so the geometry of My Scrappy Cross Roads Block remains the star.
In this comprehensive guide to My Scrappy Cross Roads Block Free Pattern, you learned how to curate scraps, cut with confidence, assemble tidy units, and press for sharp intersections.
We explored layout math, creative variations, quilting ideas, and practical finishing tips—everything you need to turn a pile of fabric remnants into a cohesive, eye-catching quilt.
