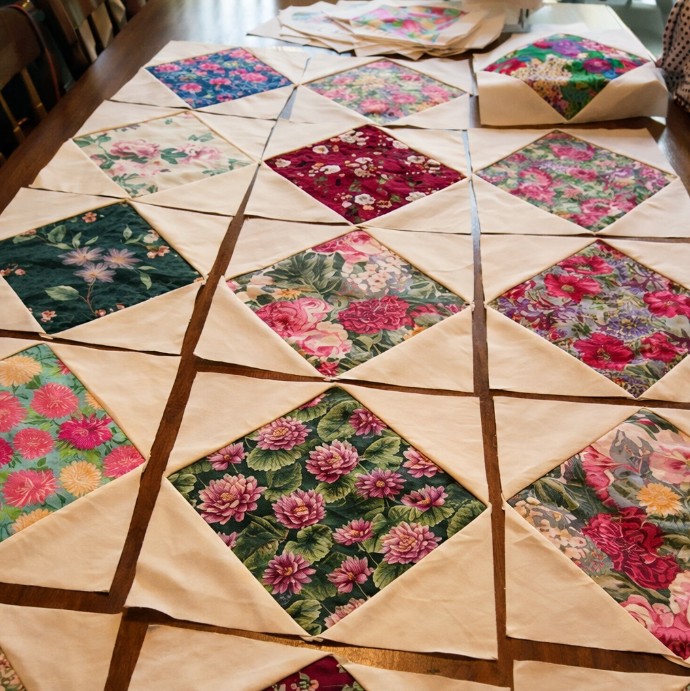
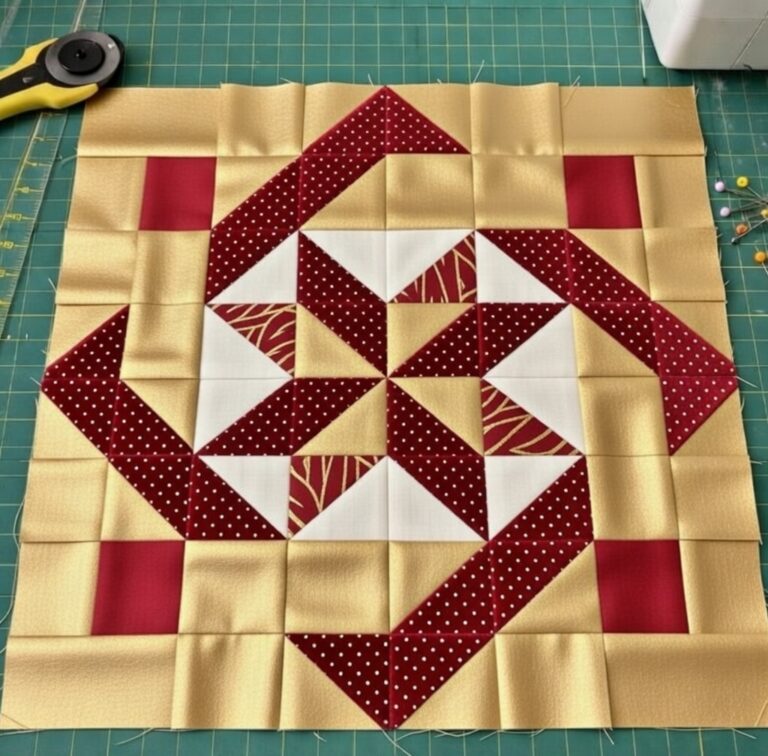
Patchwork Square Design Block Pattern

Log Cabin Quilt Free Pattern is more than just a set of cutting sizes or piecing steps—it’s an invitation to join a living tradition that welcomes absolute beginners and seasoned quilters alike.
The beauty of a Log Cabin Quilt Free Pattern is how it turns simple strips into dramatic contrast. Traditionally, makers use a light side and a dark side to symbolize hearth and home, and this value contrast is what makes the block read clearly from across the room.
Because this article focuses on a Log Cabin Quilt Free Pattern, we’ll walk through yardage guidelines, cutting strategies, pressing methods, and layout ideas you can mix and match.
The Log Cabin block has roots that cross continents and centuries, but its enduring power comes from simplicity. At its heart, a Log Cabin Quilt Free Pattern begins with a center square—often red or warm-toned to symbolize the hearth—surrounded by sequential logs, building outward like rings of growth on a tree. Keeping to light fabrics on one side and dark on the other gives you instant drama with minimal effort.
For beginners, the modular nature of the block means rapid skill-building. Every log is a short seam, and each seam is a chance to practice a consistent quarter-inch. When you follow a Log Cabin Quilt Free Pattern, you’ll learn to measure twice, cut once, and chain-piece for speed—habits that translate to any quilt you make next.
Color and value do the heavy lifting. If you’re unsure where to start, pull 10–12 fat quarters split evenly between lights and darks, add a standout center color, and you’re on your way. A Log Cabin Quilt Free Pattern thrives on contrast: low-volume prints for the light side, saturated tones for the dark side, and a center square that glows.
Pressing is the quiet hero. After each log is added, a quick press—preferably with a dry iron—keeps the block crisp. Many quilters press seams away from the center to distribute bulk. Your Log Cabin Quilt Free Pattern will note pressing suggestions, but consistency matters most: choose a direction and stick to it.
Accuracy compounds across logs. Even a tiny wobble can stack up as you add rounds. Use a sharp rotary blade, align your ruler carefully, and verify the block size at each round. A dependable Log Cabin Quilt Free Pattern will list target sizes after each ring so you can course-correct early.
Finally, remember that tradition is a guide, not a cage. The classic red hearth is lovely, but your center can be teal, mustard, or floral—whatever sings to you. The Log Cabin Quilt Free Pattern you follow should free you to experiment while keeping the steps crystal clear.
Start by choosing your size. A throw typically measures 54″ × 72″, a twin around 70″ × 90″, a queen 90″ × 96″, and a king about 108″ × 108″. Your Log Cabin Quilt Free Pattern can scale to any of these by adjusting the number of blocks, block size, or both. Decide on finished block size—10″, 12″, or 14″ are popular—and calculate how many blocks you’ll need to hit your target dimensions.
Yardage planning saves time and money. For a balanced look, split yardage evenly between lights and darks. For example, a 60″ × 72″ throw with 30 twelve-inch blocks might use roughly 2½–3 yards of lights and 2½–3 yards of darks, plus ¼ yard for center squares. Your Log Cabin Quilt Free Pattern will include estimates, but having a cushion for miscuts is wise.
Cutting strips is efficient. Most patterns call for logs of uniform width (commonly 2″ or 2½” cut), which finish at 1½” or 2″ after sewing. A Log Cabin Quilt Free Pattern will specify the exact width—stick to it religiously. Crosscut strips into log lengths as you build each round to reduce waste and keep edges square.
Begin with the center squares. Cut them at 2″ or 2½” depending on the desired finished width of each log. The Log Cabin Quilt Free Pattern typically starts by attaching the first light log to one side, then rotating clockwise (or counterclockwise) to keep the sequence consistent across blocks.
Sew with a true quarter-inch seam allowance. Test on scraps and measure the result. If your seam is too wide, blocks will shrink; too narrow, they’ll grow. A reliable Log Cabin Quilt Free Pattern will note the finished size after each round—for example, after the first ring, a 2½” log should yield a 4½” unfinished block.
Press after each seam. Set the seam by pressing it flat, then press toward the log you just added. Keep the block flat, avoid stretching, and use a light touch to maintain square corners. Great pressing turns a standard Log Cabin Quilt Free Pattern into a crisp, show-ready block.
Add logs in order: light, light, dark, dark, and repeat until you reach the desired size. Trim threads often and finger-press between trips to the iron to speed up. Chain piecing several blocks at once—sewing the same log on all centers—maximizes efficiency in your Log Cabin Quilt Free Pattern workflow.
Square up as you go. After each full round, check that the block matches the pattern’s target measurement. If you’re off by more than 1/16″, investigate: is your seam allowance drifting? Is your strip width consistent? Small corrections now keep the whole Log Cabin Quilt Free Pattern consistent.
Make it scrappy or curated. For scrappy, pull from your stash and aim for value contrast more than color coordination. For curated, select a tight palette and repeat prints strategically. Either way, the Log Cabin Quilt Free Pattern structure ensures the design reads beautifully once blocks are assembled.
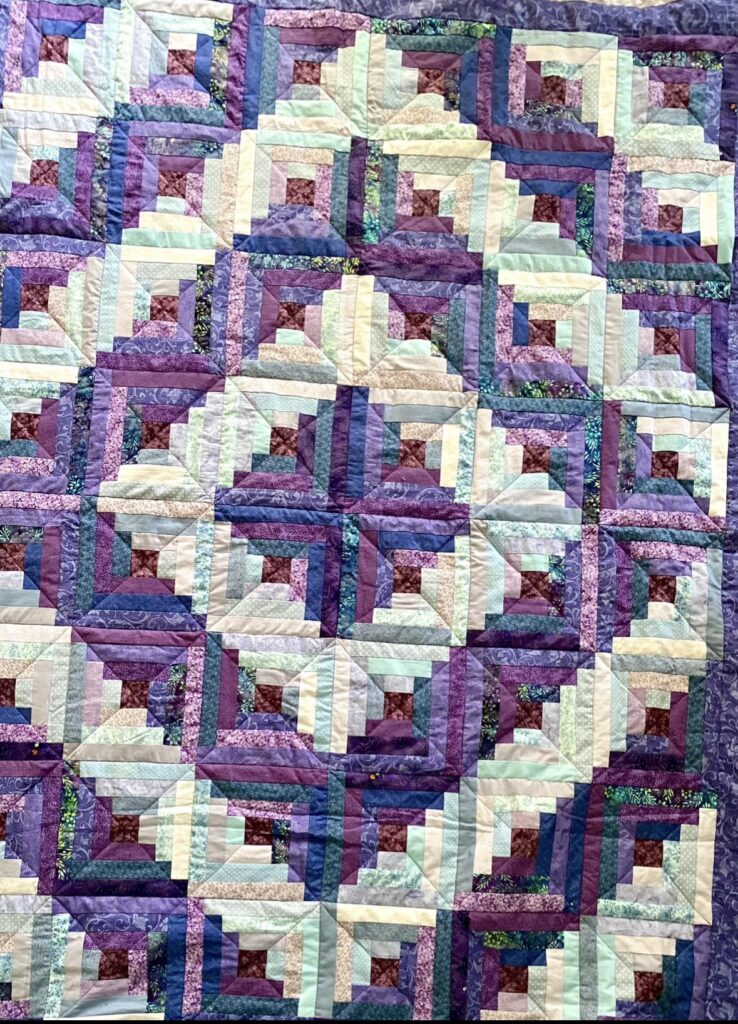
Once you have a stack of blocks, layout is where the magic happens. “Barn Raising” creates concentric diamonds that radiate from the quilt’s center, capitalizing on light/dark contrast. With a Log Cabin Quilt Free Pattern, simply rotate blocks to position the light halves together and the dark halves together, forming dramatic shapes.
“Fields & Furrows” alternates rows of diagonal light/dark, producing a zigzag that looks intricate but is easy to assemble. Your Log Cabin Quilt Free Pattern uses the same blocks; orientation does all the work. This layout is excellent for showcasing gradients from pale to deep tones.
“Streak of Lightning” leans into diagonal energy, perfect for modern color stories. Group lights along one diagonal and darks along the other to let the eye travel. Again, the Log Cabin Quilt Free Pattern doesn’t change—just the block rotation.
Basting comes first: tape your backing wrong side up, smooth out batting, and center the top. Use pins or spray to secure layers every 4–6 inches. A Log Cabin Quilt Free Pattern with narrow logs benefits from close basting to prevent shifting during quilting.
Straight-line quilting is a natural partner. Stitch in the ditch along the log seams or echo the block outlines at a fixed distance. This respects the geometry and is beginner-friendly. When following a Log Cabin Quilt Free Pattern, simple quilting emphasizes value contrast and keeps the quilt supple.
Walking-foot grids add texture. Quilt vertical and horizontal lines across the whole top at regular intervals—say every 1½” or 2″. The result is clean and modern, and your Log Cabin Quilt Free Pattern remains the star.
What size should I cut my strips for a beginner-friendly Log Cabin?
Most beginners succeed with 2½” cut strips, which finish at 2″ in the block. This width is forgiving and works beautifully with a Log Cabin Quilt Free Pattern aimed at first-time quilters.
How many blocks do I need for a throw-size quilt?
For a 54″ × 72″ throw using 12″ finished blocks, you’ll need 30 blocks (5 across by 6 down). Your Log Cabin Quilt Free Pattern can scale up or down with block size or layout.
Do I have to use a red center square?
No. The tradition symbolizes the hearth, but you can choose any focal color. Pick a hue that contrasts with your light and dark logs so the Log Cabin Quilt Free Pattern reads clearly.
How do I keep my blocks from warping?
Use a true quarter-inch seam, press rather than iron (lift and set), and avoid stretching bias edges. Squaring up after each round keeps the Log Cabin Quilt Free Pattern accurate.
What batting should I choose?
Cotton or cotton-blend battings are easy to quilt and drape nicely. If you want extra loft, try polyester. Whatever you pick, your Log Cabin Quilt Free Pattern will quilt well with simple lines.
Can I make it scrappy without it looking chaotic?
Yes—control value more than color. Keep lights clearly lighter than darks, and your Log Cabin Quilt Free Pattern will maintain definition even with many prints.
Is chain piecing necessary?
Not required, but it speeds up production and improves consistency across blocks. A Log Cabin Quilt Free Pattern with repeated logs is ideal for chain piecing.
How do I choose a layout?
Arrange blocks on a design wall or floor and photograph different orientations—Barn Raising, Fields & Furrows, or Streak of Lightning. The same Log Cabin Quilt Free Pattern yields dramatically different looks based on rotation.
Should I prewash fabrics?
It’s optional; just be consistent. Prewash everything or nothing to keep shrinkage uniform. Crisp, starched strips can make your Log Cabin Quilt Free Pattern easier to piece.
What quilting design is best for beginners?
Straight-line quilting with a walking foot is beginner-friendly and complements the geometry. It lets the Log Cabin Quilt Free Pattern shine without complicated techniques.
In this guide, you learned how a Log Cabin Quilt Free Pattern transforms simple fabric strips into a striking, heirloom-ready quilt.
We covered choosing sizes and yardage, cutting and pressing for accuracy, building blocks step by step, exploring multiple layout options, and finishing with quilting and binding that enhance the design.


