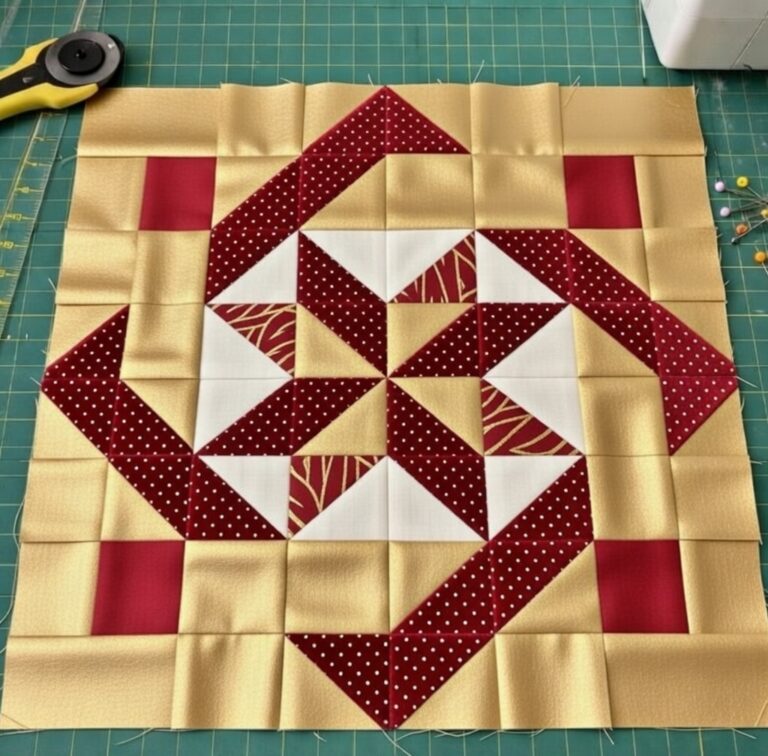
Patchwork Square Design Block Pattern

How to Use the 60º Diamond Ruler to Make a Table Topper is an essential skill for quilters who want to create striking, precise, and professional-looking table toppers.
The 60º diamond ruler simplifies cutting fabric into diamond shapes, which are the building blocks for intricate geometric designs.
Using this tool correctly ensures that your pieces fit together seamlessly, creating a polished finished project. Whether you are a beginner or an experienced quilter, mastering the 60º diamond ruler opens up a world of possibilities for decorative and functional tabletop designs.
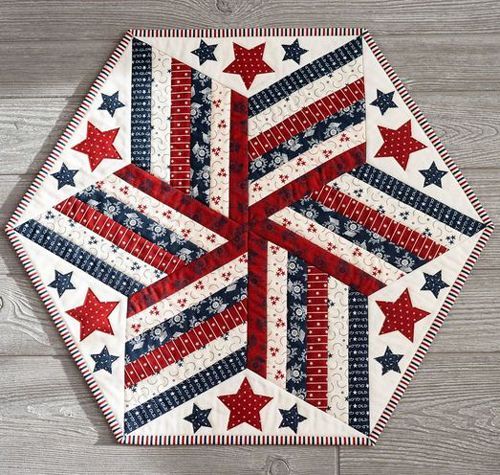
Using a 60º diamond ruler to make a table topper allows quilters to experiment with patterns such as stars, hexagons, or diamonds that interlock beautifully.
This ruler helps maintain accuracy, preventing wasted fabric and uneven seams. With the right fabric choices, color placement, and careful cutting, your table topper can become a centerpiece for any room, showcasing your creativity and quilting skill.
Beyond aesthetics, a 60º diamond ruler table topper project teaches essential quilting techniques such as chain piecing, precise seam allowances, and block alignment. Learning to cut and piece accurately enhances overall quilting proficiency, preparing you for more advanced projects. A well-made table topper not only beautifies your home but also demonstrates craftsmanship that can be shared as a gift or sold in craft markets.
When preparing to use the 60º diamond ruler to make a table topper, gather the necessary materials. You will need high-quality quilting fabric in your chosen color palette. Typically, cotton fabrics work best because they are stable and easy to cut precisely.
Other essential tools include a rotary cutter, self-healing cutting mat, and the 60º diamond ruler itself. A quilting ruler with clear markings ensures accuracy when aligning and cutting your diamond shapes. Using a sharp rotary cutter improves precision and reduces fraying.
Thread and sewing machine are required for piecing the diamonds together. Choose thread colors that blend well with your fabrics, typically matching the dominant color of each section. Pins or clips are useful to secure fabric layers before sewing.
Optional materials include a pressing mat and iron. Pressing seams as you sew ensures that your pieces lie flat and fit together perfectly. Spray starch can also help maintain fabric stability, especially when working with delicate prints or lightweight fabrics.
Finally, have a clear workspace with ample lighting. Cutting, piecing, and assembling a table topper requires attention to detail, and a well-lit, organized area makes the process smoother and more enjoyable.
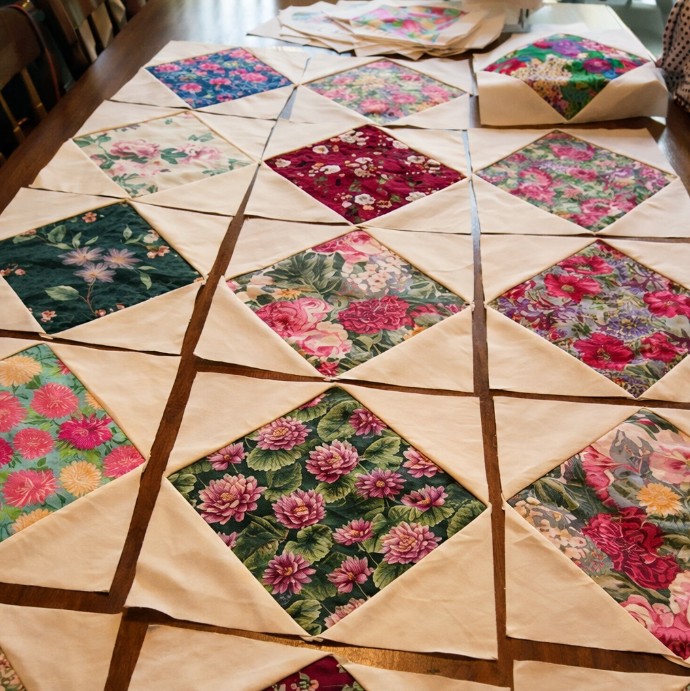
Start your project by selecting the fabric and planning the design. Sketching your layout on graph paper helps visualize color placement and diamond orientation. This preparation ensures a cohesive and balanced table topper.
Next, place the fabric on your cutting mat and align the 60º diamond ruler. Ensure that the ruler’s angles match the desired cut lines. Use a rotary cutter to cut the diamonds accurately, maintaining consistent seam allowances, typically ¼ inch.
After cutting, arrange the diamonds according to your design. Pay attention to color patterns, gradients, and symmetry. This step allows you to preview the finished look and make adjustments before sewing.
Sew diamonds together in rows or strips, depending on your table topper pattern. Chain piecing is an efficient method for sewing multiple diamonds quickly. Press each seam as you complete rows to maintain flat, precise blocks.
Assemble the rows to complete the tabletop shape. Trim edges if necessary to ensure straight sides and even corners. Adding borders or sashing can enhance the design and frame your pattern beautifully.
Finally, quilt your table topper using your preferred method, such as straight-line quilting, free-motion quilting, or hand quilting. Finish the edges with binding to create a polished, professional-looking project ready to display.
Using a 60º diamond ruler for a table topper allows for endless creative variations. You can experiment with different fabrics, colors, and patterns, such as ombre effects, scrappy designs, or bold geometric contrasts.
Consider combining multiple diamond shapes to form larger patterns like stars, flowers, or abstract designs. Mixing solid fabrics with prints adds visual interest and depth to your table topper.
Adjusting diamond sizes is another way to vary your project. Smaller diamonds create intricate designs, while larger diamonds speed up the project and make bold statements. Mixing sizes can create dynamic, eye-catching layouts.
Borders and finishing touches can further enhance your table topper. Add scalloped edges, piping, or layered trims for extra sophistication and a custom look. These details help your table topper stand out as a centerpiece in any room.
You can also create seasonal table toppers using thematic fabrics. Holiday patterns, floral prints, or color-coordinated schemes allow your diamond table topper to complement seasonal décor.
Finally, gifting or selling your table topper is a creative option. Handmade diamond table toppers showcase precision, skill, and artistry, making them valuable both as personal treasures and as unique presents.
Beginners using a 60º diamond ruler to make a table topper should start with simple designs and solid colors. This helps focus on mastering accurate cutting and piecing without being distracted by complex patterns.
Practice aligning the ruler before cutting. Proper placement ensures consistent diamonds, which is crucial for clean seams and balanced layouts. Always double-check measurements before cutting to avoid mistakes.
Maintaining consistent seam allowances is essential. A ¼-inch seam is standard and allows diamonds to fit together precisely. Using clips or pins while sewing can help beginners keep pieces aligned.
Press seams carefully after each row. Flat seams reduce bulk and make assembling rows easier. Consider pressing seams to one side or open depending on your preference and the overall thickness of the table topper.
Start with a small table topper or wall hanging before attempting larger projects. This approach builds confidence and provides practice in handling multiple pieces and assembling geometric designs.
Finally, patience and attention to detail are key. A 60º diamond ruler table topper project can be time-consuming, but precise cutting, careful sewing, and thoughtful design result in a stunning finished product.
What is a 60º diamond ruler?
A 60º diamond ruler is a quilting tool used to cut diamond-shaped pieces accurately, perfect for geometric designs and intricate patterns.
Can beginners use a 60º diamond ruler?
Yes, beginners can use it with practice. Starting with simple designs and solid colors helps build confidence.
What fabrics work best?
Quilting cotton is ideal for accuracy and stability. Lightweight fabrics may need starch for easier handling.
Do I need a sewing machine?
While hand sewing is possible, a sewing machine speeds up the process and ensures consistent seams.
Can I make different sizes of diamonds?
Yes, rulers often have multiple measurements, allowing you to cut diamonds in various sizes for creative layouts.
Are 60º diamond ruler projects suitable as gifts?
Absolutely. Handmade table toppers are thoughtful, decorative, and highly appreciated gifts.
From selecting fabrics to precise cutting, assembling diamonds, and finishing with quilting and binding, each step enhances skill and creativity.
This project allows quilters to produce visually stunning table toppers that become centerpieces in any home. Beginners and advanced crafters alike can enjoy the satisfaction of creating geometric designs with precision and flair.
Share your experiences, suggestions, and finished projects to inspire others and explore the endless potential of your quilting artistry.

