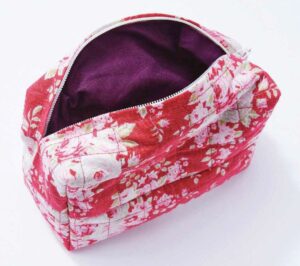
Learning how to sew a quilted makeup bag is a fun and rewarding project, especially for beginners who want to create something both practical and stylish. Whether you are looking for a way to organize your cosmetics or craft a personalized gift, a quilted makeup bag is a perfect solution. With just a few materials and some basic sewing skills, you can make a beautiful bag that reflects your personal taste.
Sewing your own quilted makeup bag allows you to customize the size, fabric, and design, giving you total creative control. You can choose bright colors, floral prints, or even upcycled fabrics from old clothes or leftover quilting scraps. This makes the project eco-friendly and budget-friendly, all while being a great way to practice quilting and sewing techniques.
This step-by-step guide will show you how to sew a quilted makeup bag from start to finish. Whether you’re new to sewing or just want a quick refresher, this tutorial is designed to be clear and easy to follow. Let’s dive into the process and create a unique accessory you’ll love using every day.

Before starting, it’s important to collect all the materials and tools you’ll need. Having everything ready will make the process smoother and more enjoyable.
To sew a quilted makeup bag, you’ll need cotton fabric for the outer layer and lining. Choose a quilting cotton that is soft but sturdy. For a padded feel, include quilt batting or fusible fleece between the layers.
You’ll also need a zipper, preferably one that matches or complements your fabric. An 8 to 10-inch zipper works well for a medium-sized bag, but feel free to adjust based on your desired size.
Other essential tools include sewing thread, scissors or rotary cutter, pins or clips, a sewing machine, and an iron. A quilting ruler and cutting mat are optional but helpful for precision.
Make sure to prewash your fabric before cutting. This prevents shrinkage and ensures that the fabric will not bleed colors after the makeup bag is finished and washed.
Lastly, keep a small notebook nearby to jot down measurements or design ideas. Staying organized can help you stay on track and avoid mistakes as you follow each step on how to sew a quilted makeup bag.
Now that you have all your materials, it’s time to prepare the fabric for quilting and assembly.
Start by cutting two rectangles for the outer fabric, two for the lining, and two pieces of batting or fusible fleece. A good standard size is 9×6 inches, but you can adjust the dimensions to fit your needs.
Layer each quilt sandwich by placing the outer fabric right side up, then the batting, and then the outer fabric again, right side down. Pin the layers together to keep them secure while sewing.
If you’re using fusible fleece, iron it onto the wrong side of your outer fabric following the manufacturer’s instructions. This adds structure and a soft feel to your makeup bag.
Use a fabric marker or chalk to draw diagonal lines across your quilt sandwich. These will guide your quilting stitches and keep your design neat and consistent.
Next, sew along the lines with a straight stitch. This creates the classic quilted look and strengthens the fabric. Don’t rush this step—take your time to ensure clean, even lines.
Once quilted, trim the edges to ensure all layers are even. You’re now ready to start assembling your quilted makeup bag.

With your quilted panels ready, it’s time to put the bag together and add the zipper.
Start by placing one quilted panel right side up. Align the zipper along the top edge, also facing right side down. Then place one lining piece on top, facing down. Clip or pin the layers together.
Using a zipper foot on your sewing machine, sew along the edge to attach the zipper. Repeat this step with the other quilted panel and lining on the opposite side of the zipper.
Once both sides are sewn, open the fabric layers and press them flat with an iron. Then, topstitch along each side of the zipper for a neat, professional finish.
Now unzip the zipper halfway—this is important for turning the bag later. Fold the bag so the outer fabrics face each other and the linings face each other. Clip or pin around the edges.
Sew around the entire edge, leaving a 2–3 inch opening at the bottom of the lining. Backstitch at the beginning and end to secure the seams.
Turn the bag right side out through the opening in the lining, then push out the corners gently with a chopstick or pen. Once fully turned, sew the opening in the lining closed with a small topstitch.
Your bag is almost complete, but a few final touches can make it truly special.
Start by pressing the bag with an iron to smooth out any wrinkles and help it hold its shape. Make sure the zipper works smoothly and that all seams are strong and clean.
Consider adding a fabric tag or a ribbon loop on the side seam. This adds a professional touch and makes the bag easier to grab from a larger tote or drawer.
You can also quilt additional designs on the outside if you like. Try free-motion quilting or hand-stitching decorative patterns for a unique look.
Want to make your quilted makeup bag more versatile? Adjust the size and shape to create a pencil case, small clutch, or travel pouch. The same steps apply, just with different measurements.
Personalize your bag by using themed fabrics—florals, animals, or even monogram prints. This makes your makeup bag a perfect handmade gift for friends and family.
Finally, always wash your quilted items with care. Use a gentle cycle and lay flat to dry to maintain the shape and softness of your beautifully sewn bag.
What is the best fabric to use for a quilted makeup bag?
Cotton quilting fabric is ideal due to its durability, ease of sewing, and variety of patterns. It’s also soft and works well with batting.
Can I sew a quilted makeup bag by hand?
Yes, you can hand-sew it, especially the quilting stitches, but using a sewing machine will save time and produce more even results.
How do I make the bag waterproof?
Use a waterproof lining like vinyl or oilcloth, or add a layer of fusible vinyl to your inner fabric. This will protect the contents from spills.
Is batting necessary for a quilted makeup bag?
Batting adds structure and padding, making the bag more protective. It’s not strictly necessary, but highly recommended for a quilted effect.
What size zipper should I use?
An 8- to 10-inch zipper works for a medium bag. You can trim longer zippers to size or adjust the fabric dimensions to fit the zipper you have.
Can I add pockets to the makeup bag?
Absolutely! Add an inner or outer pocket by sewing a small fabric piece onto the lining or outer panel before final assembly.
Now you know exactly how to sew a quilted makeup bag, from gathering materials to adding the final personal touches. This DIY project is not only enjoyable but also incredibly practical. With just a few sewing basics, you can create a custom makeup bag that showcases your personality and skills.