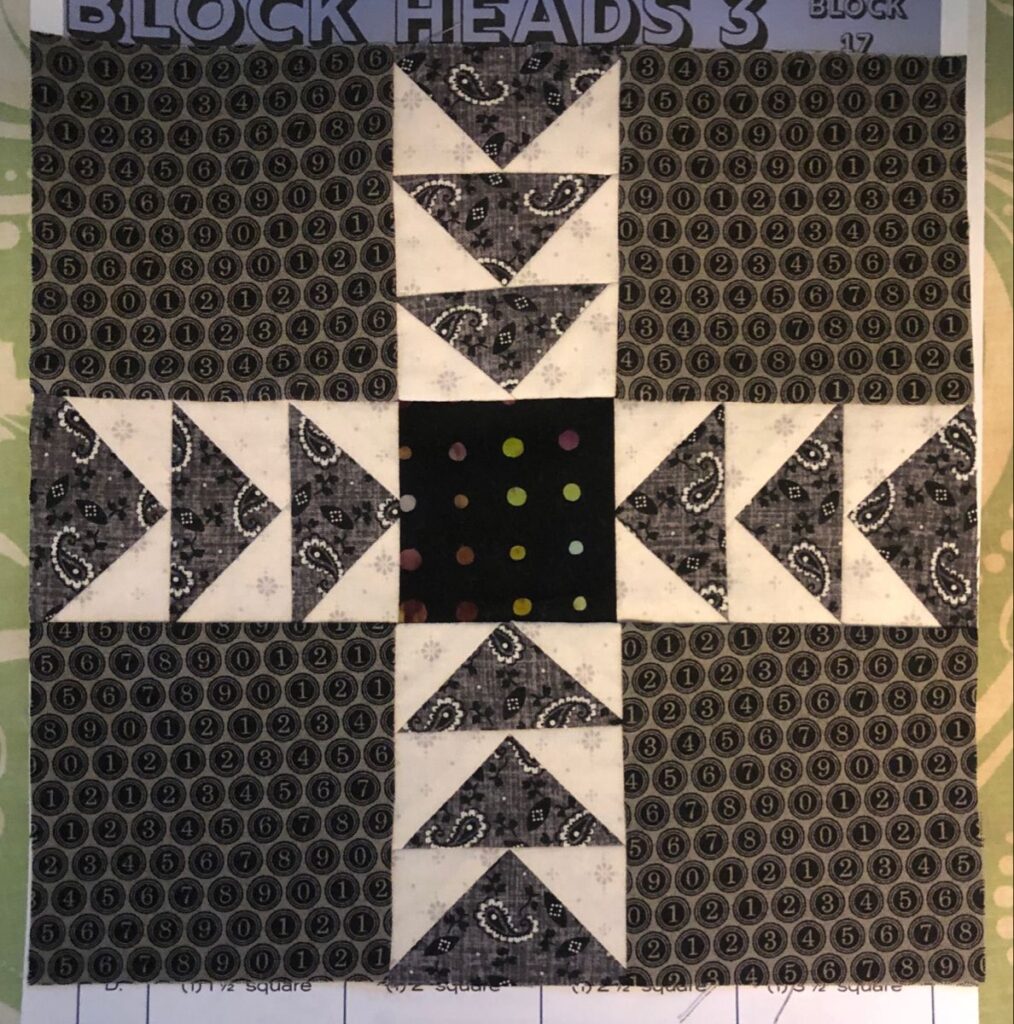
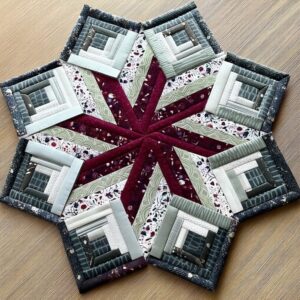
Patchwork Square Design Block Pattern

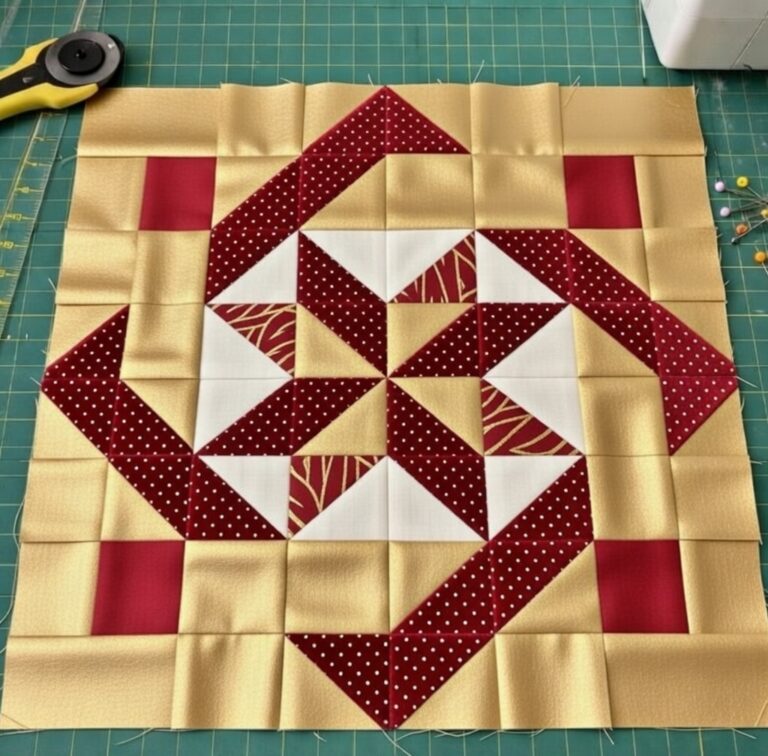
The Crossroads Block Free Pattern is a timeless and versatile quilt design that beautifully blends tradition with modern creativity. Known for its striking geometric layout and symbolic meaning, the Crossroads Block represents connection, balance, and decision-making—a meeting point of paths.
The Crossroads Block Free Pattern is ideal for quilters who love structured, symmetrical patterns that allow for endless color play and design variations. Whether you’re crafting a full-size quilt, a wall hanging, or a smaller decorative project, this block brings elegance and harmony to your work.
What makes the Crossroads Block Free Pattern so appealing is its adaptability. It can be made using bold, contrasting fabrics for a dramatic look or soft, tonal shades for a subtle and classic appearance.
The block often features intersecting lines and squares, creating a stunning illusion of movement and depth. Beginners appreciate its straightforward piecing process, while advanced quilters enjoy experimenting with layout arrangements, making it suitable for every skill level.
Beyond its beauty, the Crossroads Block holds meaningful symbolism. Historically, crossroads represent choices and new beginnings, making this quilt block a thoughtful gift for milestones such as graduations, weddings, or housewarmings. By learning and mastering the Crossroads Block Free Pattern, you not only develop essential quilting skills but also create a piece that carries a deeper story—a union of creativity, craftsmanship, and purpose.
Selecting the right fabrics for your Crossroads Block Free Pattern is the foundation of creating a quilt that truly stands out. This block thrives on color contrast, so consider pairing light and dark tones to highlight the intersecting lines and geometric balance. Solid colors help emphasize clean lines, while patterned fabrics can add depth and texture to your design.
If you want a traditional look, use classic color combinations such as red and white, blue and cream, or black and tan. For a modern twist, try using bright, bold colors like teal, mustard, or coral paired with crisp whites or grays. The Crossroads Block Free Pattern is especially striking when each section is made with complementary colors that enhance the symmetry of the design.
When choosing fabrics, think about the mood you want to convey. Muted neutrals can create a calm and elegant quilt, while vibrant prints bring energy and playfulness. You can also use fabric collections that share similar tones for a cohesive look or go completely scrappy by using leftover fabric pieces for a charming, eclectic finish.
Consider the fabric texture as well. Cotton quilting fabric is the most common choice because it’s easy to sew, press, and cut accurately. However, you can experiment with linen blends or textured cottons for a tactile variation that adds visual interest. Before cutting, always prewash your fabrics to prevent shrinkage and color bleeding.
For beginners, using a limited color palette (two to three main colors) makes it easier to visualize the design while still maintaining contrast. More advanced quilters may enjoy fussy cutting—strategically cutting fabric prints to highlight specific motifs within the Crossroads Block Free Pattern, adding a layer of artistry to the finished piece.
To make the Crossroads Block Free Pattern, start by cutting your fabric pieces accurately. Precise cutting is key to ensuring your block comes together smoothly. Each block typically consists of a combination of squares and rectangles arranged to form intersecting lines, giving it that signature crossroads appearance.
Step 1: Cutting the Fabric
Cut equal-sized squares and rectangles according to your desired block size. A common size is 12½ inches unfinished (12 inches finished), but you can easily scale it up or down. Label your pieces with sticky notes or clips to keep them organized before sewing.
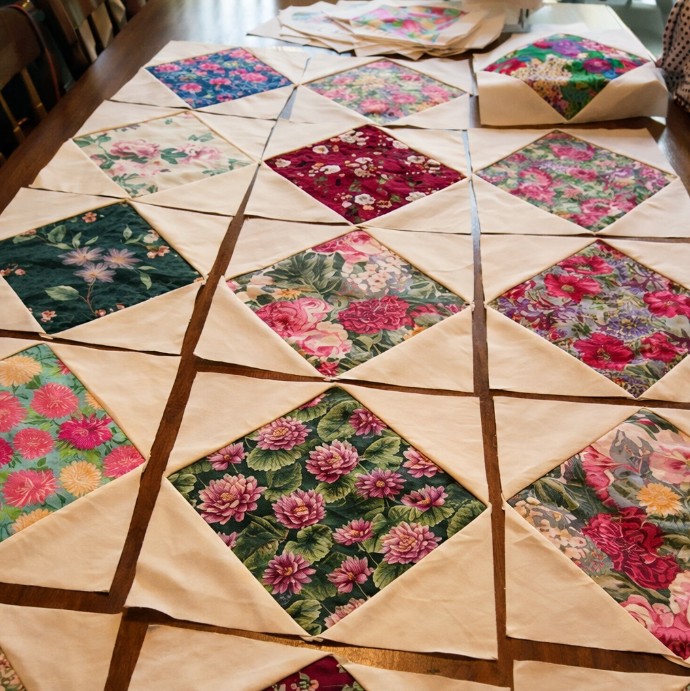
Step 2: Arranging the Layout
Lay out all your cut pieces on a flat surface or design board. The central square acts as the meeting point, surrounded by rectangles and smaller squares that form the crossroads. This step helps you visualize how the colors interact and ensures balance before you begin stitching.
Step 3: Sewing the Rows
Start by sewing the smaller squares and rectangles together into rows using a ¼-inch seam allowance. Press each seam carefully—pressing toward the darker fabric helps prevent shadows from showing through lighter fabrics. Accurate pressing ensures your block lies flat and fits together neatly.
Step 4: Joining the Rows
Once your rows are complete, join them to form the full block. Pin at each intersection point to keep your seams perfectly aligned. This is crucial for maintaining the crisp, geometric look that defines the Crossroads Block Free Pattern.
Step 5: Pressing and Trimming
After assembling the full block, give it a final press. Trim any uneven edges to ensure the block measures correctly. A clean, square block makes assembling the rest of your quilt top much easier.
Step 6: Repeating and Combining Blocks
Repeat these steps to create as many Crossroads Blocks as needed for your project. When you arrange multiple blocks together, you’ll notice how the lines connect, forming intricate patterns across the quilt top—a hallmark of this design’s beauty.
One of the most exciting aspects of the Crossroads Block Free Pattern is how adaptable it is. Small changes in color placement or layout can completely transform the overall look of your quilt. For example, rotating every other block by 90 degrees creates a dynamic grid effect, while using gradient colors results in a smooth, flowing transition across the quilt.
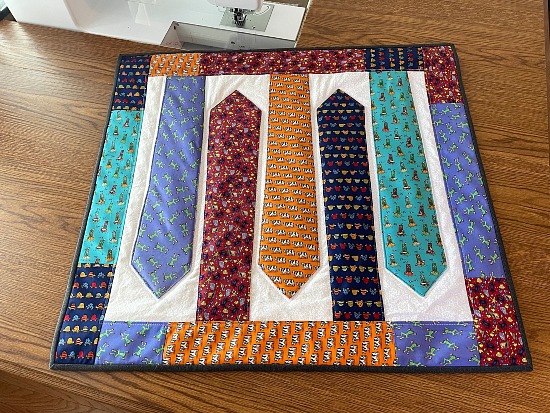
You can also use the Crossroads Block as part of other quilting projects, such as table runners, cushion covers, or wall hangings. When used in smaller items, the block serves as a bold centerpiece that draws the eye. Combine it with simpler blocks like nine-patches or half-square triangles for a mixed design full of texture and movement.
For a minimalist aesthetic, use monochrome fabrics—different shades of the same color family—to emphasize the geometric structure. Alternatively, for a playful, modern vibe, mix bright solids with patterned prints. Adding sashing between blocks or alternating background fabrics can also enhance the sense of depth and rhythm.
If you enjoy storytelling through quilting, consider using the Crossroads Block Free Pattern as a symbolic design element. It can represent a new journey, a pivotal life decision, or the blending of two paths—perfect for commemorating personal milestones.
For advanced quilters, experimenting with scale can yield stunning results. Try creating oversized Crossroads Blocks for a bold statement quilt, or miniaturize them for intricate patchwork. With every variation, the essence of the Crossroads Block—balance and connection—remains beautifully intact.
To achieve flawless results with your Crossroads Block Free Pattern, precision is everything. Start by ensuring all your fabric pieces are cut accurately and consistently. Even a small variation can affect how your seams align later on. Using a rotary cutter, ruler, and self-healing mat will help maintain clean, sharp edges.
When piecing, always use a ¼-inch seam allowance and keep it consistent. Many quilters use a ¼-inch presser foot to make this easier. Pressing seams carefully after every step also contributes to professional-looking results. Remember: press, don’t iron—sliding the iron back and forth can stretch or distort your fabric.
Chain piecing (sewing multiple units in sequence without cutting the thread) can save time and keep your workflow organized. It’s especially helpful when making multiple Crossroads Blocks for a large quilt.
Be mindful of fabric direction, especially if using prints with strong patterns or directional motifs. Align them thoughtfully so the overall design flows naturally. If you’re new to quilting, consider making a test block first to check your measurements and fabric combination before committing to the full project.
Finally, don’t rush the process. Take time to enjoy the artistry and rhythm of sewing. Each Crossroads Block is an opportunity to refine your skills and express your creativity, one seam at a time.
1. Is the Crossroads Block Free Pattern beginner-friendly?
Yes! This pattern is great for beginners who want to practice cutting, piecing, and seam alignment while creating a visually stunning result.
2. What size should I make my Crossroads Block?
A 12-inch finished block is standard, but you can resize it by adjusting your fabric measurements. Larger blocks are perfect for quilts, while smaller ones suit wall hangings or cushions.
3. What fabrics work best for this block?
100% cotton quilting fabrics are ideal because they’re easy to handle and press well. Mix solids and prints for added dimension.
4. Can I make a quilt using only Crossroads Blocks?
Absolutely! When multiple blocks are joined, they form beautiful secondary patterns that make a quilt visually rich and cohesive.
5. How do I keep my seams aligned?
Use pins at each intersection and press your seams flat after sewing. Accurate cutting and consistent seam allowances also ensure perfect alignment.
6. Can I use scraps for this pattern?
Yes, the Crossroads Block Free Pattern is perfect for scrap quilting! Mixing leftover fabrics adds personality and charm to your finished piece.
The Crossroads Block Free Pattern is more than just a quilt design—it’s a creative expression of balance, direction, and artistry. With its clean lines, symbolic meaning, and endless design potential, this block has become a beloved favorite among quilters worldwide. Whether you’re making a simple wall piece or a large heirloom quilt, the Crossroads Block offers a perfect blend of tradition and innovation. Take your time, enjoy the process, and let each block reflect your unique vision. Try it today, share your experience, and leave your honest opinion and suggestions—your creativity helps keep the quilting tradition alive and thriving!


