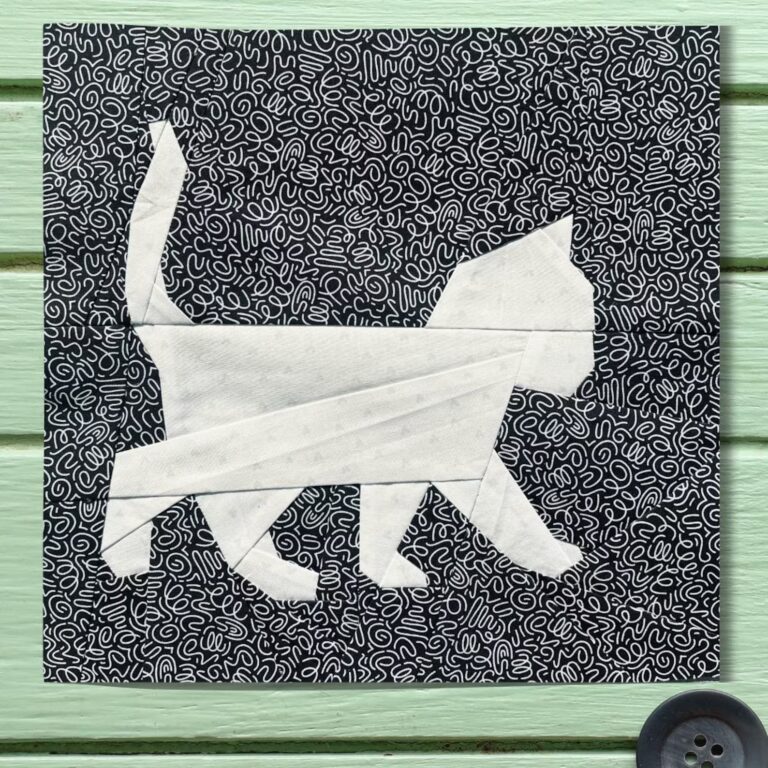
Kitten Quilt Block Pattern

The Arrowhead Quilt Block is a classic quilting pattern known for its sharp lines, dynamic shapes, and versatile design. From beginners to seasoned quilters, this block has captured the hearts of many for its elegance and adaptability. Whether you’re looking to craft a vibrant quilt or add an eye-catching accent to a larger project, the Arrowhead block is an ideal choice.
One of the most appealing aspects of the Arrowhead Quilt Block is how it brings motion and depth to your quilting work. Its pointed, arrow-like shape creates a sense of direction and energy, making it a powerful centerpiece or supporting element in a larger quilt design. With endless color and layout variations, this block lets your creativity shine.
In this comprehensive guide, you’ll learn everything you need to know about the Arrowhead Quilt Block—from its history and structure to step-by-step tips for creating one. We’ll also explore design ideas, troubleshooting tips, and ways to use this block in your own unique quilting projects. Let’s dive into the rich world of the Arrowhead Quilt Block and see how it can elevate your quilt-making journey.

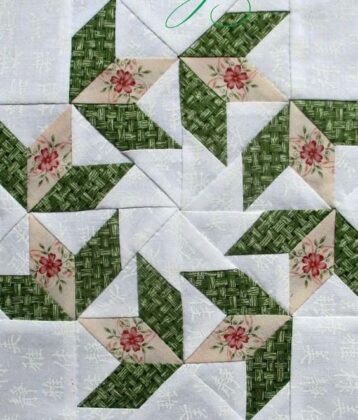
The Arrowhead Quilt Block is a dynamic quilt design formed by diagonal cuts and rearrangements that create the illusion of arrows pointing inward or outward. Its simplicity belies its striking visual impact, which can be customized through color and layout.
This block was popularized by quilt designers who wanted to achieve movement and direction in their quilt tops without using overly complicated patterns. Today, it’s a go-to design for quilters seeking clean lines and geometric appeal.
The Arrowhead Quilt Block typically starts with a square that is sliced diagonally and sewn back together in creative combinations. This method produces a layered look, often mimicking the points of an arrow or spearhead.
Despite its bold look, the block is beginner-friendly. It uses straight-line sewing and simple rotary cutting techniques, making it an excellent project for those who are new to quilting or want a quick yet beautiful block.
When used in repetition, the block can create a range of secondary patterns, from zigzags to chevrons, depending on how the blocks are rotated and combined. This makes it one of the most versatile blocks in any quilter’s toolkit.
By mastering the Arrowhead Quilt Block, you open the door to an array of quilt patterns that are visually striking yet easy to assemble. It’s a foundational skill that pays off in countless creative projects.
Before starting your Arrowhead Quilt Block, gather the right materials and tools to ensure a smooth quilting experience. Having everything prepared makes the process faster and more enjoyable.
You’ll need basic quilting supplies: a rotary cutter, cutting mat, quilting ruler, pins, an iron, and a sewing machine. These tools will help you cut and sew your fabric accurately.
Fabric selection plays a crucial role. Choose high-contrast colors for a bold effect or analogous shades for a more blended, subtle look. Cotton fabric is ideal for quilting due to its ease of handling and durability.
You’ll also need thread that complements or contrasts with your fabric, depending on your desired final look. Neutral colors like white, gray, or beige work well with most fabric palettes.
Pre-washing your fabric is recommended to avoid shrinkage or color bleeding later. Ironing the fabric before cutting ensures cleaner cuts and straighter seams, both essential for sharp blocks.
Lastly, keep a seam ripper nearby—mistakes happen, and it’s easier to fix them with the right tools on hand. With your supplies ready, you’re all set to create a flawless Arrowhead Quilt Block.
Creating an Arrowhead Quilt Block involves a unique but straightforward cutting and rearranging process that delivers eye-catching results. Here’s a simplified guide to help you get started.
Start with two squares of fabric, each measuring 10″ x 10″. Place them right sides together, then sew a quarter-inch seam around all four sides of the square. This initial step creates a secure foundation.
Next, use your rotary cutter and ruler to cut the sewn square diagonally from corner to corner, forming four triangles. Then, cut each triangle again to form smaller units that will make up the final block.
Rearrange the smaller pieces to form the signature arrowhead shape. This is where your creativity comes in—experiment with angles and fabric orientation to find your favorite design layout.
Once you’re satisfied with the arrangement, sew the pieces back together row by row, maintaining a quarter-inch seam allowance. Press each seam flat as you go to keep the block neat.
Square up the finished block by trimming any excess fabric around the edges. Most Arrowhead Quilt Blocks finish at 8″ or 9″, but you can resize them based on your project needs.
Repeat the process to create multiple blocks for a full quilt. The more blocks you make, the more possibilities you unlock for dynamic quilt layouts using the Arrowhead Quilt Block.
The Arrowhead Quilt Block is more than just a single design—it’s a flexible building block that can be used in various quilt styles. Let’s explore the creative potential of this dynamic pattern.
You can rotate the blocks in different directions to create diagonal movement, chevrons, or mirror-image designs. This makes it perfect for modern quilts that emphasize shape and motion.
The block also works well in minimalist designs. Using solid colors and placing blocks with ample negative space around them highlights the shape and structure of each arrowhead.
Add borders or sashing between blocks to make each Arrowhead Quilt Block stand out individually. This technique is great for sampler quilts or memory quilts where each block tells a story.
Another idea is to use the block in smaller projects like quilted pillows, tote bags, or table runners. The compact size and bold design make it perfect for gifts and home decor.
Experiment with color gradients for a stunning effect. Arrange blocks from light to dark to create an ombré look that guides the eye across your quilt.
Finally, combine the Arrowhead Quilt Block with other block types for a unique, eclectic quilt. Its simplicity balances well with more intricate patterns, allowing you to showcase a range of quilting skills.
What size should I cut my fabric for the Arrowhead Quilt Block?
A common starting point is 10″ x 10″ squares, but you can scale up or down depending on the desired block size. Just remember to maintain accurate seam allowances.
Is the Arrowhead Quilt Block suitable for beginners?
Yes! The block involves basic sewing techniques and simple cuts. It’s perfect for those who are new to quilting but want a design that looks advanced.
Can I use scraps to make an Arrowhead Quilt Block?
Absolutely. This block is great for using up fabric scraps. Just be sure the scraps are large enough to cut your starting squares or triangles.
What’s the best fabric to use for this quilt block?
100% cotton is ideal because it’s easy to cut, press, and sew. It also holds its shape well, which is crucial for precise block assembly.
How do I avoid bulky seams in the Arrowhead Quilt Block?
Press seams open or to one side depending on your layout, and trim away any overlapping corners before sewing pieces together.
What quilt styles work best with the Arrowhead Quilt Block?
Modern, geometric, and traditional quilts all benefit from this block. Its versatility makes it a fit for nearly any design approach.
The Arrowhead Quilt Block is a fantastic addition to any quilter’s skillset. Its strong lines, simple construction, and design flexibility make it an ideal choice for both small and large-scale projects. Whether you’re crafting a bold wall hanging, a stylish tote, or a full-size quilt, this block offers endless creative potential.
We’ve covered the basics of what the block is, how to make it, the materials needed, and creative ways to use it. We also addressed common questions to help you succeed in your quilting journey.
If you found this guide helpful, please leave a sincere opinion or suggestion below. Your feedback helps us improve and inspires other quilters just like you. Happy quilting!