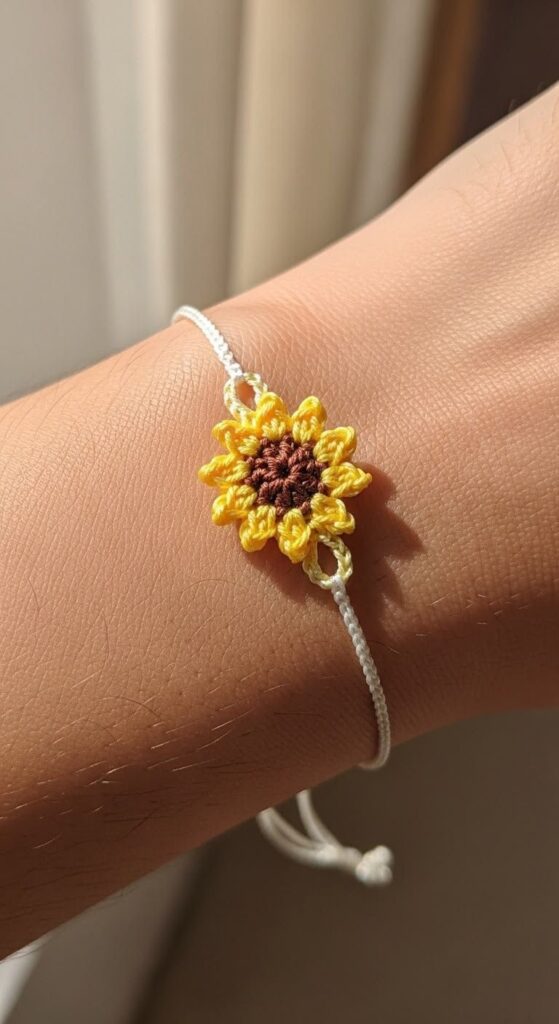
Sunflower Bracelet Pattern

If you are looking for a fun and refreshing project, Crochet a Lemon Mini Bag Free Pattern is the perfect idea to bring sunshine into your crochet journey.
Starting with the basics, this mini bag is designed to be compact yet functional. With the right yarn and hook size, you will see how quickly the lemon shape comes to life.
Another reason this pattern is so appealing is that it offers versatility. You can use it as a coin purse, a mini crossbody, or a decorative pouch to store small items.

When starting your Crochet a Lemon Mini Bag Free Pattern, gathering the right materials is essential. The most important part is choosing the yarn. A soft, medium-weight cotton yarn is ideal because it holds its shape well and highlights the lemon design. Yellow is the main color, but you will also need green for the leaves and possibly white for the interior details. The yarn should not be too thick, as that may make the bag bulky, nor too thin, as it would make it fragile.
In addition to yarn, the hook size is a crucial detail. A 3.5mm or 4mm hook often works well for this type of project, depending on your tension. Always check your gauge by making a small swatch before committing to the entire pattern. This ensures your bag has the proper shape and size. Using stitch markers is also recommended, especially since the lemon bag requires maintaining symmetry when shaping the fruit outline.
You will also need a yarn needle for weaving in ends and sewing the small pieces together. Scissors and a measuring tape should always be within reach during the process. For those who want extra durability, adding a lining fabric inside the mini bag can provide structure and prevent stretching over time. Choosing a soft cotton fabric in a light color will complement the crochet work beautifully.
Preparing your workspace is another step that should not be underestimated. Since this is a small project, it is best to work in a well-lit environment where you can clearly see your stitches and color changes. Organize your yarn, hook, and accessories before starting to avoid interruptions. A tidy workspace helps you stay focused and enjoy the process more.
Before beginning, it is also a good idea to review the main stitches you will be using. The How to Crochet a Lemon Mini Bag: A Step-by-Step Tutorial often includes chains, single crochet, increases, and decreases. These stitches are simple, yet they are the foundation for shaping the lemon and making the bag sturdy. Even beginners can learn these stitches quickly and gain confidence as they progress.
Finally, remember that preparation is not just about materials but also about mindset. Crochet should be relaxing and enjoyable, so approach the project with patience. Mistakes can happen, but they are part of the learning process. Once you are ready, you can move on to creating the base of your lemon bag.
The most exciting part of the Crochet a Lemon Mini Bag Free Pattern is creating the actual lemon shape. You will begin by making a chain and forming an oval base. This foundation is worked in rounds, gradually increasing to give the lemon its characteristic form. It is important to count your stitches carefully at this stage to maintain symmetry and avoid distortions in shape.
As the base grows, you will use increases on both ends of the oval to elongate the body of the lemon. This technique creates the pointed ends that resemble the natural look of the fruit. Working evenly and maintaining a consistent tension will help achieve a clean design. The beauty of this project is that small variations still look charming, so do not worry if your first lemon does not look perfect.
Once the base is wide enough, you will continue working in rounds without increases, which allows the sides of the lemon to rise into a pouch-like form. This step builds the body of the mini bag, making it spacious enough to hold coins, keys, or small items. At this point, you can already visualize the lemon design taking shape.
Next, you will add decreases toward the top to close the form slightly and prepare for the bag opening. The decreases should be gradual, ensuring the top does not look uneven. Stitch markers can be especially helpful here, as they indicate where decreases should happen on each round. By following the How to Crochet a Lemon Mini Bag: A Step-by-Step Tutorial, you will find it easy to complete this step without confusion.
After shaping the body, you can create two identical lemon halves that will later be joined together. This ensures the bag has an even structure and can be assembled neatly. Each half should mirror the other in stitch count and size, so paying attention to detail is essential.
Before moving on, take time to block your lemon pieces if necessary. Blocking helps smooth out the stitches and enhances the final look of the bag. Once you are satisfied with the lemon shape, you can proceed to the details that make this mini bag truly stand out.
A mini bag is not complete without the small details that make it unique. In the case of the Crochet a Lemon Mini Bag Free Pattern, the leaves and optional lining are the perfect finishing touches. To create the leaves, you will use green yarn and simple stitches such as chains and single crochet. These are usually made separately and then sewn onto the lemon shape. Adding leaves makes the bag more realistic and charming.
The assembly stage is where your project comes together. You will join the two lemon halves by sewing or crocheting around the edges. This step must be done carefully to ensure the bag has a smooth outline. Leaving an opening at the top creates the space for your zipper, button, or drawstring closure, depending on your preference.
A zipper is a practical choice because it keeps items secure inside the bag. If you prefer a softer look, a button with a loop closure works nicely as well. For beginners, a simple drawstring made of braided yarn can be the easiest option. Whichever closure you choose, make sure it matches the style and purpose of the bag.
If you want the mini bag to be more durable, adding a lining is highly recommended. Sewing a piece of cotton fabric inside prevents stretching and makes the bag sturdier. Choose a fabric that complements the yellow and green colors of your crochet work. Even if you are not experienced in sewing, a simple hand-stitch can be enough for this step.
At this stage, you can also attach a strap or handle to your bag. Some people prefer a short wristlet strap, while others like a longer crossbody version. By crocheting a simple chain and reinforcing it with rows of single crochet, you can create a sturdy strap that matches the rest of the design.
The final assembly step involves weaving in all yarn ends securely. Trimming them neatly ensures your bag looks professional and clean. Once all details are complete, you will have a beautiful lemon-shaped bag ready to use or gift.
The Crochet a Lemon Mini Bag Free Pattern is already delightful, but you can make it even more special with creative variations. One idea is to experiment with different yarn textures. Using a slightly shiny yarn gives the lemon a glossy effect, while matte cotton creates a natural look. Both options work well, depending on your style.
Another fun variation is changing the size of the lemon. By adjusting your hook size and yarn weight, you can make a larger tote-style lemon bag or a tiny keychain version. This flexibility makes the pattern suitable for all kinds of accessories, from functional bags to playful decorations.
You can also add embellishments like beads or embroidery. For example, stitching small white lines across the lemon body can mimic the texture of citrus fruit. Adding a green tassel or pom-pom to the zipper pull gives the bag extra personality. These details allow you to express your creativity while keeping the main design intact.
If you want to make the project more eco-friendly, consider using recycled yarn or leftover yarn scraps. The lemon mini bag is small enough that it does not require much material, making it a sustainable project. Creating multiple bags in different shades of yellow or even other fruit-inspired colors can be a fun way to reduce waste.
Some crocheters like to make matching accessories along with the bag. For instance, you can crochet a lemon key holder or a mini coin pouch to go with your larger lemon bag. These matching sets make thoughtful handmade gifts that are both practical and charming.
Lastly, do not forget to enjoy the process. Crochet is not just about the final product but also about the joy of creating. By personalizing your lemon mini bag, you turn a simple pattern into something truly unique that reflects your style.
What materials do I need for the Crochet a Lemon Mini Bag Free Pattern?
You will need cotton yarn in yellow and green, a 3.5mm or 4mm crochet hook, a yarn needle, scissors, and optional lining fabric.
Is this pattern beginner-friendly?
Yes, the bag mainly uses chains, single crochet, increases, and decreases, making it suitable for beginners who want to learn shaping.
How long does it take to make the lemon mini bag?
On average, it takes about 4 to 6 hours, depending on your crochet speed and whether you add extra details like lining or straps.
Can I resize the lemon bag?
Absolutely. By changing hook size and yarn thickness, you can create a larger tote or a smaller coin pouch version.
What closure works best for the mini bag?
A zipper is the most secure, but you can also use buttons, snaps, or a simple drawstring closure depending on your preference.
Do I need to add lining to the bag?
Lining is optional but recommended if you want the bag to be more durable and to prevent stretching over time.
From preparing your materials to shaping the lemon and adding details, each step teaches valuable crochet skills. By following the How to Crochet a Lemon Mini Bag: A Step-by-Step Tutorial.
We hope this guide inspires you to start your own lemon mini bag project. If you try this pattern, please leave your sincere opinion and share any suggestions for improvements.


