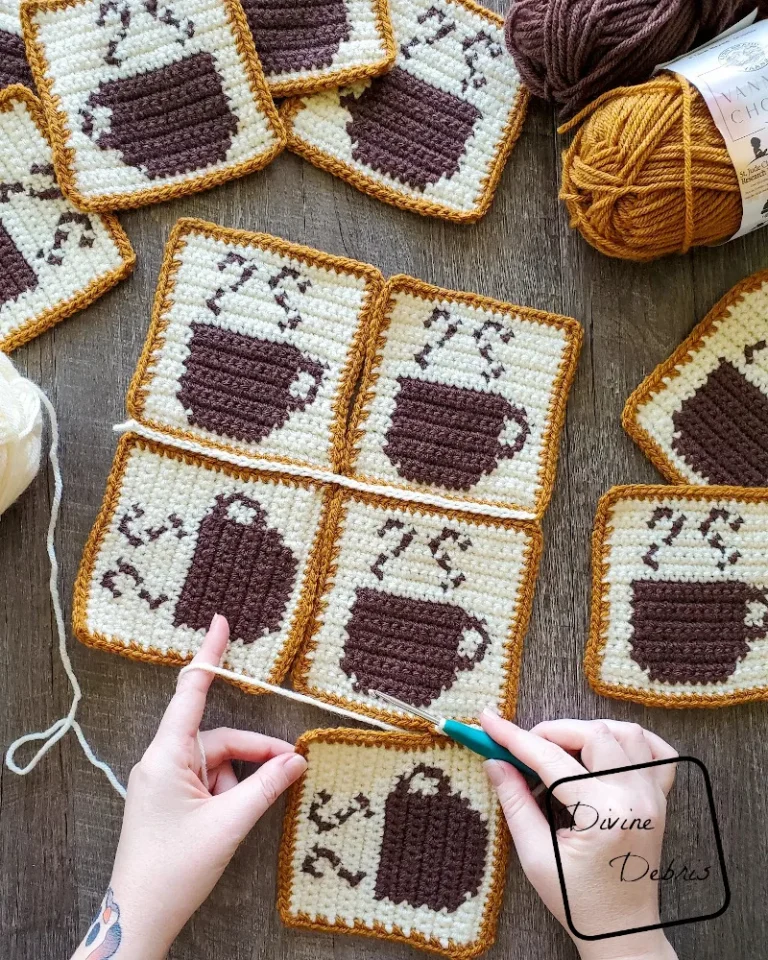
Free Calliope Coffee Bag Crochet Pattern

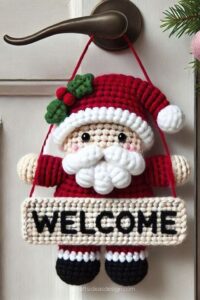
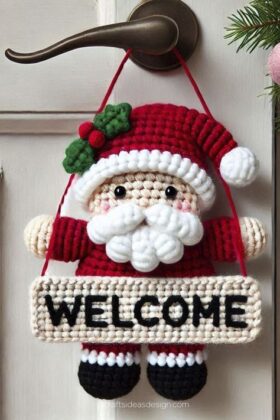
The Crochet Santa Welcome Sign is a delightful and heartwarming addition to any holiday setup. Whether you’re welcoming guests to your home, preparing for a Christmas craft fair, or simply enjoying the joy of crocheting, this project offers the perfect blend of creativity and festivity. This charming sign features the iconic figure of Santa Claus, adorned with cheerful colors and cozy textures that only crochet can offer.
Creating your own Crochet Santa Welcome Sign is not only a fun project but also a great way to personalize your holiday decorations. From the fluffy white beard to the twinkling eyes and jolly red suit, every stitch brings Santa to life in a whimsical and welcoming way. It’s a great handmade piece that can be displayed on your front door, wall, or even gifted to a loved one.
In this article, we’ll dive into everything you need to know about making your own Crochet Santa Welcome Sign. We’ll walk you through the tools and techniques, provide tips for customization, and explain how this project aligns with traditional crochet skills. Let’s get started and bring a little extra magic into your holiday season with this festive craft.
The first step in creating a Crochet Santa Welcome Sign is gathering the appropriate materials. The success of your project depends largely on using high-quality yarn and the correct tools.
For the best results, choose a worsted-weight yarn in classic Christmas colors like red, white, black, and green. Acrylic yarn is a popular option due to its affordability, durability, and wide color range.
You’ll also need a crochet hook suitable for your chosen yarn weight—typically a 4.0 mm (G) or 5.0 mm (H) hook. Make sure your hook is comfortable for long use, as this project involves detailed stitching.
To bring Santa to life, you’ll want to use polyfill for stuffing (for 3D parts like his nose or hat), plastic safety eyes or embroidery thread for his features, and a wooden or foam board to mount the sign.
Don’t forget embellishments! Small bells, buttons, or mini pom-poms can add delightful details to Santa’s outfit and make your Crochet Santa Welcome Sign truly unique.
A hot glue gun or crafting adhesive will also be helpful when assembling and mounting your finished pieces onto the base.
One of the joys of making a Crochet Santa Welcome Sign is assembling Santa’s adorable face and accessories. Each element adds personality and festive charm to your sign.
Start with the head and face. Use beige or peach yarn to create an oval or circle shape for the face. The beard and mustache can be made with fluffy white yarn in loop or bobble stitch for extra texture.
The Santa hat is a signature feature. Crochet it in red with a white trim, adding a soft pom-pom on the tip. The hat can be made separately and sewn on or crocheted directly onto the headpiece.
Next, crochet small black eyes or attach safety eyes. Embroider a gentle smile using black thread and add rosy cheeks using pink yarn or fabric paint for a cheerful look.
For the body, create a simple red coat with black trim. Add a small gold or yellow buckle to represent Santa’s belt. Keep the body lightweight so it can hang easily.
Finally, crochet letters or use felt cutouts to spell “WELCOME” under Santa. Attach them to the bottom of the sign for a complete festive greeting.
Customizing your Crochet Santa Welcome Sign lets you tailor it to your unique style and home décor. Whether you want something traditional or a bit more whimsical, small changes can make a big impact.
Change the color scheme to match your existing holiday decorations. Consider using gold and white for a more elegant Santa, or bright greens and blues for a playful look.
If you want a rustic vibe, use jute twine for the hanging string and mount your crochet work on a wooden plaque. You can even distress the wood for an antique effect.
Incorporate different textures by using specialty yarns like boucle or chenille for the beard and hat trim. These yarns add softness and dimension.
Add personal touches like the family name stitched beneath “Welcome” or tiny crocheted gifts or ornaments around Santa to enhance the holiday scene.
Try including lights! Battery-powered fairy lights can be woven behind or around the crochet for a glowing, magical effect.
If you’re gifting the sign, include a tag or label with the year and a short message for a lasting keepsake that your loved one will treasure.
Once your Crochet Santa Welcome Sign is complete, it’s time to show it off! Where and how you display it can make a big difference in your holiday presentation.
Hang it on your front door using a hook or suction cup. Make sure it’s under a covered area to protect it from the weather if it’s not made with outdoor-safe materials.
Display it on a fireplace mantel with garlands and candles for a cozy, indoor setup. You can even position it on a wall near the Christmas tree for extra festive spirit.
Use a small easel stand to showcase your sign on a side table or buffet. It becomes a charming centerpiece during family dinners or holiday parties.
In a classroom or office, it adds seasonal cheer to a workspace and can be a fun conversation starter or morale booster.
After the season, gently dust your sign and place it in a plastic storage bin. Wrap it in tissue paper to protect delicate features and keep it away from heat or moisture.
Label the storage container clearly so you can find your Crochet Santa Welcome Sign easily next year and keep it in perfect condition for future holidays.
Q: Is this project suitable for beginners?
A: Yes, the Crochet Santa Welcome Sign can be adapted for various skill levels. Beginners can use simpler patterns, while advanced crocheters can add intricate details.
Q: How long does it take to make the sign?
A: Depending on complexity, it usually takes 6–10 hours spread over a few days. Simpler versions may take less time.
Q: Can I use leftover yarn for this project?
A: Absolutely! This is a great stash-busting project. Just make sure the yarn weights are consistent for a uniform look.
Q: What if I don’t have a wooden base?
A: You can use cardboard, canvas, or even a stretched crochet background as an alternative to a wooden base.
Q: How do I clean the sign if it gets dusty?
A: Gently dust with a soft brush or cloth. Avoid water to prevent damage to glued parts and mounted features.
Q: Can I sell Crochet Santa Welcome Signs at craft fairs?
A: Yes, as long as the pattern you use allows for commercial use. Always credit the designer if required.
Making a Crochet Santa Welcome Sign is a joyful and fulfilling way to celebrate the holiday season with creativity and warmth. From selecting the perfect yarn to crafting each detail of Santa’s face, this project offers endless opportunities for personalization and festive charm.
We hope this guide has inspired you to create your own cozy and welcoming decoration. Whether for yourself or as a heartfelt gift, this handmade touch will surely bring smiles and cheer to anyone who sees it.
Did you enjoy this tutorial? Leave us your honest opinion and any suggestions you have for future crochet projects. Your feedback helps us improve and continue creating helpful content for crafters like you!


