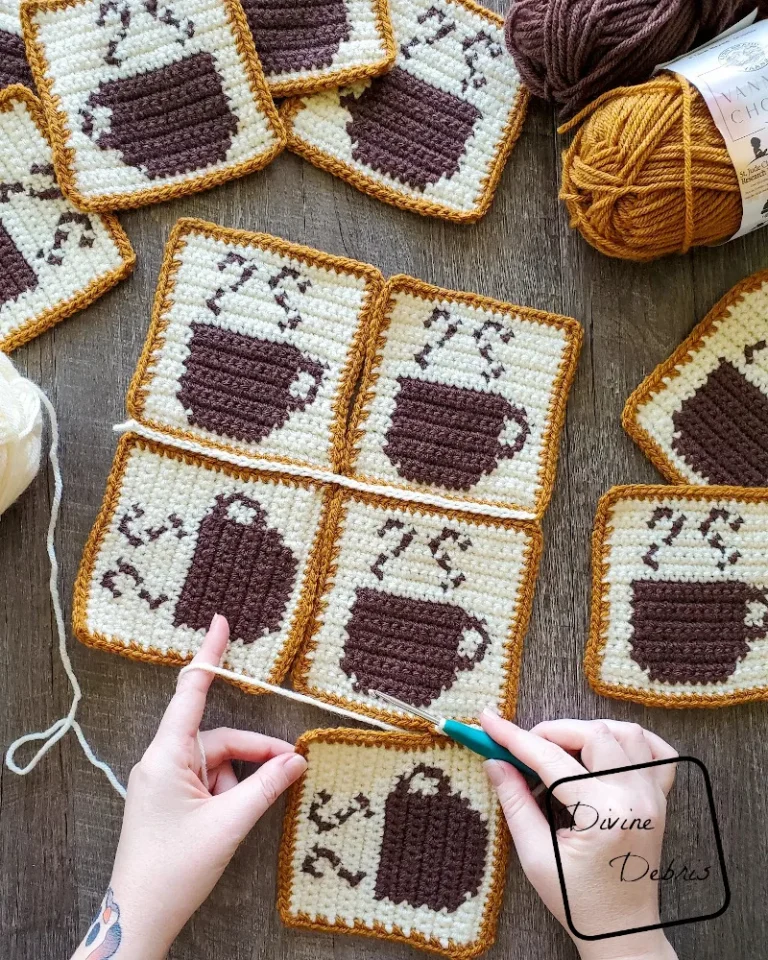
Free Calliope Coffee Bag Crochet Pattern

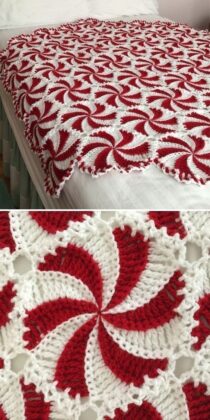
If you’re looking for a cozy, festive, and eye-catching project, the Crochet: Peppermint Throw is a perfect choice. This beautiful blanket pattern combines the warm comfort of crocheting with the charming design of peppermint swirls, creating a throw that is not only functional but also decorative. Ideal for the holiday season or any time of year you want to add a pop of color to your space, this project is fun to make and satisfying to complete.
The Crochet: Peppermint Throw is beginner-friendly yet engaging enough for experienced crocheters. It involves basic stitches and techniques, making it accessible while offering a stunning visual result. Whether you’re making it for your home, as a thoughtful gift, or even to sell, this throw will surely impress. Using soft yarns in vibrant red and white shades, it mimics the look of classic peppermint candies, bringing warmth and joy to any setting.
Crafting a throw like this is not just about the end product. It’s about enjoying the process, relaxing with each stitch, and creating something beautiful and meaningful with your own hands. In this article, we’ll guide you step-by-step through understanding the pattern, selecting the right materials, and giving you useful tips to ensure your Crochet: Peppermint Throw turns out perfect. Let’s dive into the swirly, sweet world of crochet magic.

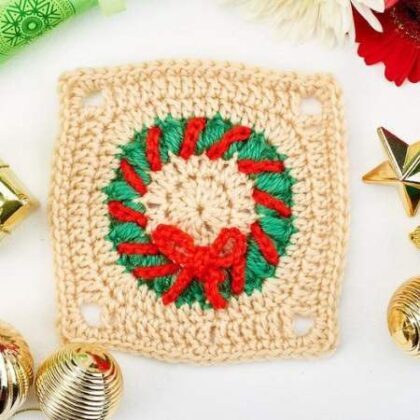
The Crochet: Peppermint Throw stands out because of its distinctive circular motif that mimics peppermint candy. Each motif is crafted individually and later joined together to create the complete throw, making the assembly process manageable and flexible.
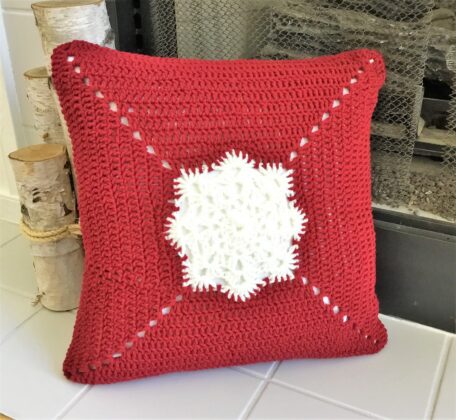
This design is typically made using red and white yarn, but you can personalize it with colors of your choice. Experimenting with different hues can create a totally unique aesthetic while keeping the charm of the original idea.
Each circle usually begins at the center and spirals outwards, alternating between colors. The visual swirl effect is achieved by clever color changes and specific stitch patterns that keep the shape round and even.
Once you’ve made several peppermint circles, you’ll need to block them. Blocking ensures that each motif maintains its shape and lies flat, which is essential for a neat and professional-looking finish when joining them.
After preparing your motifs, they are connected either by stitching them together or using a join-as-you-go technique. The final steps often include adding a border to unify the whole throw and give it a polished edge.
Understanding the structure and components of the Crochet: Peppermint Throw is essential before starting. This helps prevent mistakes, saves time, and makes the overall process much smoother.
To start your Crochet: Peppermint Throw, selecting the right materials is crucial. High-quality yarn ensures durability, softness, and ease of use. Acrylic or cotton yarns are great choices for comfort and color vibrancy.
The most common yarn weight used is medium (worsted weight), which provides the perfect thickness and warmth without being too bulky. Be sure to check your pattern for specific recommendations on yarn type and brand.
You’ll also need a crochet hook suitable for your chosen yarn, typically between 5.0 mm and 6.5 mm. The right hook size is essential for achieving the correct tension and maintaining consistent stitch sizes.
Don’t forget other tools like scissors, a yarn needle for weaving in ends, and stitch markers to help you keep track of rounds and joining points. These small accessories can make a big difference in your workflow.
Optional but useful additions include a blocking mat and pins. These are especially helpful for shaping each peppermint motif before joining them together.
Having all the right materials on hand before you begin allows for an uninterrupted and enjoyable crochet experience. Preparation is key to producing a stunning final product.
Begin each motif by forming a magic ring or chain circle. This will serve as the center of your peppermint swirl. Secure the ring with a few single crochets before moving on to color work.
Switch between red and white yarn every few stitches to start forming the swirl. Using double crochets or treble crochets will help the circle expand quickly and create a dynamic effect.
Make sure your tension remains consistent. Uneven tension can cause the motifs to pucker or warp, which will affect the way they fit together later in the process.
Count your stitches after each round to ensure accuracy. Since you’ll be repeating the same motif multiple times, consistency across all pieces is important for a uniform throw.
Once you’ve finished several rounds, fasten off and weave in the ends neatly. This will make joining motifs easier and give the blanket a cleaner appearance.
After all motifs are complete and blocked, begin the joining process. Lay them out on a flat surface to plan the arrangement and stitch them together one by one using your preferred joining method.
If you want your Crochet: Peppermint Throw to truly stand out, consider adding a border. A scalloped or picot edge can enhance the festive look and tie the entire piece together.
Personalize your throw with initials, dates, or themed motifs in between the peppermint circles. This makes it a perfect gift for birthdays, holidays, or special occasions.
If you’re making this as a seasonal decoration, try using glitter or metallic yarns for a little sparkle. These yarns add a touch of elegance while keeping the design playful.
Take your time when joining the motifs. Rushing this step can cause misalignment and make the blanket look uneven. Careful stitching ensures a smooth and professional appearance.
Blocking is not just for individual motifs—it also helps after the throw is complete. A final steam block or wet block will ensure the blanket lies flat and holds its shape beautifully.
Lastly, share your finished Crochet: Peppermint Throw with others. Post it on social media or gift it to someone special. Every stitch you’ve made tells a story, and sharing that story spreads joy.
Q1: Can beginners make the Crochet: Peppermint Throw?
Yes! The pattern is simple enough for beginners to follow. Basic crochet skills like magic ring, double crochet, and color changes are needed, and many tutorials are available online.
Q2: How long does it take to complete the throw?
It depends on your skill level and how much time you dedicate daily. On average, it may take 1–2 weeks to complete if you work consistently a few hours each day.
Q3: What type of yarn is best for this pattern?
Medium weight (worsted) yarn in acrylic or cotton works best. These yarns hold shape well and offer the bright colors needed for the peppermint swirl design.
Q4: Can I change the colors in the pattern?
Absolutely! While red and white are traditional, you can use any color combination to suit your personal taste or match your home decor.
Q5: Is blocking necessary?
Yes, blocking is highly recommended. It helps maintain the shape of the peppermint motifs and ensures the final throw looks polished and flat.
Q6: What size will the finished throw be?
The final size depends on the number of motifs you create and how large each one is. Typically, a throw ranges from 45 to 60 inches in width and length.
The Crochet: Peppermint Throw is more than just a festive decoration—it’s a heartfelt, handmade creation that brings warmth and charm to any space. Through each swirl and stitch, you craft a cozy masterpiece that showcases your creativity and dedication. We’ve walked through the design, tools, steps, and tips to help you succeed in this delightful project.
Now it’s your turn! Start your crochet journey with the Crochet: Peppermint Throw and enjoy the sweet satisfaction of completing something truly special. If you’ve tried this pattern or plan to, please leave your honest opinion and suggestions below. We’d love to hear your thoughts and see your creations!


