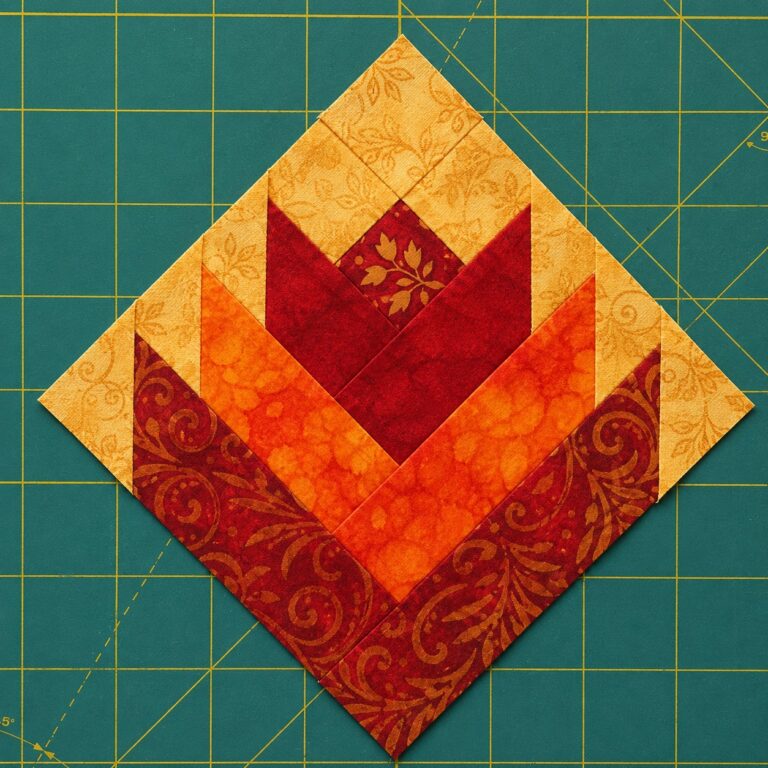
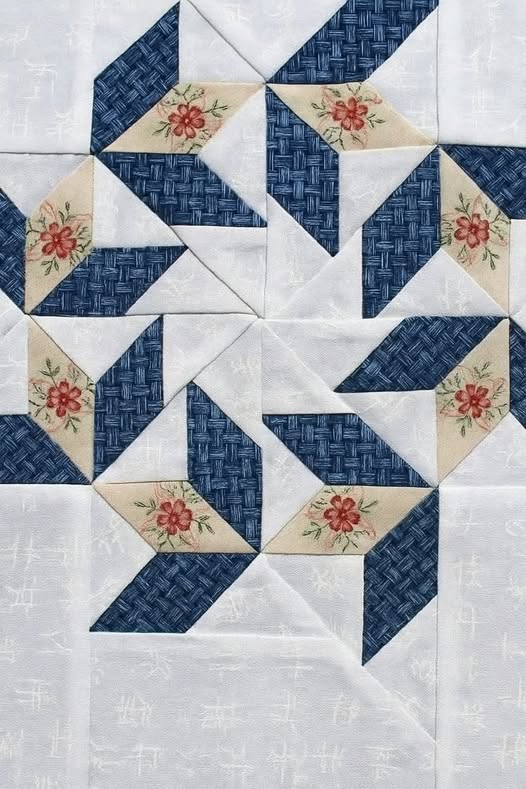
Desert Flower Quilt Block Pattern

A Car Neck Pillow Free Pattern is an excellent project for anyone looking to combine comfort, creativity, and a touch of personalization in their travels.
Whether you are a beginner in sewing or an experienced quilter, this free pattern can be adapted to your skill level, making it a versatile and enjoyable project.
You can choose fabrics that match your car’s interior, pick colors that reflect your personality, or even add decorative elements such as buttons, embroidery, or appliqués.
The first step in creating your Car Neck Pillow Free Pattern is selecting the right materials. Choosing suitable fabrics and quilting supplies ensures that the pillow is comfortable, durable, and visually appealing.
Cotton fabric is a popular choice for quilted neck pillows because it is soft, breathable, and easy to work with. For added durability, you can combine cotton with a layer of batting to provide extra cushioning. Batting comes in various thicknesses, allowing you to customize the softness of the pillow to your preference.
Quilted fabrics enhance the look and feel of the neck pillow. Pre-quilted fabrics can save time, but if you enjoy the process, quilting your own layers adds a personal touch. Use high-quality thread to ensure durability, especially if the pillow will be used frequently during road trips.
Other essential materials include scissors, pins, a sewing machine, measuring tape, and a pattern template. Using a template ensures consistent sizing and helps guide your stitching accurately. Additionally, consider adding a zipper or buttons if you want the pillow to have a removable cover for easy washing.
Color and pattern selection is another important aspect. Neutral tones like gray, beige, or navy are classic and versatile, while bright prints or geometric patterns add a fun and modern flair. Quilting with contrasting thread colors can also create unique decorative effects, elevating the pillow from a simple travel accessory to a stylish piece.
Lastly, make sure to prepare your workspace and organize materials before starting. This preparation minimizes interruptions and helps maintain focus during the sewing and quilting process.
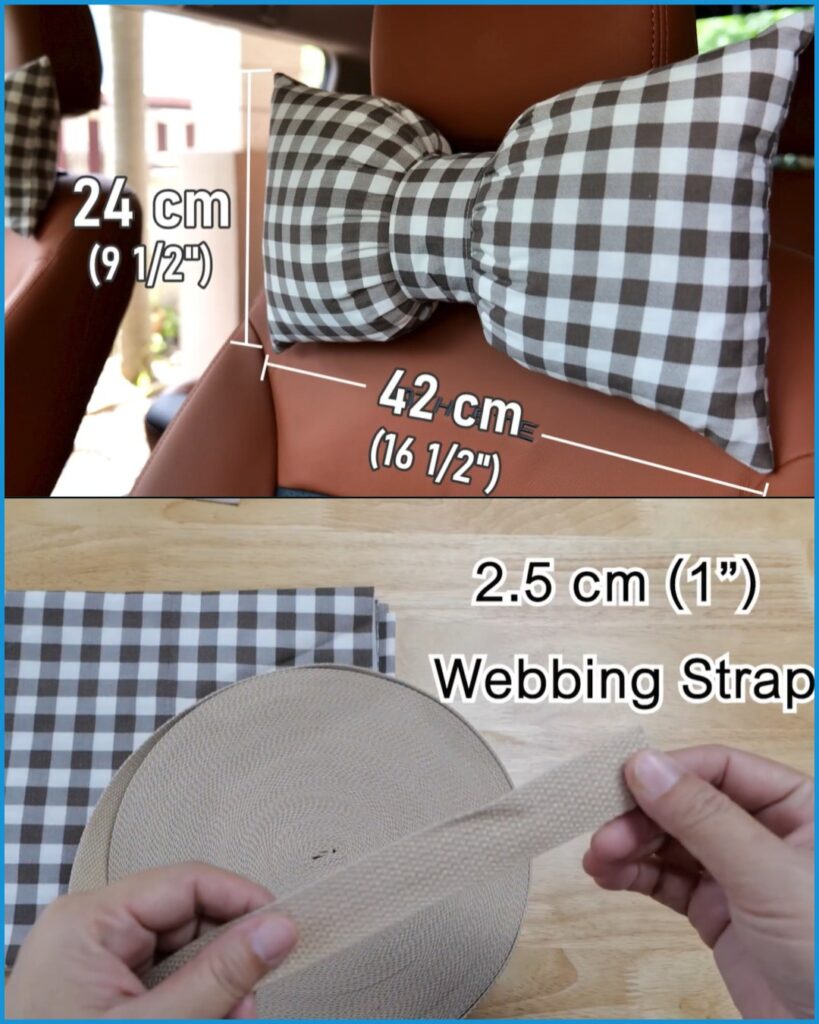
Following a structured Car Neck Pillow Free Pattern ensures a smooth and enjoyable sewing experience. Begin by cutting your fabric and batting according to the template. The standard U-shape design provides optimal neck support and can be easily adjusted to fit different sizes.
Once your pieces are cut, layer the fabric and batting for quilting. Pin the layers together to prevent shifting while sewing. Quilting can be done in straight lines, diamond patterns, or even free-motion designs, depending on your skill and creativity. Quilting adds structure and durability to the pillow while enhancing its visual appeal.
After quilting, sew the pieces together along the edges, leaving an opening to insert the pillow filling. Polyester fiberfill is a common choice for stuffing because it provides firm support while remaining soft and lightweight. Make sure to fill the pillow evenly to maintain its U-shaped form.
Once filled, sew the opening closed with a neat topstitch. If using a removable cover, sew a zipper or buttons instead. Adding a closure ensures the pillow remains clean and makes maintenance easier.
For extra functionality, you can add a strap or loop to the pillow so it can hang on the car seat when not in use. Small details like these make the pillow practical and convenient for daily travel.
Finally, inspect the pillow for any loose threads or uneven stitching. Trim and finish all edges neatly to create a professional-looking product that is both durable and comfortable.
One of the advantages of a Car Neck Pillow Free Pattern is the ability to personalize the design. Personal touches make the pillow unique and enhance its sentimental value.
Adding embroidery or appliqués with initials, favorite symbols, or decorative motifs gives the pillow a custom look. You can also experiment with quilting patterns, using geometric shapes or floral designs to create visual interest.
Color coordination is another way to personalize the pillow. Mix and match fabrics with different textures and prints to achieve a distinctive style. Consider coordinating the pillow with your car interior or selecting colors that reflect your personality and taste.
For children or young travelers, you can choose playful prints such as animals, cartoons, or vibrant geometric patterns. This customization makes the pillow fun and inviting, encouraging kids to use it and stay comfortable during trips.
Adding small details like piping or decorative edges enhances the overall look. Piping can be made from contrasting fabric to frame the pillow and highlight its shape, while scalloped or ruffled edges add a soft and feminine touch.
For a luxurious feel, consider using quilted fabrics with subtle patterns, such as chevron or herringbone. Combining textures like soft fleece with cotton creates a cozy experience and makes the pillow appealing for long journeys.
Personalization is not only about aesthetics but also about functionality. Adjusting the pillow size to fit your neck or adding adjustable straps ensures maximum comfort and support. Every personalized detail contributes to a pillow that is practical, stylish, and uniquely yours.
When making a Car Neck Pillow Free Pattern, there are some common mistakes to be mindful of. Avoiding these pitfalls ensures a smooth sewing experience and a high-quality final product.
One common mistake is cutting fabric inaccurately. Ensure that all pieces are cut according to the template and that layers align properly before quilting. Misaligned layers can result in uneven stitching and an ill-fitting pillow.
Another mistake is uneven stuffing. Overstuffing or under-stuffing the pillow can compromise its shape and support. Use small amounts of fiberfill at a time, shaping the pillow as you go to maintain the U-shape design.
Neglecting quilting can also be problematic. Quilting stabilizes the pillow and keeps the filling evenly distributed. Skipping or doing inconsistent quilting may result in lumps and a less durable product.
Improper sewing machine tension is another issue to watch for. Ensure that the machine is set to the correct tension for your fabric to prevent puckering or loose stitches. Testing on a small fabric scrap before starting the project is always recommended.
Using low-quality materials is a common oversight. Cheap fabrics or weak thread can lead to a pillow that wears out quickly, especially with frequent use. Invest in durable cotton, quality batting, and strong thread to ensure longevity.
Lastly, skipping finishing touches can affect the pillow’s appearance. Take the time to trim threads, reinforce seams, and finish edges neatly for a professional-looking product. Attention to detail makes a big difference in the final outcome.
1. What materials are best for a quilted neck pillow?
High-quality cotton fabric combined with polyester or cotton batting ensures softness, durability, and a cushioned feel.
2. Can beginners make this pillow?
Yes, the project is beginner-friendly. Start with basic quilting and stitching techniques, and gradually try more advanced designs.
3. How do I clean a quilted neck pillow?
Removable covers can be machine washed on gentle settings. For pillows without covers, hand washing and air drying are recommended.
4. How long does it take to complete the pillow?
Completion time varies depending on skill level. Beginners may need 3–4 hours, while experienced sewers can finish in 1–2 hours.
5. Can I personalize the pillow?
Absolutely. Add embroidery, appliqués, decorative stitching, piping, or unique fabrics to make it custom and special.
6. How do I keep the pillow shape?
Quilting and evenly distributed stuffing ensure the pillow maintains its U-shaped form. Use fiberfill sparingly and shape as you fill.
From selecting fabrics and batting to quilting, sewing, and personalizing, every step contributes to a thoughtful and enjoyable project.
Whether you are a beginner learning basic stitches or an experienced sewer exploring quilting techniques, this free pattern can be adapted to your skill level.
Share your experiences, suggestions, or improvements in the comments. Your feedback inspires creativity and keeps the tradition of handmade crafts alive.

