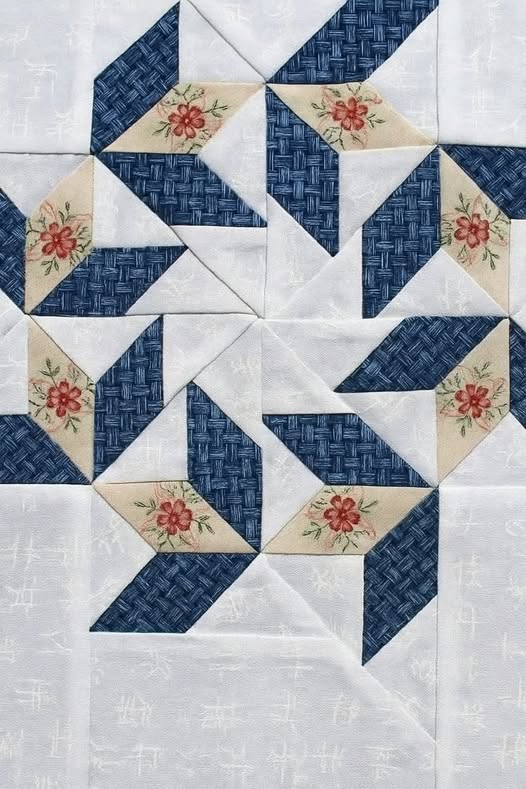
Desert Flower Quilt Block Pattern

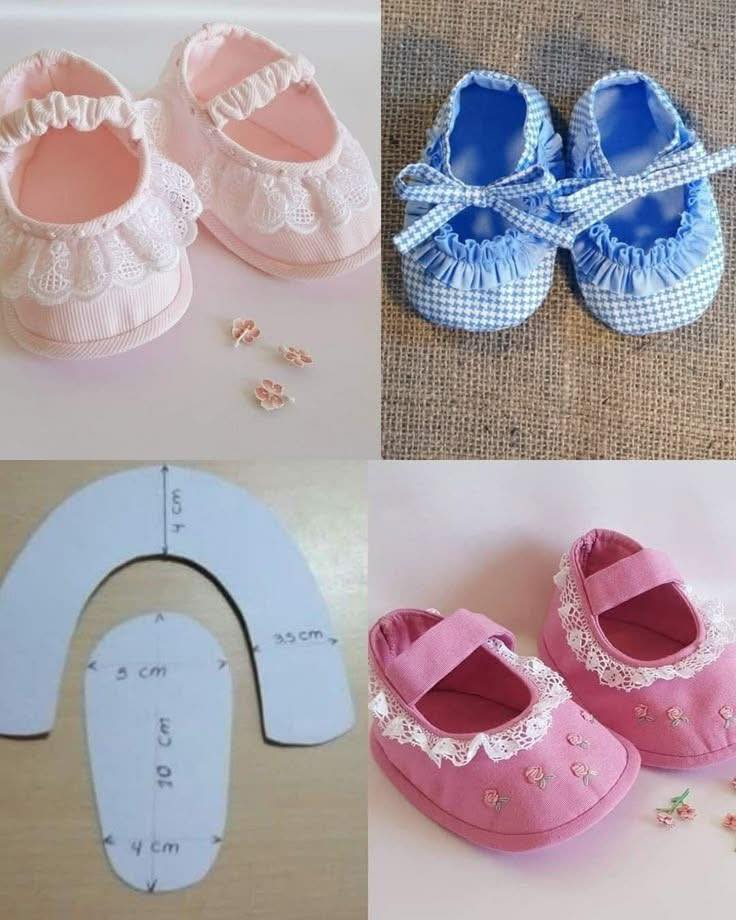
If you have ever admired tiny baby shoes in boutiques and wondered how they were made, this guide will walk you through everything you need to know.
Unlike store-bought versions, a handmade pair carries sentimental value and can be customized with colors, fabrics, and details that reflect your personal touch.
You don’t need to commit to large amounts of fabric or complicated techniques, and the satisfaction of finishing a pair of shoes is immediate.
To start with your sewing baby shoes free pattern, you will need a few simple materials that are easy to source. Cotton fabric is often recommended for beginners because it is soft, breathable, and easy to sew. If you prefer, you can also use fleece or felt for a warmer pair. In addition to fabric, you’ll need:
With these materials prepared, you’ll be ready to move forward with confidence.
When selecting fabric, remember that babies’ feet are delicate. Soft, natural fabrics are the best choice, and avoiding rough textures ensures comfort. You can even upcycle fabric from an old shirt, dress, or blanket to add a nostalgic touch. This makes your project eco-friendly as well as budget-friendly.
The sewing machine settings should be adjusted for small, detailed work. A shorter stitch length offers greater control and durability. If you’re new to sewing, practice on fabric scraps before working on the baby shoe pieces to gain confidence.
Adding interfacing to the soles helps the shoes keep their shape. If you want extra cushioning, consider adding a thin layer of quilt batting. These small adjustments will enhance the final look and comfort of your handmade baby shoes.
Lastly, closures such as Velcro or snaps are highly recommended for baby shoes. They make the shoes easy to put on and take off while ensuring they stay secure during wear. Once your materials are ready, it’s time to move on to the cutting and preparation stage.
Printing your sewing baby shoes free pattern in the correct size is the first step. Many patterns come in multiple sizes, so ensure you select the one suitable for the baby’s age. Carefully cut out the paper templates and place them on your chosen fabric. Use pins or fabric clips to hold them in place while cutting.
When cutting fabric, precision matters. Uneven pieces may cause difficulty when assembling the shoes. Mark the notches and alignment points on the fabric with tailor’s chalk or a fabric marker to guide your sewing later.
Cut two soles, two uppers, and any additional pieces depending on the pattern design. If you’re using lining fabric, remember to cut those as well. The lining not only adds comfort but also gives the shoes a professional finish.
Interfacing should be fused to the soles and, if desired, to the upper parts of the shoes. This ensures the shoes maintain their shape while still being flexible enough for little feet. Press carefully with an iron, following the manufacturer’s instructions for the interfacing.
To make sewing easier, prepare your pieces by pinning or basting layers together. For instance, you can baste the lining to the outer fabric before beginning final assembly. This small step prevents slipping and makes the sewing process smoother.
After preparing all pieces, you are ready to assemble your baby shoes. The next section will guide you through the sewing process step by step.
The first step in assembling your sewing baby shoes free pattern is to attach the upper part to the lining. Place the fabrics right sides together, stitch around the edge, and then turn them inside out. This gives the upper a neat appearance and prevents raw edges from irritating the baby’s feet.
Next, sew the back seam of the upper, forming the heel of the shoe. Press open the seam for a flatter finish. If your pattern includes elastic, insert it into the casing at this stage. This ensures the shoes stay snug without being too tight.
Now, align the upper piece with the sole. Pin carefully, easing the fabric to fit the curves. This step requires patience, as mismatched edges may cause puckering. Take your time and adjust the pins until everything lies flat.
Sew slowly around the edge, attaching the upper to the sole. A shorter stitch length works best here, ensuring durability and neatness. Once completed, trim any excess seam allowance and clip curves for smoother edges.
Turn the shoes right side out and check the seams. If needed, topstitch around the opening for reinforcement and style. At this stage, you can also add closures like Velcro or snaps to make the shoes easy to wear.
After finishing one shoe, repeat the process for the second. Soon, you will have a pair of adorable handmade baby shoes ready to gift or use.
One of the joys of using a sewing baby shoes free pattern is the opportunity to personalize each pair. You can choose fun prints, pastel colors, or even holiday-themed fabrics depending on the occasion.
Embellishments such as small bows, embroidery, or appliqués can be added to the uppers for a unique look. Always ensure decorations are securely attached and free of choking hazards.
If you want sturdier shoes, experiment with denim or canvas fabric. For a softer, slipper-like feel, fleece or flannel are excellent choices. Changing the fabric type can dramatically alter the style of the baby shoes.
You can also play with different sole materials. Using non-slip fabric or adding grippy dots ensures safety when babies start crawling or taking their first steps. This makes your handmade shoes not only stylish but also practical.
Consider seasonal themes: light cottons for summer, cozy flannels for winter. This allows you to create shoes suitable for every season and occasion.
Finally, don’t forget to label your handmade baby shoes if gifting. A small fabric tag with the baby’s name or the maker’s initials adds a thoughtful touch.
1. What size should I choose when using a sewing baby shoes free pattern?
Most free patterns come in multiple sizes, usually from newborn up to 12 months. Select based on the baby’s age and adjust slightly if necessary.
2. Can I hand sew baby shoes instead of using a machine?
Yes, you can. While a sewing machine offers more durability and speed, careful hand stitching works well for small projects like baby shoes.
3. What fabrics are best for baby shoes?
Soft, breathable fabrics such as cotton, fleece, or flannel are ideal. Avoid rough or stiff fabrics that might irritate the baby’s skin.
4. How can I make the soles non-slip?
Use non-slip fabric or add puffy paint dots to the soles. This provides grip when babies begin crawling or standing.
5. Are handmade baby shoes safe for babies to wear?
Yes, if made with soft fabrics and secure seams. Avoid loose embellishments that could become choking hazards.
6. Can I wash handmade baby shoes?
Yes, most can be washed on a gentle cycle or hand washed. Always prewash fabrics before sewing to prevent shrinkage.
Not only do you save money, but you also make something personal and meaningful. From choosing fabrics to customizing designs, every pair can be unique and special.
Now that you know the steps, it’s time to try making your own pair. Whether for your baby, as a gift, or simply for the joy of sewing, this project is worth exploring.
