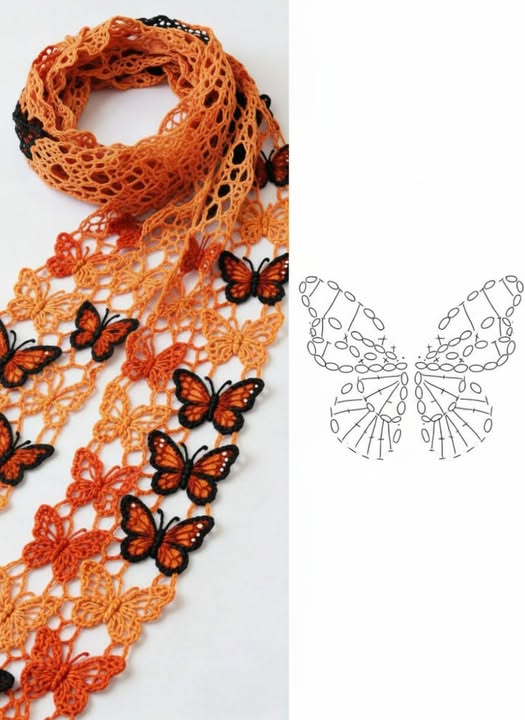
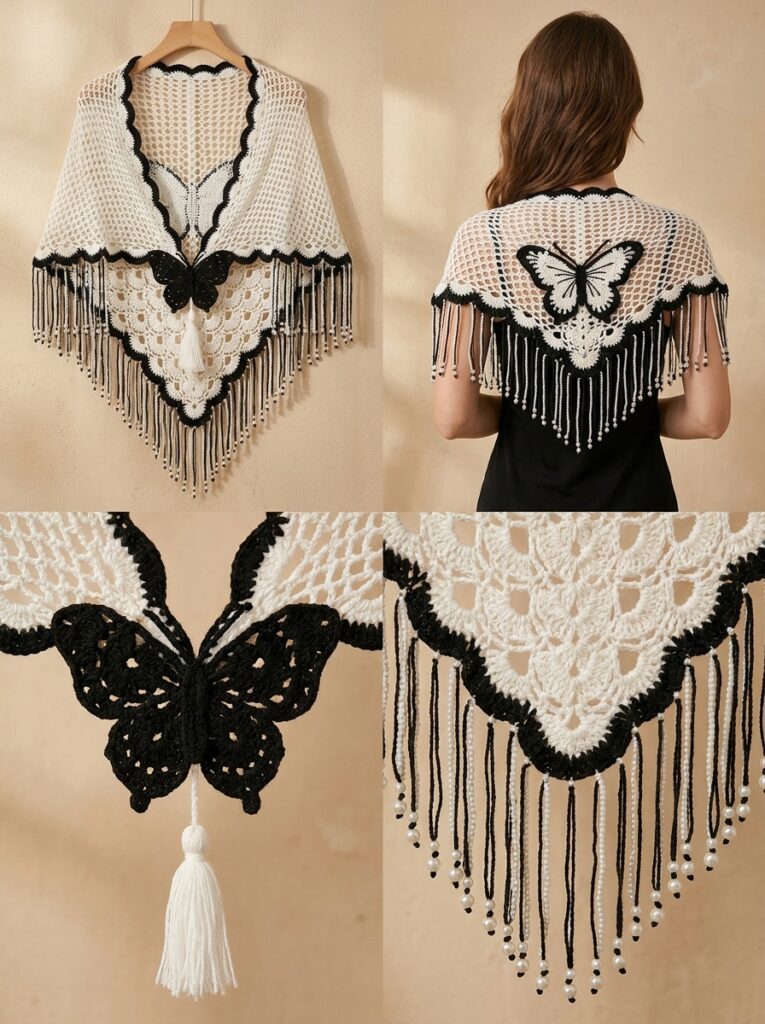
Crochet Butterfly Scarf Pattern

The Amigurumi Violin Free Pattern is an enchanting project that combines the love for crochet with the charm of musical instruments.
When people hear about Amigurumi Violin Free Pattern, they may think it is a complex or advanced project, but the truth is that it can be adapted to different skill levels.
Another reason why the Amigurumi Violin Free Pattern has gained popularity is its versatility. Some crafters prefer to create it in classic brown or wooden tones.
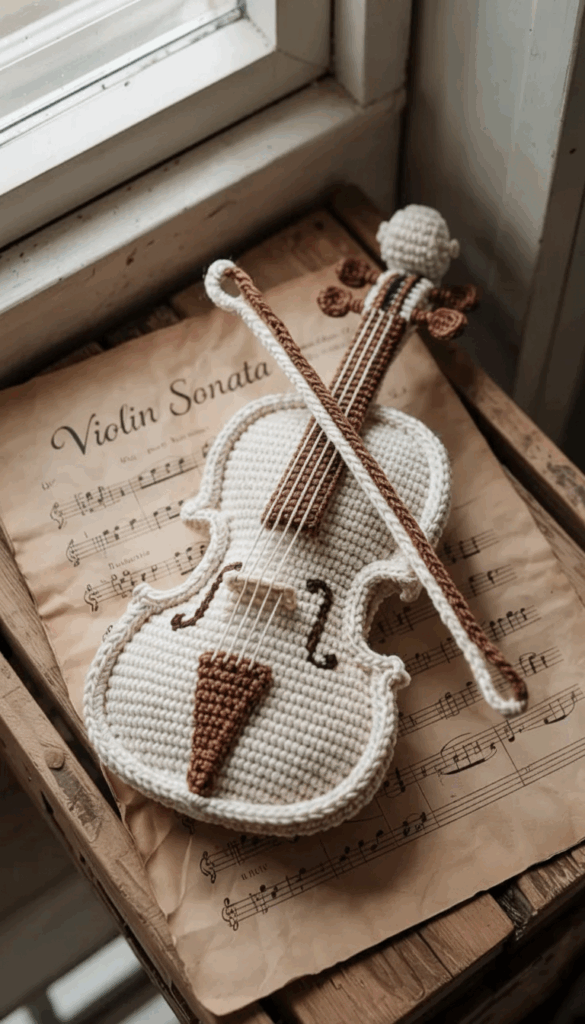
To begin with, the Amigurumi Violin Free Pattern is rooted in the Japanese art of amigurumi, where small crochet figures are crafted with detailed stitches. This particular design goes beyond animals or dolls and ventures into the artistic world of musical instruments. By doing so, it opens a unique space for creators who want to explore different shapes and ideas in their crochet journey.
The violin design requires a structured approach because of its elongated body, curved edges, and subtle details. By breaking down the pattern into manageable steps, even beginners can feel confident. For example, the body is usually crocheted in the round, while the fingerboard and scroll involve tighter stitches and smaller parts. These differences train your hands to adapt to varying stitch density.
When working on this project, the yarn choice becomes crucial. Many crafters prefer cotton yarn for its durability and definition, which highlights the violin’s structure. Others use acrylic yarns to achieve a softer and more playful texture. Whatever you choose, the key is to maintain consistency in tension to keep the violin proportionate.
Colors also play a vital role in shaping the final look. Classic shades such as brown, beige, and black help the amigurumi resemble a realistic violin. On the other hand, bold colors like red, blue, or even multicolored yarns can turn the piece into a fun accessory for children or a whimsical display item.
The Amigurumi Violin Free Pattern also emphasizes small but important details such as the strings and bow. These can be created with embroidery thread, thin yarn, or even alternative materials like metallic threads. By adding these elements, your violin gains character and becomes more recognizable.
Finally, patience and practice are your best allies. Like any crochet project, the violin may require trial and error, especially when shaping curves or attaching delicate parts. However, the satisfaction of finishing a miniature violin by hand is unmatched, making the effort worthwhile.
For beginners interested in the Amigurumi Violin Free Pattern, it is essential to start slowly and focus on mastering the basics. The pattern often begins with a magic ring or a foundation chain that forms the violin’s body. Practicing this foundation several times before moving forward ensures your stitches are even and consistent.
Once the base is ready, the pattern usually requires increasing and decreasing stitches to shape the instrument’s rounded form. This is where many beginners discover the importance of counting carefully. Missing or adding an extra stitch can alter the violin’s shape, so precision is key. A simple stitch marker can make this process much easier.
Attaching parts is another learning curve. The violin is made of different sections, such as the body, neck, scroll, and sometimes the bow. Beginners often find it tricky to sew these pieces together neatly. A good tip is to pin the parts in place before sewing to visualize the final look and ensure proper alignment.
When working on smaller details like the pegs or strings, patience is crucial. These elements may involve tiny stitches or embroidery techniques. Beginners should not rush this step; instead, they can practice separately before adding them to the main piece.
Stuffing is also a vital part of amigurumi. For the violin, stuffing should be firm but not too tight. Overstuffing can distort the shape, while under-stuffing can make the piece look flat. Using small pieces of fiberfill and adjusting as you go helps maintain the proper structure.
Above all, the most important thing for beginners is to enjoy the process. The Amigurumi Violin Free Pattern is a journey into creativity and patience, and every mistake becomes a valuable lesson. With time, the stitches will feel more natural, and the final product will reflect both skill and passion.
One of the best aspects of the Amigurumi Violin Free Pattern is how versatile the finished item can be. Some crafters make these tiny violins as collectibles to showcase in a handmade display. Others prefer to give them as personalized gifts, which hold much more sentimental value than a store-bought item.
For musicians or music students, receiving a crochet violin is a heartfelt gesture. It represents the passion for music and the dedication to practice. Parents often use these amigurumi creations as decorative pieces in their children’s rooms, especially if the child is learning violin. The crochet violin becomes a motivational symbol that encourages learning.
The amigurumi violin also makes an excellent holiday ornament. Its small size and charming appearance allow it to hang perfectly on a Christmas tree or be part of festive décor. With metallic yarns or sparkly accents, it can add a magical touch to seasonal celebrations.
In classrooms or music schools, teachers can use amigurumi violins as playful teaching tools. Children often respond positively to tactile objects, and having a miniature crochet violin can make lessons more interactive and enjoyable.
Collectors also love the Amigurumi Violin Free Pattern. Some crochet enthusiasts build entire collections of instrument amigurumi, from violins to guitars and pianos. Each piece tells a story and contributes to a unique handmade gallery.
Lastly, these tiny violins can also serve as keychains, bag charms, or accessories. With a small keyring or chain attachment, the amigurumi violin becomes a portable and stylish accessory, spreading creativity wherever it goes.
Even though the Amigurumi Violin Free Pattern can be simple, achieving a polished look requires attention to detail. One of the best tips is to maintain even stitch tension throughout the project. Irregular stitches can create bumps or uneven shapes that distract from the final design.
Blocking is another technique that helps improve the final appearance. By lightly steaming or shaping the crochet violin after completion, you can smoothen edges and give it a more professional finish. Be careful not to overheat the yarn, especially if using acrylic.
Adding embroidery details like f-holes or fine lines can elevate the realism of your violin. Using black thread to mimic the carved designs on a real violin body adds authenticity. This step requires precision but greatly enhances the overall result.
When attaching parts, it’s essential to sew them securely. Loose attachments can make the violin look sloppy or even fall apart over time. Using strong thread and invisible stitching ensures durability.
Experimenting with size can also be fun. By changing the hook size and yarn thickness, you can create violins in different scales. Tiny violins work perfectly as charms, while larger ones can serve as room decorations.
Lastly, always personalize your work. While following the Amigurumi Violin Free Pattern gives structure, adding your own creative touch makes the project unique. Whether through colors, accessories, or slight modifications, your violin will reflect your individuality.
1. Is the Amigurumi Violin Free Pattern suitable for beginners?
Yes, it can be adapted for beginners, especially if the steps are followed carefully and practice is applied to shaping and attaching parts.
2. What type of yarn should I use for the Amigurumi Violin Free Pattern?
Cotton yarn is recommended for its durability and definition, but acrylic yarn can also work well for a softer finish.
3. How long does it take to complete the project?
The time depends on skill level. Beginners may take several days, while experienced crocheters can finish it in a few hours.
4. Can I customize the colors of my amigurumi violin?
Absolutely. While classic brown and black look realistic, bright and bold colors create a whimsical effect.
5. What can I use the finished amigurumi violin for?
It can serve as a decoration, collectible, teaching tool, holiday ornament, or even be turned into a keychain or bag charm.
6. Do I need special tools to create the Amigurumi Violin Free Pattern?
No special tools are required beyond the usual crochet hook, yarn, stuffing, and a needle for assembly.
By following the steps carefully, choosing the right yarns, and adding personal touches, anyone can create a charming violin that brings joy to both the maker and the receiver.
If you enjoyed this article and decide to try making your own amigurumi violin, I would love to hear your honest opinion and suggestions.
Share your experiences, what worked best for you, and how you added your personal style to the design. Your feedback helps make the crochet community even more inspiring and supportive.