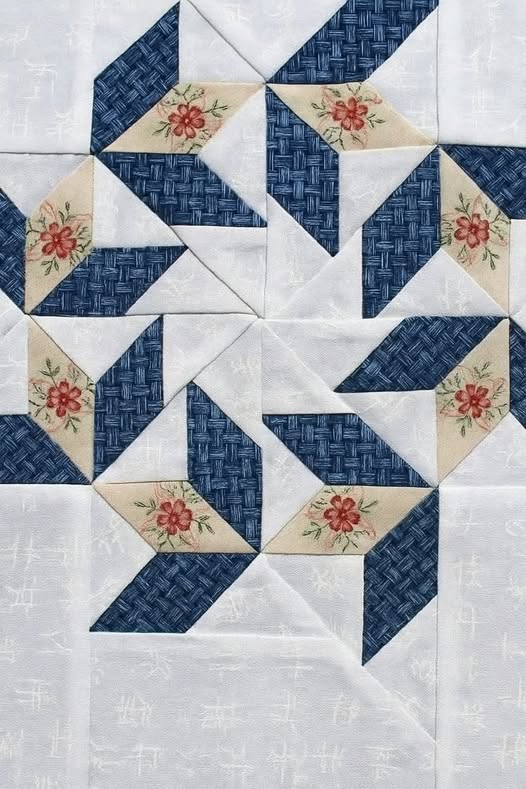
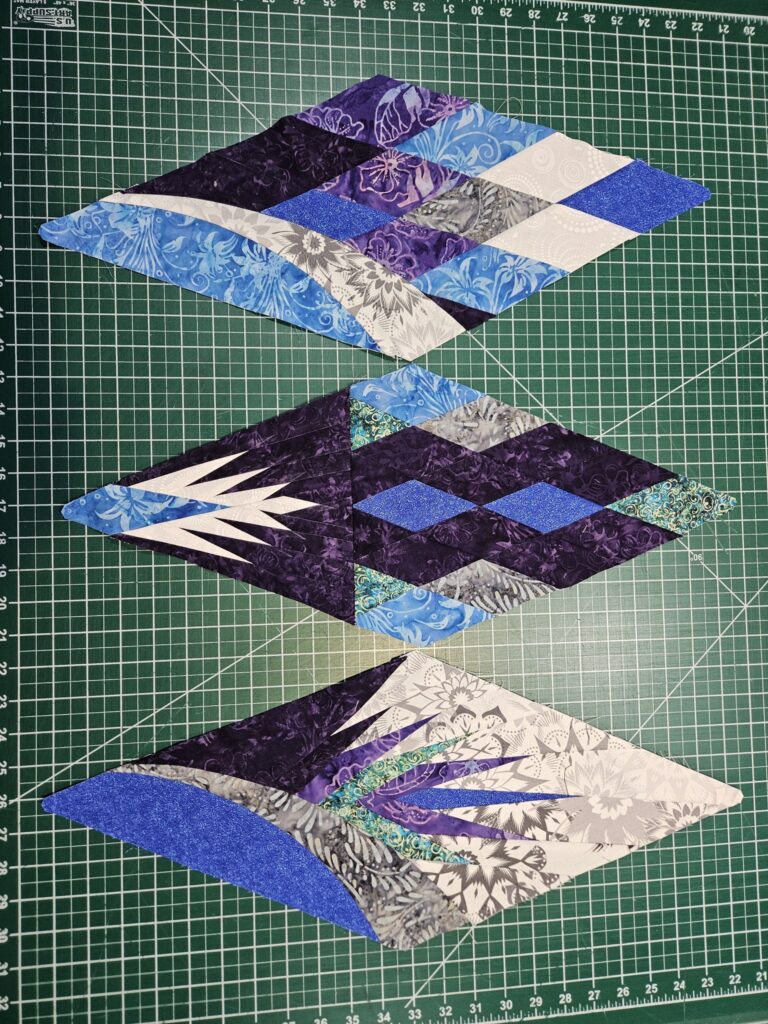
Desert Flower Quilt Block Pattern

Starting your journey with a Mini Backpack Pouch Tutorial is one of the most enjoyable and rewarding experiences for anyone who loves sewing, crafting, or simply creating something practical and stylish by hand.
Learning how to make a mini backpack pouch doesn’t require you to be a professional seamstress. With some simple materials, a bit of patience, and the right step-by-step guide, anyone can complete this project.
Another great advantage of diving into a Mini Backpack Pouch Tutorial is the flexibility it offers. You can customize the pouch with different fabrics, colors, zippers, and decorations, making it fit any style or personality.
Before starting the Mini Backpack Pouch Tutorial, it’s essential to gather all the necessary materials. Having everything at hand ensures a smoother crafting process and avoids unnecessary interruptions while working on your project.
First, you’ll need fabric of your choice. Cotton or canvas fabrics are highly recommended because they are easy to sew and durable enough for everyday use. Consider using two contrasting colors or patterns—one for the outer layer and another for the lining—to give your pouch a unique look.
Second, zippers are an important component. Choose a zipper length that matches the size of your pouch. For a standard mini backpack pouch, a 5 to 7-inch zipper works well. You can even select zippers in fun colors to make the pouch more eye-catching.
Third, don’t forget the basic sewing supplies: scissors, pins, a ruler, thread that matches your fabric, and a sewing machine. While hand-sewing is possible, using a machine will make the process quicker and give your stitches more strength and consistency.
In addition, consider adding extras like small clips, keyrings, or decorative patches. These accessories not only improve the functionality of the pouch but also enhance its overall design. For example, attaching a keyring allows you to use the pouch as a key holder, while patches or embroidery can give it a more personalized touch.
Finally, make sure you have a workspace that is clean, well-lit, and organized. A clutter-free environment helps you focus better and reduces mistakes while working through the steps of the Mini Backpack Pouch Tutorial. Preparing your materials and workspace in advance sets the tone for a successful crafting session.
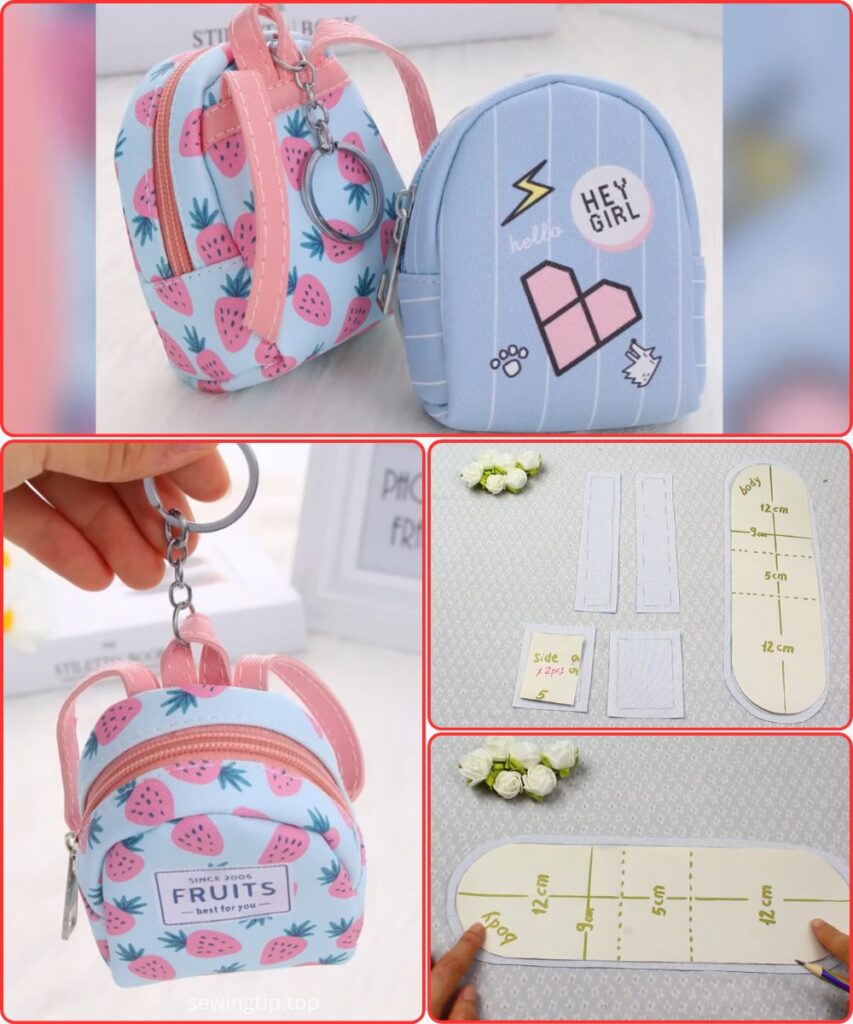
To begin the Mini Backpack Pouch Tutorial, start by cutting out the fabric pieces. Typically, you’ll need two outer fabric pieces, two lining pieces, and smaller strips for the straps and zipper tabs. Precision in cutting is key, as it ensures your pouch will have a neat and professional finish.
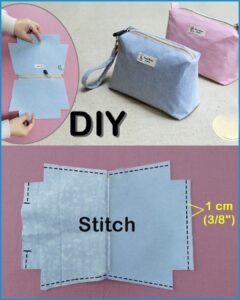
Once your pieces are ready, move on to the zipper installation. Place the zipper between one outer fabric piece and one lining piece, with the right sides facing each other. Sew along the edge, then repeat with the other side of the zipper and fabric. When you flip the pieces right side out, you’ll have a neat zipper installation.
After the zipper, stitch around the outer edges of the fabric while leaving a small opening at the bottom of the lining. This allows you to turn the pouch inside out later. Be sure to backstitch at the start and end to secure the seams. At this stage, the pouch will start taking shape.
Next, focus on creating the straps and loops. Sew the fabric strips into narrow tubes, turn them right side out, and press them flat. Attach these to the top and sides of the pouch to mimic the straps of a real backpack. This small detail gives the mini pouch its signature look.
Turn the pouch right side out through the opening in the lining and carefully push out the corners. Once everything is aligned, sew the lining closed with a simple topstitch. Your mini backpack pouch is now nearly complete and ready for final touches.
The last step is personalization. Add embellishments such as buttons, patches, or embroidery. This step transforms your pouch from a simple project into a statement piece, highlighting your personal style and creativity. At this point, you’ve successfully completed the Mini Backpack Pouch Tutorial and created a beautiful handmade item.
Starting with a Mini Backpack Pouch Tutorial can be an exciting and rewarding experience for anyone who enjoys sewing, crafting, or creating functional accessories. This tutorial is designed for beginners and experienced crafters alike, offering a detailed step-by-step guide that ensures you can make a stylish and practical mini backpack pouch. A handmade pouch is not only a charming accessory but also a versatile tool for carrying small items, such as coins, keys, or even cosmetics. By following this tutorial, you will gain skills that extend beyond this project, improving your overall sewing techniques.
The beauty of a Mini Backpack Pouch Tutorial lies in its simplicity and adaptability. With a few basic materials and some creativity, you can customize your pouch to reflect your personal style. Whether you choose vibrant fabrics, playful patterns, or a minimalist design, each pouch can become a unique piece. Handmade pouches are also ideal as gifts, showing thoughtfulness and effort that store-bought items simply cannot match. Creating your own pouch allows you to experiment with textures, colors, and small design elements, resulting in a one-of-a-kind creation.
Moreover, this Mini Backpack Pouch Tutorial is perfect for learning about functional design in small accessories. It introduces essential techniques, such as sewing zippers, creating straps, and assembling layers of fabric efficiently. Even if you have limited experience, following this tutorial will help you build confidence in your crafting skills. By the end of the process, you will have a charming mini backpack pouch that is both practical and aesthetically pleasing.
Before diving into the Mini Backpack Pouch Tutorial, it is crucial to gather all the materials. Having everything ready will make your crafting process smoother and more enjoyable.
You will need fabric for both the exterior and lining of the pouch. Cotton, canvas, or denim fabrics are excellent choices because they are durable and easy to sew. Using contrasting colors or patterns for the lining and exterior can make your pouch stand out beautifully.
A zipper is a key element in this project. For a mini backpack pouch, a zipper length between 5 to 7 inches is ideal. You may choose zippers in fun colors to add personality to your design or opt for a neutral color to keep the pouch versatile.
The first step in the Mini Backpack Pouch Tutorial is cutting your fabric pieces. You will need two outer fabric pieces, two lining pieces, and strips for straps and zipper tabs. Accurate cutting is essential for a polished final product.
Next, attach the zipper. Place the zipper between one outer fabric piece and one lining piece, right sides together, and sew along the edge. Repeat with the other side of the zipper and remaining fabric pieces. Once flipped right side out, the zipper should be neatly aligned and functional.
After installing the zipper, sew the outer edges of the fabric, leaving a small opening at the bottom of the lining. This opening allows you to turn the pouch right side out and ensures the lining sits smoothly inside the pouch. Backstitching at the start and end strengthens your seams.
Now, create the straps. Fold the fabric strips into tubes, sew them, and turn them right side out. Attach these strips to the top and sides of the pouch to resemble a miniature backpack. This detail adds charm and enhances the overall design of your pouch.
Turn your pouch right side out, pushing out all corners gently. Stitch the lining opening closed, either by hand or machine, and press the pouch for a crisp finish. At this stage, the mini backpack pouch is fully functional and almost ready for personal touches.
Finally, add embellishments such as embroidery, patches, or decorative buttons. These final touches allow you to showcase your creativity and make each Mini Backpack Pouch Tutorial project uniquely yours.
Once you complete your Mini Backpack Pouch Tutorial, it’s time to think about personalization. Adding personal touches enhances both aesthetics and usability.
Consider experimenting with different fabrics, such as patterned cotton, faux leather, or even upcycled materials. Each material gives the pouch a distinct feel and look. Using fabric scraps creatively can also make your pouch eco-friendly.
Colorful zippers or contrasting stitching can add a pop of interest. For example, a bright zipper against a neutral fabric creates a bold visual effect, making your pouch stand out. You can also try decorative topstitching to enhance edges or straps.
Adding small accessories like keyrings, beads, or charms can increase functionality. You might attach a keychain to the zipper pull or add small charms to straps. These details make the pouch more interactive and visually appealing.
Another idea is embroidery. Simple patterns, initials, or small designs can give your mini backpack pouch a professional and custom look. Even beginners can experiment with basic embroidery stitches to create charming motifs.
Finally, don’t be afraid to mix and match ideas. Combining fabrics, trims, and embellishments allows for endless creativity. Each project can be completely unique, reflecting your personal style and making your mini backpack pouch a one-of-a-kind accessory.
A Mini Backpack Pouch Tutorial teaches you more than just sewing; it opens doors to practical applications for your creation.
Firstly, use your pouch as a coin purse. Its compact size is perfect for keeping change organized, fitting easily in a larger bag or pocket.
Secondly, it can serve as a small cosmetics pouch. Lip balm, compact mirror, and other essentials fit neatly inside, making it ideal for daily use or travel.
Thirdly, it works as a key holder or small electronics pouch. Earphones, charging cables, or USB drives can be stored securely, keeping your items accessible and organized.
Fourthly, it’s a fun gift option. Handmade pouches show care and creativity, making them perfect presents for friends, family, or craft swaps.
Fifthly, it can be a stylish accessory for kids. Mini backpack pouches are perfect for children to carry small toys, snacks, or treasures.
Finally, it can be used for creative storage solutions. Organizing small craft supplies, jewelry, or stationery is easy with these charming, functional pouches.
Q1: How difficult is the Mini Backpack Pouch Tutorial for beginners?
A1: This tutorial is beginner-friendly, with step-by-step instructions. While basic sewing skills are helpful, even novices can complete the project with patience.
Q2: What type of fabric is best for a mini backpack pouch?
A2: Cotton, canvas, and denim are ideal. They are durable, easy to work with, and hold their shape well.
Q3: Can I make the pouch without a sewing machine?
A3: Yes, hand-sewing is possible, but using a machine ensures stronger seams and faster completion.
Q4: What size should the zipper be?
A4: A 5 to 7-inch zipper works best for a standard mini backpack pouch. Adjust the length if making a larger or smaller pouch.
Q5: Can I customize the pouch with decorations?
A5: Absolutely! You can add patches, embroidery, charms, or decorative stitching to make your pouch unique.
Q6: Are there any tips for turning the pouch right side out smoothly?
A6: Use a pencil, chopstick, or turning tool to push corners out gently without damaging seams or fabric.
In this Mini Backpack Pouch Tutorial, you learned how to create a charming, functional accessory from start to finish. From gathering materials and cutting fabric to sewing the zipper, adding straps, and personalizing the pouch, each step contributes to a unique handmade item.
Mini backpack pouches are versatile, practical, and customizable, making them perfect for everyday use, gifts, or creative storage solutions.
By following this tutorial, you not only gain a beautiful finished product but also valuable sewing skills applicable to future projects. Share your creations, leave a sincere opinion, and suggest improvements to continue growing as a crafter.

