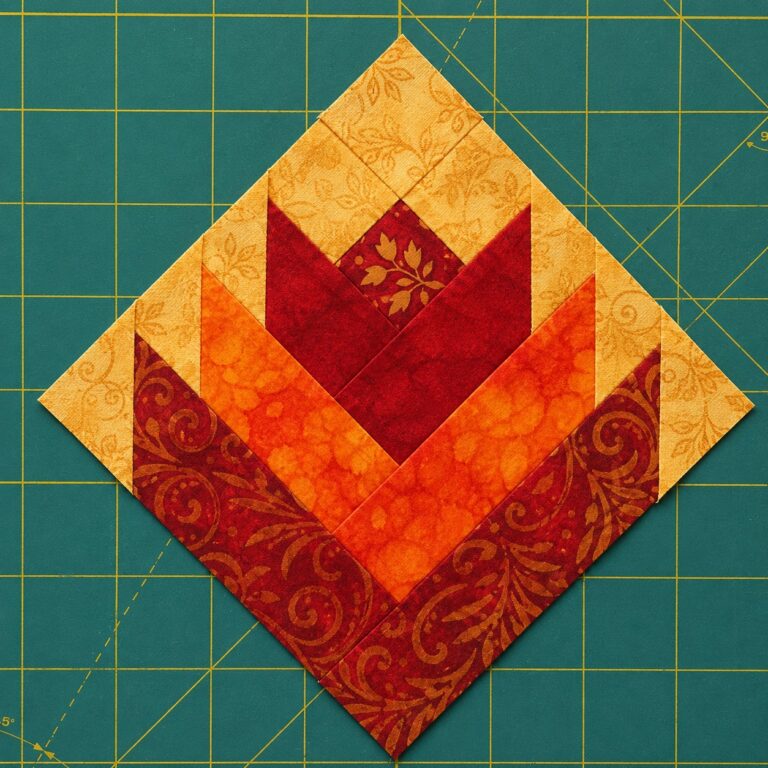
Desert Flower Quilt Block Pattern

Feathered Star Block Free Pattern is more than a catchy phrase—it’s a doorway into one of quilting’s most dramatic, heirloom-worthy designs.
Many makers hesitate because the block looks complex, but it’s surprisingly achievable when broken into bite-sized steps
If you’re here to optimize your time, this article is structured for skim-readers and deep-divers alike. You’ll see scannable this sections, technique snippets, precision tips, and finishing advice tailored to a Feathered Star Block.
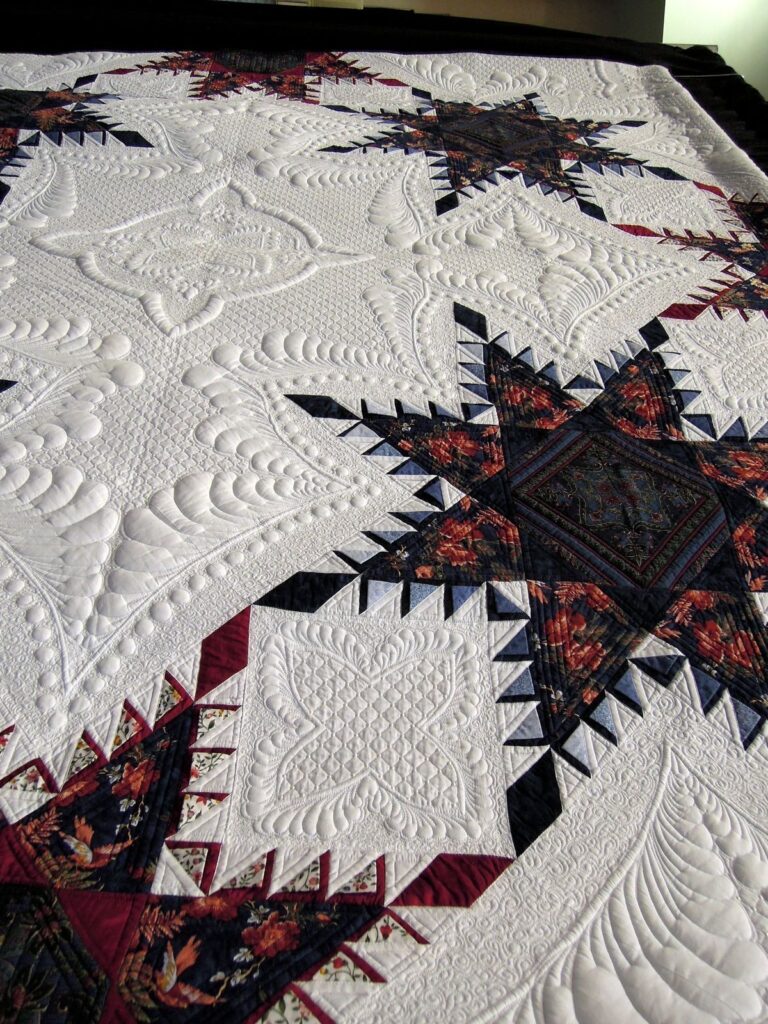
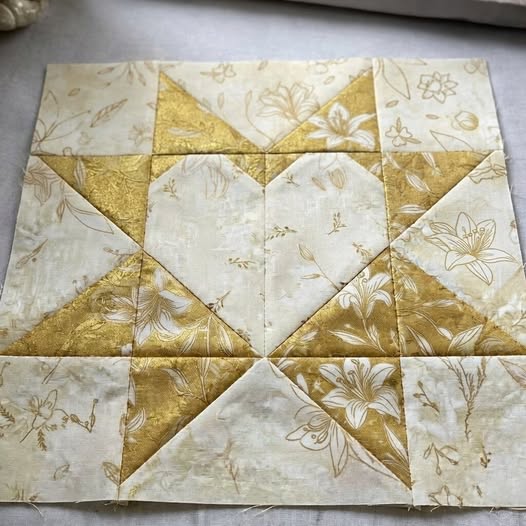
The Feathered Star Block is a traditional star motif surrounded by serrated “feathers,” which are small triangles arranged like radiant points. These feathers amplify the star’s brilliance and create the illusion of intricate piecing, even though the block is ultimately a collection of repeatable units. Within this Feathered Star Block Free Pattern framework, you’ll build units first, then join them seamlessly.
Quilters love this block for its balance of symmetry and motion. The central star anchors your eye, while the feathered triangles create sparkle and texture. Using contrasting values—light against dark—helps each feather read clearly from a distance. With thoughtful fabric selection, your Feathered Star Block can look antique, modern, or anything in between.
Historically, the design appears in museum collections and vintage quilts, sometimes with minuscule pieces hand-pieced over paper. Today’s quilters can translate the look with rotary cutting and chain piecing for a swift, precise result. This Feathered Star Block Free Pattern emphasizes modern efficiency while honoring traditional aesthetics.
Choose quilting-cotton solids or small-scale prints with high contrast. A light background makes the feathers pop; a deep background creates a moody, night-sky effect. For your Feathered Star Block Free Pattern, plan one dominant color for star points, one accent color for select feathers, and a background fabric that enhances contrast.
Pre-wash if you prefer, and starch lightly for crisp handling. Starching reduces fraying and helps tiny triangles hold their shape when you press. Keep a fresh 45mm rotary blade and a fine, sharp needle (70/10 or 80/12) for smooth stitching. Accurate tools turn a complex-looking Feathered Star Block into a precise, joyful sew.
Cutting is the foundation. You’ll need squares for HSTs, rectangles for flying geese, and strips for border frames or sashing. Label your stacks with sticky notes: center star units, feather triangles, background spacers. In a Feathered Star Block Free Pattern, pre-labeling saves time and prevents color mix-ups later.
Start with the center star. Make HSTs by pairing light and dark squares, drawing a diagonal line, stitching a seam on both sides, and cutting along the line. Trim HSTs to the precise unfinished size. The crisper your HSTs, the cleaner your Feathered Star Block center will look.
Piece the star points with flying geese units. Sew smaller squares onto a rectangle, stitch corner to corner, trim, then repeat for the second corner. Alternatively, use the no-waste four-at-a-time method for efficiency. Flying geese form the visual “arrows” that pull the eye outward in a Feathered Star Block Free Pattern.
Create the feather units next. Each feather is a small triangle set against background pieces so the serrations echo around the star. Batching helps: chain piece a dozen at a time, press, then trim. Precise trimming ensures the feather ring flows smoothly around your Feathered Star Block.
Play with value. Use a medium background and push the star points to very light or very dark; this flips the expected light-dark relationship and gives the Feathered Star Block a modern edge. For extra sparkle, insert a few print feathers among solids.
Try a limited palette for drama—two hues plus background. The fewer colors you use, the more the geometry sings. In a Feathered Star Block Free Pattern, strategic restraint can read as sophisticated and gallery-ready.
Consider scale shifts. Use larger triangles for the primary feathers and mini triangles for an inner echo. This compound serration adds depth without changing the overall silhouette of your Feathered Star Block.
Quilting motifs can underscore the design. Straight-line quilting radiating from the center amplifies movement. Echo quilting around the feathers highlights their serration. Dense fill in the background makes the star lift forward in a Feathered Star Block.
Bind with intention. A narrow binding in the star-point color frames the design without distraction. For pillows, add a flange in the feather accent color for a boutique finish. The right edge treatment completes a Feathered Star Block Free Pattern project.
Document your color recipe. Pin fabric swatches to a card with notes on value contrasts and yardage used. Future you will thank you—especially when you remake the Feathered Star Block in a new size or palette.
If your points are blunted, check seam allowances. A true scant ¼”—just a thread shy—protects triangle tips. Test on scraps first, then adjust your needle position to perfect those Feathered Star Block points.
Wavy edges usually mean over-handling or uneven pressing. Let the iron press rather than slide; steam sparingly on bias edges. For the feather ring, support the fabric with a pressing cloth. This preserves the crisp profile central to a Feathered Star Block Free Pattern.
Color looks muddy? Bump contrast. Swap a medium print for a solid, or choose a background one value lighter or darker. The feathers should read as serrations from six feet away; that’s a quick visual test for a successful Feathered Star Block.
Struggling with bulk at intersections? Grade seams: trim one seam allowance narrower so layers step down. Consider spinning the seam at the center junction for a flat hub. This structural tweak adds polish to your Feathered Star Block.
When trimming HSTs, use a rotating mat to avoid shifting bias edges. Trim two sides, rotate, then trim the remaining sides. Consistency at this stage makes assembling a precise Feathered Star Block Free Pattern far easier.
Finally, slow down for alignment. Pin at seam intersections, then stitch over the pin or remove right before the needle—your call, based on comfort. Accuracy beats speed in a Feathered Star Block every time.
For beginners, start with an 18″ block. The pieces are comfortable to handle, and the impact is huge. Turn it into a pillow or a single-block wall quilt to spotlight your Feathered Star Block.
For bed quilts, set multiple blocks with sashing to give the feathers breathing room. Cornerstones can echo the star-point color, stitching the palette together. This layout showcases each Feathered Star Block Free Pattern motif like framed artwork.
Try a medallion layout: place the Feathered Star Block in the center, then surround it with pieced borders—checkerboards, flying geese, or log cabin strips. The feathered star becomes the heart of a story quilt.
What size should I start with for my first Feathered Star Block?
Most beginners find 18″ comfortable because the pieces aren’t tiny and the finished look is dramatic. After that, resize up or down once you’ve built confidence with the feather units.
How do I keep my triangle tips sharp?
Use a scant ¼” seam and trim units accurately before assembly. Avoid stretching bias edges, and press—don’t iron—so you don’t distort those delicate points in your Feathered Star Block.
Why do my edges ripple after adding the feather ring?
Ripples often come from over-handling or steam on bias. Support the fabric, use minimal steam, and let the block cool flat. Consistent trimming between steps also stabilizes your Feathered Star Block Free Pattern units.
You’ve just walked through a complete, friendly roadmap to making a showworthy Feathered Star Block, from fabric pull to pressing strategy, from feather units to final layout.
With the guidance above, the once-intimidating Feathered Star Block Free Pattern becomes a series of simple, repeatable steps: cut carefully, sew consistently, trim precisely, and press with intention.


